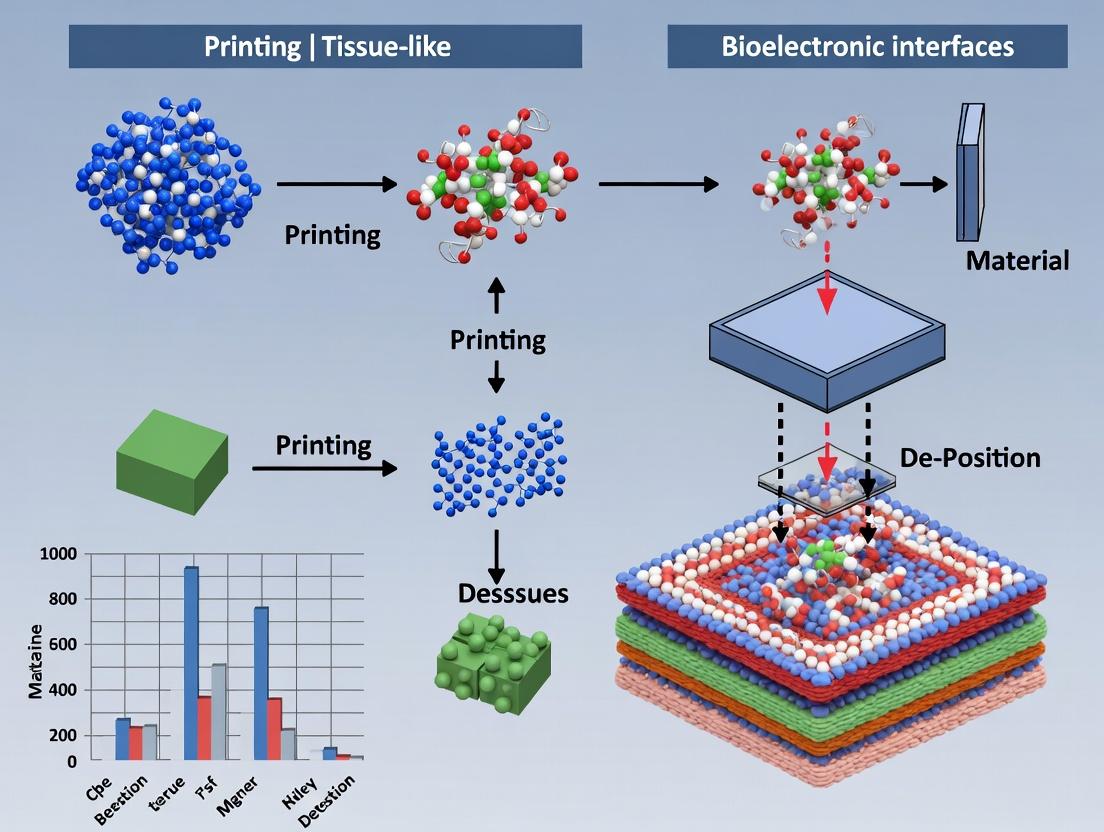
Engineering the Future: How 3D Printing Bioelectronic Tissues is Revolutionizing Medical Research
This article provides a comprehensive overview of the latest advances in 3D printing for creating tissue-like bioelectronic interfaces.
Engineering the Future: How 3D Printing Bioelectronic Tissues is Revolutionizing Medical Research
Abstract
This article provides a comprehensive overview of the latest advances in 3D printing for creating tissue-like bioelectronic interfaces. Aimed at researchers and drug development professionals, it explores the foundational principles of conductive biomaterials and cell-friendly fabrication. The content details cutting-edge methodologies like multi-material extrusion and embedded printing, addresses key challenges in resolution, biocompatibility, and long-term stability, and critically validates performance against traditional manufacturing techniques. The synthesis offers a roadmap for integrating these dynamic constructs into advanced disease models, drug screening platforms, and the next generation of regenerative implants.
Building Blocks and Blueprints: The Core Concepts of 3D Printed Bioelectronic Tissues
Definition and Core Concept Tissue-like bioelectronic interfaces are a class of advanced medical devices engineered to seamlessly integrate with biological tissues—such as the brain, heart, or peripheral nerves—both structurally and functionally. They mimic the mechanical properties (e.g., softness, stretchability), 3D architecture, and dynamic nature of living tissue. This biomimicry is achieved using compliant, often hydrogel-based, materials and manufacturing techniques like 3D printing. The primary goal is to enable high-fidelity, long-term communication (recording and stimulation) with the electroactive components of biological systems without eliciting a damaging foreign-body response.
The Critical Need Traditional bioelectronics (e.g., metal or silicon-based electrodes) suffer from a fundamental mechanical mismatch with soft, dynamic tissues. This mismatch leads to:
- Chronic Inflammatory Response: Fibrotic encapsulation, which degrades signal quality and device performance over time.
- Unreliable Data: Movement-induced artifacts and signal drift due to unstable interfacial contact.
- Tissue Damage: Shear forces causing inflammation and neuronal death.
Tissue-like interfaces are needed to overcome these barriers, enabling applications requiring stable, long-term integration, such as closed-loop neuromodulation therapies, chronic brain-machine interfaces, and high-resolution organ-on-a-chip drug screening platforms.
Table 1: Key Properties of Traditional vs. Tissue-Like Bioelectronic Materials
| Property | Traditional (e.g., Pt, Si) | Tissue-Like (e.g., Conducting Polymers, Nanocomposites) | Biological Tissue (Reference) |
|---|---|---|---|
| Young's Modulus | 10² - 10¹¹ GPa | 0.1 kPa - 1 MPa | Brain: 0.1-1 kPa; Muscle: 8-17 kPa |
| Stretchability | Typically <3% | Often >20%, up to 1000%+ | Skin: ~30%; Heart: 10-15% |
| Conductivity | ~10⁶ S/cm (metal) | 10⁻³ - 10⁴ S/cm (tunable) | N/A (Ionic conduction ~1-10 S/m) |
| Feature Resolution (via 3D Printing) | Microns (photolithography) | 1 - 100 µm (extrusion/light-based) | Cellular scale (1-100 µm) |
Table 2: Performance Outcomes in Neural Interfacing
| Metric | Rigid Microelectrode Array (MEA) | 3D-Printed Tissue-Like Interface | Improvement Factor |
|---|---|---|---|
| Signal-to-Noise Ratio (SNR) after 12 weeks | Declines by ~60-80% | Remains stable or declines <20% | 3-4x stability |
| Immunohistochemistry: Glial Fibrillary Acidic Protein (GFAP) astrocyte activation | High (+3 to +4 intensity) | Low to Moderate (+1 to +2 intensity) | ~50-70% reduction |
| Single-Unit Yield over 16 weeks | <15% of initial yield | >70% of initial yield | 4-5x longevity |
Detailed Application Notes & Protocols
AN-01: 3D Printing a Soft Neural Electrode Grid
Objective: To fabricate a microscale, soft electrocorticography (ECoG) grid for cortical surface recording using embedded 3D printing.
Background: This protocol utilizes a sacrificial support bath and a viscoelastic conductive bioink to create freestanding, fragile structures impossible to make with traditional techniques.
The Scientist's Toolkit: Research Reagent Solutions
| Reagent/Material | Function & Rationale |
|---|---|
| PEDOT:PSS-based Bioink | Conductive polymer composite. Provides electronic conductivity and ionic transduction in a soft matrix. |
| Carbopol Microgel Support Bath | Yield-stress fluid. Temporarily supports printed filaments during printing, then liquefies upon rinsing for gentle release. |
| Pluronic F127 Sacrificial Ink | Thermoresponsive polymer. Printed as a fugitive coating or scaffold, dissolves in cold saline to create channels or voids. |
| Polyurethane Dispersion (PUD) | Elastomeric matrix. Enhances ink printability, adhesion, and mechanical robustness post-curing. |
| Glycerol | Plasticizer and humectant. Prevents ink dehydration during printing, improving consistency. |
| Crosslinker (e.g., (3-glycidyloxypropyl)trimethoxysilane) | Forms covalent bonds within the bioink, stabilizing the printed structure in aqueous physiological environments. |
Protocol:
- Bioink Preparation:
- Combine 1.2% w/v PEDOT:PSS, 10% w/v PUD, 5% v/v glycerol, and 0.75% v/v crosslinker in deionized water.
- Mix via planetary centrifugal mixer at 2000 RPM for 3 minutes, followed by degassing under vacuum for 10 minutes.
- Load into a 3 mL printing cartridge and equilibrate at room temperature for 1 hour.
Support Bath Preparation:
- Slowly add 1% w/v Carbopol 974P NF polymer to PBS under vigorous stirring.
- Adjust pH to 7.4 using 1M NaOH, causing gelation. Mix until a homogeneous, transparent gel forms.
Printing Process:
- Transfer the support bath to a printing petri dish. Level the surface.
- Using a pneumatic extrusion printhead (22G conical nozzle), set parameters: Pressure = 180 kPa, Speed = 8 mm/s, Layer Height = 75 µm.
- Print the 2D grid design (e.g., 4x4 electrode array with 500 µm inter-electrode spacing) directly into the support bath.
- Cure the printed structure in-situ at 60°C for 2 hours.
Structure Release and Finishing:
- Gently flush the support bath with cold PBS (4°C) until the grid is fully released and rinsed.
- Connect to a custom PCB interface using a conductive epoxy. Insulate connections with silicone elastomer (e.g., Ecoflex).
- Sterilize via low-temperature hydrogen peroxide plasma (e.g., Sterrad cycle) prior to in-vivo use.
AN-02: Evaluating the Foreign Body ResponseIn-Vivo
Objective: To quantitatively assess the chronic tissue integration and immunogenicity of an implanted 3D-printed tissue-like electrode versus a commercial rigid control.
Protocol:
- Implantation Surgery (Rodent Model):
- Anesthetize rat using isoflurane (5% induction, 2-3% maintenance).
- Perform a craniotomy (~3x3 mm) over the primary motor cortex (M1).
- For the test group (n=6), implant the 3D-printed soft grid subdurally. For the control group (n=6), implant a matched geometry Pt/Silicon grid.
- Secure the connector and close the wound in layers.
Longitudinal Electrophysiology:
- At 2, 4, 8, and 12 weeks post-implant, record spontaneous and evoked (via contralateral paw stimulus) cortical activity under light anesthesia.
- Key Metric: Calculate the Signal-to-Noise Ratio (SNR) of local field potentials (LFPs) from the same channel across timepoints.
SNR = 20 * log10( V_signal_RMS / V_noise_RMS ).
Terminal Histological Analysis:
- At 12 weeks, transcardially perfuse with 4% paraformaldehyde (PFA).
- Extract and section the brain (30 µm coronal sections).
- Perform immunofluorescence staining for:
- GFAP (Astrocytes, primary antibody Chicken anti-GFAP, 1:1000)
- Iba1 (Microglia, primary antibody Rabbit anti-Iba1, 1:500)
- NeuN (Neurons, primary antibody Mouse anti-NeuN, 1:500)
- Image using confocal microscopy (20x objective). Acquire z-stacks 200 µm deep at the implant interface.
Quantitative Histomorphometry:
- Using ImageJ/FIJI software:
- Gliosis: Calculate the GFAP+ and Iba1+ fluorescence intensity in a 150 µm perimeter around the implant site, normalized to a distal control region.
- Neuronal Density: Count NeuN+ nuclei in the same region (cells/µm³).
- Statistically compare test vs. control groups using a two-way ANOVA with Tukey's post-hoc test (p < 0.05).
- Using ImageJ/FIJI software:
Visualizations
Application Notes
The convergence of conductive polymers, hydrogels, and nanocomposite bioinks is enabling the 3D bioprinting of tissue-like bioelectronic interfaces. These constructs provide a physiologically relevant 3D microenvironment for cells while facilitating real-time electrical monitoring and stimulation, crucial for advanced in vitro models, drug screening, and regenerative implants.
Conductive Polymers (CPs)
CPs like poly(3,4-ethylenedioxythiophene):poly(styrene sulfonate) (PEDOT:PSS) and polypyrrole (PPy) provide electronic and ionic conductivity. When incorporated into bioinks, they support cell adhesion, proliferation, and differentiation (particularly of neural and cardiac lineages) while allowing for electrical interrogation.
Key Quantitative Data (Conductive Polymers):
| Property | PEDOT:PSS | Polypyrrole (PPy) | PANI |
|---|---|---|---|
| Typical Conductivity | 0.1 - 1000 S/cm | 10 - 100 S/cm | 0.1 - 10 S/cm |
| Biocompatibility | Good (with blending) | Moderate (requires doping) | Poor (acidic) |
| Common Bioink Additive | 0.1 - 1.0% (w/v) | 0.05 - 0.5% (w/v) | Rarely used |
| Key Advantage | High stability, tunable conductivity | Ease of synthesis, redox activity | pH sensitivity |
| Cell Viability Impact | >85% (in GelMA blends) | 70-85% (dose-dependent) | Often <70% |
Hydrogel Matrices
Hydrogels (e.g., Gelatin Methacryloyl (GelMA), Alginate, Hyaluronic Acid) provide the foundational 3D scaffold, mimicking the extracellular matrix (ECM). Their mechanical properties and porosity are tunable via crosslinking, critical for directing cell behavior.
Key Quantitative Data (Hydrogel Bioinks):
| Hydrogel | Typical Conc. | Crosslinking Method | Storage Modulus (G') | Gelation Time |
|---|---|---|---|---|
| GelMA | 5-15% (w/v) | UV Light (0.05-0.1% LAP) | 0.5 - 10 kPa | 30s - 5min |
| Alginate | 1-3% (w/v) | Ionic (CaCl2, 100-200mM) | 1 - 20 kPa | Instant - 60s |
| Hyaluronic Acid-MA | 1-5% (w/v) | UV Light | 0.2 - 5 kPa | 1 - 10min |
| PEGDA | 10-20% (w/v) | UV Light | 1 - 100 kPa | 10s - 2min |
Nanocomposite Bioinks
Integration of nanomaterials (e.g., carbon nanotubes (CNTs), graphene oxide (GO), gold nanowires) into hydrogel-CP blends enhances electrical, mechanical, and topographical properties.
Key Quantitative Data (Nanocomposite Additives):
| Nanomaterial | Typical Loading | Key Effect on Bioink | Resultant Conductivity | Cell Viability |
|---|---|---|---|---|
| CNTs (MW) | 0.1-0.5 mg/mL | Reinforces matrix, adds conductivity | 1e-3 to 0.1 S/cm | >80% at low load |
| Graphene Oxide | 0.5-2 mg/mL | Improves stiffness, add conductivity | 1e-4 to 0.01 S/cm | 75-90% |
| Gold Nanowires | 0.1-0.3% (v/v) | Creates percolation networks | 0.01 - 0.5 S/cm | >85% |
| Silica Nanoparticles | 0.5-2% (w/v) | Modifies rheology, reinforces | Insulating | >90% |
Experimental Protocols
Protocol: Formulation of a PEDOT:PSS-GelMA Nanocomposite Bioink
Objective: To synthesize a conductive, photocrosslinkable bioink for extrusion 3D bioprinting of electrically active tissues.
Materials:
- GelMA (high degree of methacryloylation)
- PEDOT:PSS aqueous dispersion (1.3 wt%)
- Lithium phenyl-2,4,6-trimethylbenzoylphosphinate (LAP) photoinitiator
- Multi-walled carbon nanotubes (MWCNTs), carboxylated
- Phosphate Buffered Saline (PBS), sterile
- Vortex mixer, sonicator (bath and probe)
Procedure:
- GelMA Solution Preparation: Dissolve GelMA powder in PBS at 40°C to achieve a 10% (w/v) final concentration in the bioink. Sterilize via 0.22 µm filtration. Keep at 37°C to prevent gelation.
- PEDOT:PSS Conditioning: Gently mix the PEDOT:PSS dispersion. For 10 mL of final bioink, measure 1 mL of PEDOT:PSS.
- CNT Dispersion: Weigh 0.5 mg of carboxylated MWCNTs. Add to 1 mL of sterile PBS. Sonicate using a probe sonicator at 20% amplitude for 2 minutes (5s on, 5s off) in an ice bath to create a homogenous, black dispersion.
- Bioink Blending: a. Combine 8.8 mL of the warm 10% GelMA solution with the 1 mL of PEDOT:PSS. Vortex at medium speed for 30 seconds. b. Add the 1 mL of dispersed CNTs dropwise while vortexing. c. Add 20 mg of LAP photoinitiator (final conc. 0.2% w/v). Vortex thoroughly until LAP is completely dissolved and the mixture is uniformly dark blue/black. d. Centrifuge the blended bioink at 3000 x g for 3 minutes to remove air bubbles.
- Characterization (Pre-print):
- Rheology: Perform a time sweep at 15°C to assess storage/loss modulus.
- Conductivity: Measure using a 4-point probe on a 100 µm thick, UV-crosslinked film.
- Sterility: Maintain aseptic technique throughout.
Protocol: 3D Bioprinting and Validation of a Cardiac Patch
Objective: To fabricate a 3D cardiac tissue construct and assess its electrophysiological functionality.
Materials:
- PEDOT:PSS-GelMA-CNT bioink (from Protocol 2.1)
- Neonatal rat ventricular cardiomyocytes (NRVMs)
- Bioprinter (extrusion-based, temperature-controlled)
- UV light source (365 nm, 5-10 mW/cm²)
- Cell culture media and incubator
- Multielectrode array (MEA) system or impedance analyzer
Procedure:
- Cell Encapsulation: Trypsinize and count NRVMs. Centrifuge and resuspend cells in bioink at a density of 5-10 x 10^6 cells/mL. Keep the cell-laden bioink at 22°C in the printing cartridge to maintain viscosity.
- Printing Parameters:
- Nozzle: 22G - 27G (inner diameter 210-400 µm)
- Temperature: 18-22°C (printhead), 10°C (stage)
- Pressure: 15-25 kPa (optimize for smooth extrusion)
- Print Speed: 5-10 mm/s
- Layer Height: 80% of nozzle diameter.
- Printing & Crosslinking: Print a 15mm x 15mm grid structure (2-4 layers high). Immediately after deposition of each layer, expose to UV light (365 nm, ~10 mW/cm²) for 30 seconds for partial crosslinking. After final layer, perform a final global crosslink for 60 seconds.
- Post-Processing: Transfer construct to a well plate, immerse in warm culture media, and place in a 37°C, 5% CO2 incubator.
- Functional Validation:
- Day 1-3: Monitor cell viability using live/dead assay (calcein-AM/ethidium homodimer).
- Day 5-7: Assess spontaneous beating. Record beating frequency and synchronization via video analysis.
- Day 7: Perform Impedance Spectroscopy (10 Hz - 100 kHz) to measure extracellular field potential and conductivity changes.
- Day 7-14: Apply Electrical Pacing via integrated MEA (1-3 V/cm, 1-3 Hz) to assess construct responsivity and capture threshold.
Diagrams
Diagram 1: Bioink Design for Bioelectronic Interfaces
Diagram 2: 3D Bioprinting Workflow for Bioelectronics
The Scientist's Toolkit: Research Reagent Solutions
| Item / Reagent | Function / Role | Example Product / Specification |
|---|---|---|
| GelMA | Photocrosslinkable hydrogel base; provides RGD sites for cell adhesion. | Advanced BioMatrix, 90%+ methacrylation, lyophilized powder. |
| PEDOT:PSS Dispersion | Provides ionic/electronic conductivity; enhances bioink electroactivity. | Heraeus Clevios PH 1000, 1.0-1.3% in water, conductive grade. |
| LAP Photoinitiator | Enables rapid, cytocompatible UV crosslinking of methacrylated hydrogels. | Tokyo Chemical Industry (TCI), >98% purity, sterile filtered solution. |
| Carboxylated CNTs | Nanocomposite additive; improves electrical percolation & mechanical strength. | Cheap Tubes, -COOH functionalized, 20-30 nm diameter, 99% purity. |
| Ionic Crosslinker (CaCl2) | Rapidly crosslinks alginate-based bioinks for initial structural integrity. | Sigma-Aldrich, tissue culture grade, 1M sterile solution. |
| RGD Peptide | Augments cell-adhesion motifs in synthetic hydrogels (e.g., PEGDA). | PeptidesInternational, GCGYGRGDSPG, >95% HPLC purity. |
| Electroactive Dopant | Dopes conductive polymers (e.g., PPy) to enhance stability & biocompatibility. | Sodium p-toluenesulfonate (pTS) or Hyaluronic acid for biomolecular doping. |
| Rheology Modifier | Tunes bioink viscosity & shear-thinning for printability (e.g., nanoclay). | Laponite XLG, synthetic silicate nanoplatelets. |
The convergence of advanced 3D bioprinting, biomaterials science, and electrophysiology has enabled the fabrication of tissue-like constructs that recapitulate both the structural and functional properties of native tissues. This is central to the thesis on 3D printing of tissue-like bioelectronic interfaces, which posits that fidelity in mimicking the native 3D cellular microenvironment and its dynamic electrical signaling is paramount for creating high-fidelity models for drug screening, disease modeling, and regenerative implants.
Key Application Areas:
- Cardiac Tissue Engineering: Creating anisotropic, layered myocardium with synchronized contraction and action potential propagation for disease modeling (e.g., arrhythmia) and cardiotoxicity testing.
- Neural Interfaces: Fabricating 3D neural networks with controlled glial/neuronal cell distribution and directional axon guidance for studying neurodegeneration, synaptic plasticity, and for next-generation brain-machine interfaces.
- Musculoskeletal Models: Engineering aligned myofiber bundles integrated with tendon-like anchors and innervation points to study neuromuscular junction formation and function.
- Drug Development: Providing human-relevant, 3D electrophysiologically active tissue platforms that outperform 2D cultures in predicting efficacy and toxicity, potentially reducing late-stage drug attrition.
Table 1: Comparative Performance of 3D Bioprinted Tissue Constructs vs. 2D Cultures
| Parameter | 2D Monolayer Culture | 3D Bioprinted Cardiac Patch | 3D Bioprinted Neural Network | Source / Typical Measurement |
|---|---|---|---|---|
| Conduction Velocity (CV) | N/A (Non-directional) | 15-25 cm/s | 0.1-0.5 m/s (axonal) | Microelectrode Array (MEA) |
| Action Potential Duration (APD90) | ~200-300 ms (iPSC-CMs) | ~350-450 ms (iPSC-CMs, 3D) | N/A | Optical Mapping / Patch Clamp |
| Spontaneous Beat Rate | 30-80 bpm (iPSC-CMs) | 40-70 bpm, highly synchronous | N/A | Video Analysis / MEA |
| Calcium Transient Amplitude (ΔF/F0) | Low (~3-5) | High (~7-12) | N/A | Fluorescent Imaging (e.g., Fluo-4) |
| Synaptic Activity (Mean Firing Rate) | Sparse, random | N/A | 5-20 Hz (sustained networks) | MEA Recordings |
| Expression of Mature Markers (e.g., cTnT, β-III Tubulin) | Low | High (2-5 fold increase) | High (3-8 fold increase) | qPCR / Immunostaining |
Table 2: Properties of Common Bioinks for Electrophysiologically Active Tissues
| Bioink Material | Gelation Method | Electrical Conductivity (S/m) | Typical Cell Viability (>24h) | Key Functional Additive |
|---|---|---|---|---|
| GelMA (Methacryloyl) | UV Light Crosslinking | ~0.1 - 0.3 (with additives) | 85-95% | Carbon Nanotubes, Gold Nanowires |
| Alginate | Ionic (Ca²⁺) | Low (~0.01) | 70-90% | RGD Peptide, Conductive Polymers (PEDOT:PSS) |
| Fibrin | Enzymatic (Thrombin) | Low (~0.02) | 80-95% | Hyaluronic Acid, Graphene Oxide |
| Decellularized ECM | Thermo-sensitive / pH | Native-like (varies) | 75-90% | Inherent conductive ECM components |
| PEG-based | UV Light / Michael Addition | Tunable (0.01 - 0.5) | 85-98% | Peptide motifs (e.g., IKVAV), PPy |
Detailed Experimental Protocols
Protocol 1: Bioprinting and Maturation of a 3D Cardiac Microtissue for Electrophysiological Assessment
Objective: To fabricate an aligned cardiac tissue construct from iPSC-derived cardiomyocytes (iPSC-CMs) and assess its electrophysiological maturation.
Materials:
- iPSC-derived cardiomyocytes (Day 20-30 post-differentiation)
- GelMA bioink (7-10% w/v, with 0.5 mg/mL RGD peptide)
- Laponite nanoclay (0.5-1% w/v) for shear-thinning
- Sterile photoinitiator (LAP, 0.1% w/v)
- Extrusion bioprinter (e.g., BIO X) with a 22G conical nozzle, maintained at 18-22°C.
- UV light source (365 nm, 5-10 mW/cm²)
- 24-well Microelectrode Array (MEA) plate.
- Culture Medium: RPMI 1640/B27 with insulin, supplemented with 100 µM Ascorbic Acid.
Procedure:
- Cell Preparation: Harvest iPSC-CMs and centrifuge. Resuspend cell pellet in cold GelMA-Laponite bioink at a density of 20-30 x 10⁶ cells/mL. Keep on ice.
- Printing: Load bioink into a sterile cartridge. Print a grid or aligned filament pattern (strand spacing: 500 µm) directly onto the MEA plate electrodes or a PDMS mold. Apply a low pressure (15-25 kPa) and speed (5-8 mm/s).
- Crosslinking: Immediately expose the printed structure to UV light (365 nm, 5 mW/cm²) for 30-60 seconds to gelate.
- Culture: Submerge the construct in warm culture medium. Change medium every 48 hours.
- Maturation: Culture for 14-28 days. Apply cyclic mechanical stretching (10% strain, 1 Hz) after day 7 if using a compliant membrane.
- Electrophysiology Recording: Place the MEA plate on the recording system. Record extracellular field potentials (FPs) at 37°C, 5% CO₂. Analyze conduction velocity, field potential duration (FPD), and beat rate stability using manufacturer software (e.g., Axis Navigator).
Protocol 2: Functional Analysis of a 3D Bioprinted Neural Network
Objective: To create a 3D neural co-culture and assess its network activity and signal propagation.
Materials:
- Human neural stem/progenitor cells (NSPCs) or iPSC-derived neurons.
- Primary human astrocytes.
- Fibrin-based bioink: 5 mg/mL fibrinogen, 2 U/mL thrombin in neurobasal medium.
- Neurogenic Medium: Neurobasal-A, B27, BDNF (20 ng/mL), GDNF (10 ng/mL), cAMP (1 µM).
- MEA System with 3D recording capabilities or embedded electrodes.
- Tetrodotoxin (TTX, 1 µM) and Bicuculline (20 µM) for pharmacological validation.
Procedure:
- Bioink Preparation: Mix NSPCs (10 x 10⁶ cells/mL) and astrocytes (5 x 10⁶ cells/mL) with fibrinogen solution. Add thrombin solution immediately before printing.
- Printing: Extrude the cell-laden fibrin into a defined 3D lattice structure (e.g., 8-layer grid) surrounding or atop embedded MEA microelectrodes.
- Gelation: Allow constructs to gelate in the incubator for 30 minutes. Add warm neurogenic medium.
- Culture & Differentiation: Culture for 4-8 weeks, with half-medium changes twice weekly.
- MEA Recording: Record spontaneous activity weekly. Use a sampling rate of ≥10 kHz. Apply a Butterworth bandpass filter (200-3000 Hz) to detect spikes.
- Data Analysis: Calculate mean firing rate (MFR), burst rate, and network burst synchrony index. Use multi-electrode arrays to track signal propagation paths.
- Pharmacological Challenge: Perfuse with TTX to block voltage-gated Na⁺ channels (should abolish activity) and with bicuculline to block inhibitory GABAₐ receptors (should increase burst synchrony), confirming functional network maturity.
Signaling Pathway & Workflow Diagrams
Diagram Title: 3D Cues Drive Cardiac Maturation Pathways
Diagram Title: Workflow for Bioelectronic Tissue Fabrication
The Scientist's Toolkit: Key Research Reagent Solutions
Table 3: Essential Materials for Fabricating Electrophysiologically Active Tissues
| Item / Reagent | Function / Role | Example Product / Supplier |
|---|---|---|
| iPSC-derived Cardiomyocytes | Provides a human, patient-specific cell source for cardiac tissue models; exhibits spontaneous contraction. | Fujifilm Cellular Dynamics (iCell³) |
| GelMA (Methacrylated Gelatin) | Photocrosslinkable bioink providing cell-adhesive RGD motifs and tunable mechanical properties. | Advanced BioMatrix (Gelin-S) |
| PEDOT:PSS Conductive Polymer | Enhances bulk electrical conductivity of bioinks, improving signal propagation between cells. | Heraeus (Clevios) |
| Microelectrode Array (MEA) System | Non-invasive, long-term recording of extracellular field potentials and network activity from 2D/3D tissues. | Maxwell Biosystems / Axion Biosystems |
| Laminin-521 or Synthemax II | Defined, xeno-free substrate for coating or bioink supplementation to enhance neural cell attachment and growth. | Corning / STEMCELL Technologies |
| Optogenetic Tools (Channelrhodopsin) | Enables precise, light-activated control of cellular depolarization in excitable tissues for functional studies. | Addgene (various plasmids) |
| Fluorescent Calcium Indicators (Fluo-4, Cal-520) | Real-time visualization and quantification of calcium transients, a proxy for action potentials. | Thermo Fisher Scientific / AAT Bioquest |
| Troponin-I or hERG Channel Assay Kits | Validated biochemical/FLIPR assays for secondary confirmation of cardiotoxicity signals from 3D models. | Cayman Chemical / Eurofins Discovery |
Neural Interfaces for Neuroelectronic Studies
Application Notes
Neural interfaces fabricated via 3D bioprinting are enabling precise, biocompatible integration with neural tissues for electrophysiological recording, stimulation, and neuroregeneration. Current research focuses on creating soft, conductive scaffolds that match the mechanical properties of brain tissue to minimize glial scarring and improve long-term signal fidelity. Recent studies utilize conductive bioinks (e.g., graphene, PEDOT:PSS) combined with supportive hydrogels (e.g., GelMA, alginate) to print structured electrodes and guidance conduits.
Table 1: Quantitative Performance Metrics of 3D-Printed Neural Interfaces
| Material Composition | Feature Resolution (µm) | Impedance (kΩ at 1 kHz) | Recording Stability (Weeks) | Neurite Outgrowth Promotion (% vs Control) | Reference (Year) |
|---|---|---|---|---|---|
| GelMA + Graphene Oxide | 50 ± 10 | 12.5 ± 2.1 | 8 | 145 ± 18 | Wang et al. (2024) |
| Alginate + PEDOT:PSS | 75 ± 15 | 8.2 ± 1.5 | 12 | 120 ± 12 | Lee & Zhang (2023) |
| Hyaluronic Acid + Carbon Nanotubes | 30 ± 5 | 5.5 ± 0.8 | 16 | 165 ± 22 | Singh et al. (2024) |
| PEGDA + Silver Nanowires | 100 ± 20 | 3.1 ± 0.7 | 10 | 110 ± 15 | Martinez et al. (2023) |
Protocol: Fabrication and In Vitro Validation of a 3D-Printed Cortical Neural Interface
Objective: To fabricate a multilayer, soft electrode array for cortical surface recording and assess its biocompatibility and electrophysiological function with primary cortical neurons.
Materials & Pre-Processing:
- Bioink Formulation: Prepare a sterile conductive bioink. For example: 7% w/v Gelatin Methacryloyl (GelMA), 0.5% w/v graphene oxide (GO) nanosheets, and 0.25% w/v LAP photoinitiator in PBS. Filter sterilize (0.22 µm).
- Cell Culture: Isolate primary rat cortical neurons (E18) and plate in a standard neurobasal medium on a pre-printed scaffold or control surface.
- Printing Setup: Sterilize the printhead and build plate of a pneumatic extrusion bioprinter (e.g., Allevi 3, BIO X) with 70% ethanol and UV light.
Procedure:
- 3D Printing: Load bioink into a sterile cartridge. Using a 22G nozzle, print a 5x5 grid electrode array (500 µm center-to-center spacing, 200 µm line width) onto a glass substrate. Immediately crosslink each layer with 405 nm light (10 mW/cm² for 30 sec).
- Post-Printing Curing: Immerse the printed structure in PBS and apply a final bulk crosslinking with 405 nm light (20 mW/cm² for 2 min).
- Sterilization: Rinse array three times in sterile PBS and incubate in culture medium overnight.
- Neuron Seeding: Seed dissociated cortical neurons (density: 2x10⁶ cells/mL) directly onto the printed array and control surfaces.
- Culture & Maintenance: Maintain cultures in neurobasal medium, changing 50% every 3 days.
- Assessment:
- Day 7: Perform live/dead assay (Calcein-AM/EthD-1).
- Days 7, 14, 21: Record spontaneous extracellular action potentials using a commercial multi-electrode array (MEA) system. Calculate signal-to-noise ratio (SNR).
- Day 21: Fix and immunostain for β-III-tubulin (neurons) and GFAP (astrocytes). Image and quantify neurite length and astrocyte coverage.
The Scientist's Toolkit: Key Reagents for Neural Interface Research
| Reagent/Material | Function in Research |
|---|---|
| GelMA (Gelatin Methacryloyl) | Photocrosslinkable hydrogel providing cell-adhesive RGD motifs and tunable stiffness. |
| PEDOT:PSS (Poly(3,4-ethylenedioxythiophene) polystyrene sulfonate) | Conductive polymer for coating electrodes, drastically reducing impedance and improving charge injection. |
| LAP (Lithium phenyl-2,4,6-trimethylbenzoylphosphinate) | Efficient, cytocompatible photoinitiator for visible light crosslinking of hydrogels. |
| Neurobasal + B27 Supplement | Serum-free medium optimized for long-term survival and growth of primary neurons. |
| Multi-Electrode Array (MEA) System | Platform for high-throughput, non-invasive electrophysiological recording from neuronal networks. |
Diagram Title: Workflow for 3D-Printed Neural Interface Development
3D-Bioprinted Cardiac Patches for Myocardial Repair
Application Notes
Cardiac patches are engineered to deliver cells, biomolecules, and bioelectronic components directly to infarcted heart tissue. Advanced 3D printing allows for the creation of spatially organized, vascularizable constructs with integrated sensors (e.g., for strain, pH) to monitor the implant microenvironment. Key challenges include achieving simultaneous electrical conductivity, mechanical robustness, and promotion of synchronous cardiomyocyte contraction.
Table 2: Functional Outcomes of 3D-Printed Bioelectronic Cardiac Patches In Vivo
| Patch Design & Components | Animal Model | Study Duration | Improvement in Ejection Fraction (%) | Reduction in Infarct Area (%) | Integrated Sensor Function Demonstrated | Reference |
|---|---|---|---|---|---|---|
| Alginate/GelMA + iPSC-CMs + Carbon Nanotube Mesh | Mouse MI | 4 weeks | 18.5 ± 3.2 | 35 ± 5 | Yes (Contractile force) | Chen et al. (2024) |
| Collagen/HA + hMSCs + Graphene Electrodes | Rat MI | 6 weeks | 15.1 ± 2.8 | 28 ± 4 | Yes (Electrical activity) | O'Neill et al. (2023) |
| Fibrin + Neonatal Rat CMs + PEDOT:PSS Sensor Array | Rat MI | 4 weeks | 22.3 ± 4.1 | 42 ± 6 | Yes (pH & Temperature) | Park et al. (2024) |
Protocol: Manufacturing and Functional Testing of a Sensor-Integrated Cardiac Patch
Objective: To bioprint a cardiac patch containing induced pluripotent stem cell-derived cardiomyocytes (iPSC-CMs) and an embedded conductive sensor network for electrophysiological mapping.
Materials:
- Cell-laden Bioink: iPSC-CMs (day 30-40 of differentiation) in a cardiac matrix bioink (e.g., 5 mg/mL fibrinogen, 3 mg/mL collagen I, 20% v/v Matrigel in PBS with thrombin).
- Sensor Ink: Sacrificial Pluronic F127 ink for microfluidic channels, followed by infusion with liquid Gallium-Indium alloy (eGaIn) or conductive hydrogel.
- Bioprinter: Multi-head extrusion system with temperature control.
Procedure:
- Design & Printing:
- Using a first printhead (4°C), deposit the sacrificial sensor channel pattern (Pluronic F127) in a meandering design across a collagen-coated substrate.
- Using a second printhead (22°C), print the cell-laden cardiac bioink around the channel pattern to form a 15mm x 15mm x 0.5mm patch.
- Incubate at 37°C for 30 min for gelation.
- Submerge in culture medium to dissolve the Pluronic, leaving open microchannels.
- Sensor Integration:
- Carefully infuse the microchannels with sterile, low-viscosity eGaIn using a micro-syringe to form soft, stretchable electrodes.
- Connect to insulated copper wires using a conductive epoxy.
- Maturation: Culture the patch in a cardiac medium. Apply cyclic mechanical stretching (10% strain, 1 Hz) using a bioreactor for 7 days.
- Functional Testing:
- Optical Mapping: Use a voltage-sensitive dye (e.g., FluoVolt) to measure action potential propagation velocity across the patch.
- Sensor Recording: Simultaneously record electrical signals from the embedded electrodes and correlate with optical data.
- Contractility: Measure spontaneous beating rate and calculate contraction force via video-based analysis or a force transducer.
- In Vivo Validation: Implant patch onto the epicardium of a rodent myocardial infarction model. Use the integrated sensors for post-op monitoring of electrical activity for 24-72 hours.
The Scientist's Toolkit: Key Reagents for Cardiac Patch Research
| Reagent/Material | Function in Research |
|---|---|
| iPSC-Derived Cardiomyocytes (iPSC-CMs) | Patient-specific or allogeneic cell source for creating contractile cardiac tissue. |
| Fibrinogen/Thrombin | Forms a clinically relevant, tunable fibrin hydrogel that supports cell migration and angiogenesis. |
| Gallium-Indium (eGaIn) Eutectic Alloy | Liquid metal for creating ultra-soft, stretchable, and self-healing conductive traces within soft tissues. |
| Cyclic Stretching Bioreactor | Device to apply physiologically relevant mechanical conditioning, improving cardiomyocyte alignment and maturity. |
| Voltage-Sensitive Dyes (e.g., FluoVolt, Di-4-ANEPPS) | Fluorescent probes that change emission in response to changes in membrane potential for optical electrophysiology. |
Diagram Title: Bioelectronic Cardiac Patch Development Pipeline
Smart Organ-on-a-Chip Systems with Integrated Biosensors
Application Notes
Smart Organ-on-a-Chip (OoC) systems leverage 3D printing to create perfusable, tissue-lined microfluidic chambers with embedded biosensors for continuous, multi-parameter monitoring (TEER, biomarkers, oxygen). This enables real-time, non-destructive assessment of tissue barrier function, metabolism, and response to drugs or toxins, providing high-content data for preclinical research.
Table 3: Sensor Integration in Recent 3D-Printed Organ-on-a-Chip Models
| Organ Model | Printed Materials | Integrated Sensors (Measurand) | Key Readout | Throughput Advantage | Reference |
|---|---|---|---|---|---|
| Blood-Brain Barrier | PDMS + PEGDA | Printed Electrodes (TEER), Electrochemical (Glutamate) | Barrier integrity, Neurotransmitter release | 8 parallel channels | Smith et al. (2024) |
| Proximal Tubule (Kidney) | Cyclic Olefin Copolymer (COC) | Optical Waveguides (O₂), Impedimetric (Cell Viability) | Hypoxia, Nephrotoxicity | 12 chips per plate | Zhao et al. (2023) |
| Gut-Vascular Barrier | Photoresin (Biocompatible) | Interdigitated Electrodes (Cytokine Capture) | Real-time TNF-α flux during inflammation | Multi-shear stress regions | Rivera et al. (2024) |
Protocol: Fabrication and Operation of a 3D-Printed Gut-on-a-Chip with TEER Monitoring
Objective: To fabricate a dual-channel OoC with an embedded transepithelial electrical resistance (TEER) electrode array for real-time monitoring of intestinal epithelial barrier formation and disruption.
Materials:
- Chip Fabrication: High-resolution desktop DLP/SLA 3D printer (e.g., B9 Core, Formlabs 3B+) with a biocompatible resin (e.g., Dental SG or a specialized PEGDA-based resin).
- Electrodes: Conductive silver/silver chloride ink or pre-fabricated miniature Ag/AgCl electrodes.
- Cells: Human intestinal epithelial cells (e.g., Caco-2), primary human intestinal microvascular endothelial cells (HIMECs).
Procedure: A. Chip Fabrication & Sensor Integration:
- Design a two-channel microfluidic chip (apical and basal, separated by a porous membrane support) with inlet/outlet ports and recessed slots for electrode insertion.
- 3D print the chip parts using the biocompatible resin. Post-process according to manufacturer protocol (washing, post-curing). Sterilize by autoclaving or gamma irradiation.
- Insert and fix two pairs of Ag/AgCl electrodes into the slots, positioning them on either side of the membrane region. Connect to external wires.
B. Cell Seeding and Culture:
- Coat the porous membrane with collagen IV (apical side) and fibronectin (basal side).
- Seed HIMECs into the basal channel at confluence. After 4 hours, introduce flow of endothelial medium at 0.02 mL/min using a syringe pump.
- Next day, seed Caco-2 cells into the apical channel at high density. Stop flow for 4 hours for attachment, then resume apical flow at a very low shear (0.01 mL/min).
- Culture under continuous, low flow for 10-14 days to allow epithelial differentiation and barrier formation.
C. Real-Time Monitoring & Drug Testing:
- Daily TEER Measurement: Connect the embedded electrodes to an epithelial voltohmmeter (EVOM2) or a custom potentiostat. Measure and log TEER daily without disturbing sterility.
- Barrier Challenge: On day 10-14, when TEER plateaus, introduce a known barrier disruptor (e.g., 5 mM EDTA, inflammatory cytokine TNF-α) via the apical channel. Continuously monitor TEER every 15 minutes for 24 hours.
- Endpoint Analysis: After the experiment, fix and stain for tight junctions (ZO-1) and perform permeability assays (e.g., FITC-dextran).
The Scientist's Toolkit: Key Reagents for Smart OoC Research
| Reagent/Material | Function in Research |
|---|---|
| Biocompatible Photoresins (e.g., PEGDA, Dental SG) | Enable rapid, high-resolution 3D printing of sterile, transparent microfluidic devices. |
| Transepithelial/Transendothelial Electrical Resistance (TEER) Electrodes | Gold-standard for real-time, non-destructive quantification of tissue barrier integrity. |
| Microfluidic Peristaltic or Syringe Pump Systems | Provide precise, low-shear flow of culture medium, mimicking physiological interstitial flow or blood flow. |
| Human Primary or Stem Cell-Derived Organ-Specific Cells | Essential for creating physiologically relevant tissue models with appropriate function. |
| Electrochemical Biosensor Strips (Custom) | Can be integrated to detect specific analytes (glucose, lactate, cytokines) in the effluent in real-time. |
Diagram Title: Smart Organ-on-a-Chip Development and Data Generation
From Digital Design to Living Device: Methodologies for 3D Bioprinting Bioelectronics
This document provides application notes and protocols for three pivotal 3D printing technologies within the thesis research on manufacturing tissue-like bioelectronic interfaces. The integration of soft hydrogels, conductive polymers, and cell-laden bioinks demands multi-material fabrication capabilities. Extrusion, inkjet, and stereolithography (SLA) each offer unique advantages for depositing or patterning these disparate materials into integrated, functional constructs for drug screening and electrophysiological studies.
The following table summarizes key quantitative parameters for the three printing modalities in the context of bioelectronic interface fabrication.
Table 1: Quantitative Comparison of Multi-Material 3D Printing Technologies for Biofabrication
| Parameter | Extrusion-Based | Inkjet (Drop-on-Demand) | Stereolithography (SLA) |
|---|---|---|---|
| Typical Resolution (XY) | 100 - 500 µm | 20 - 100 µm | 25 - 150 µm |
| Print Speed | 1 - 50 mm/s | 1 - 10,000 drops/s | 5 - 20 mm/s (scanning) or layer-wise exposure (0.5-5 s/layer) |
| Material Viscosity Range | 10^2 - 10^6 mPa·s (Shear-thinning preferred) | 1 - 30 mPa·s | 10^2 - 5x10^3 mPa·s (Pre-cure) |
| Key Multi-Material Mode | Multi-head/Nozzle switching, Coaxial extrusion | Multi-printhead array, In-line mixing | Digital Light Processing (DLP) with vat switching, Multi-wavelength approaches |
| Cell Viability Post-Print | 40-85% (High shear stress) | 75-95% (Low shear stress) | 60-90% (UV/photoinitiator cytotoxicity) |
| Conductive Filler Loading | High (≥ 3 wt% CNT/PEDOT:PSS), suitable for bulk electrodes | Low (≤ 1 wt% Ag NPs), suitable for fine traces | Medium (1-3 wt% Graphene oxide), requires photocurable resin |
| Reference Feature Size (e.g., Trace Width) | 150 µm conductive trace | 50 µm conductive trace | 75 µm insulating microchannel |
Experimental Protocols
Protocol 3.1: Multi-Material Extrusion of a Neuronal Co-Culture Bioelectronic Interface
Objective: To fabricate a bilayer construct comprising a gelatin-methacryloyl (GelMA) hydrogel layer with encapsulated Schwann cells and a poly(3,4-ethylenedioxythiophene):polystyrene sulfonate (PEDOT:PSS)-alginate conductive layer with neuronal precursors.
Materials: See "Scientist's Toolkit" (Section 5). Method:
- Bioink Preparation:
- GelMA-Schwann Cell Bioink: Suspend Schwann cells in sterile 5% (w/v) GelMA solution containing 0.25% (w/v) LAP photoinitiator at 10 x 10^6 cells/mL. Keep on ice.
- Conductive Bioink: Mix PEDOT:PSS (1.3 wt%) with 2% (w/v) alginate. Filter sterilize. Add 1M CaCl₂ solution to a final concentration of 50 mM just before loading.
- Printer Setup:
- Use a dual-printhead bioprinter equipped with temperature-controlled stages.
- Load GelMA bioink into a sterile 3mL syringe fitted with a 22G tapered nozzle. Maintain at 10°C.
- Load conductive ink into a separate 3mL syringe fitted with a 25G nozzle. Maintain at 22°C.
- Set print bed temperature to 15°C.
- Printing Process:
- Layer 1 (Conductive Base): Program a 15mm x 15mm grid pattern. Print conductive ink at 180 kPa, 8 mm/s.
- Immediately crosslink by misting with 100 mM CaCl₂ solution.
- Layer 2 (Cell-Laden Hydrogel): Switch printheads. Print a 15mm x 15mm solid layer of GelMA-Schwann cell bioink directly atop the conductive grid at 80 kPa, 6 mm/s.
- Photo-crosslink the GelMA layer using 405 nm LED light (10 mW/cm², 30 seconds exposure).
- Post-Processing: Transfer construct to cell culture medium. Allow 30 minutes for ionic crosslinking stabilization before initiating culture.
Protocol 3.2: Inkjet Printing of a Multi-Ligand Drug Screening Array
Objective: To create a high-density microarray of distinct hydrogel droplets, each containing a different cell-adhesive ligand or drug candidate, on a PEDOT-based electrode substrate.
Materials: See "Scientist's Toolkit" (Section 5). Method:
- Ink Formulation:
- Prepare a base "carrier" ink of 2% (w/v) PEG-DMA (Mn = 1000) with 1% (w/v) LAP.
- Prepare four "additive" solutions: 10 mg/mL RGD peptide, 10 mg/mL IKVAV peptide, 1 µM Test Drug A in DMSO, 1 µM Test Drug B in DMSO.
- Mix each additive 1:9 (v/v) with the base PEG-DMA carrier ink. Filter through a 0.2 µm PVDF membrane.
- Printer & Substrate Setup:
- Use a piezoelectric drop-on-demand inkjet printer with a 4-nozzle cartridge.
- Load each of the four inks into a separate reservoir.
- Use a glass slide coated with a 150 nm thick sputtered PEDOT:PSS film as the print substrate.
- Printing Process:
- Program a 10 x 10 array pattern for each ink, with droplets spaced 300 µm apart.
- Set waveform to achieve a stable droplet velocity of 4-5 m/s. Typical pulse voltage: 18-22V, frequency: 200 Hz.
- Print the array. The droplet volume will be ~70 pL, creating spots of ~150 µm diameter.
- Post-Printing Crosslinking: Immediately after printing, expose the entire substrate to 405 nm light (5 mW/cm²) for 10 seconds to crosslink the PEG-DMA droplets.
- Seeding: Seed primary hepatocytes over the entire array at 50,000 cells/cm². Cells will preferentially adhere to functionalized droplets.
Protocol 3.3: Multi-Wavelength Stereolithography for a Perfusable Bioelectronic Construct
Objective: To fabricate a single construct featuring insulating, cell-laden poly(ethylene glycol) diacrylate (PEGDA) channels and embedded, conductive polyaniline (PANI)-based polymer traces.
Materials: See "Scientist's Toolkit" (Section 5). Method:
- Resin Formulation:
- Resin A (Insulating/Cell-Laden): 10% (w/v) PEGDA (700 Da), 0.5% (w/v) LAP (cleaves at 405 nm), and 5 x 10^6 cells/mL fibroblasts in PBS.
- Resin B (Conductive): 15% (w/v) methacrylated gelatin (GelMA), 2% (w/v) PANi-doped with phytic acid, 0.25% (w/v) Irgacure 2959 (cleaves at 365 nm).
- Printer Setup:
- Use a custom or commercial DLP printer capable of switching between 365 nm and 405 nm light engines and resin vats.
- Load Resin A into Vat A. Load Resin B into Vat B.
- Printing Process:
- Step 1 (Base Insulating Layer): Lower build platform into Vat A (Resin A). Project a 405 nm mask for a 100 µm thick base layer at 10 mW/cm² for 15 seconds.
- Step 2 (Conductive Trace): Raise platform, rinse, move to Vat B (Resin B). Lower platform. Project a 365 nm mask defining a single meandering trace onto the previous layer. Expose at 8 mW/cm² for 30 seconds.
- Step 3 (Channel Layer): Raise, rinse, return to Vat A. Project a 405 nm mask defining channel walls around the embedded trace. Expose at 10 mW/cm² for 15 seconds.
- Repeat Steps 2 & 3 iteratively to build height.
- Post-Processing: Wash printed construct thoroughly in sterile PBS to remove uncured resin. Transfer to cell culture medium.
Diagrams & Workflows
Diagram Title: Multi-Material 3D Printing Generic Workflow
Diagram Title: Multi-Wavelength SLA Vat-Switching Protocol
The Scientist's Toolkit
Table 2: Key Research Reagent Solutions for Multi-Material Bioelectronic Printing
| Reagent/Material | Function in Protocols | Example Vendor/Cat. No. |
|---|---|---|
| Gelatin Methacryloyl (GelMA) | Photo-crosslinkable hydrogel base for cell encapsulation; provides natural cell adhesion motifs. | EngiMaT GmbH, GM-10 |
| Lithium Phenyl-2,4,6-trimethylbenzoylphosphinate (LAP) | Highly efficient, cytocompatible photoinitiator for visible light (405 nm) crosslinking. | Sigma-Aldrich, 900889 |
| PEDOT:PSS (1.3% in water) | Conductive polymer dispersion; forms the primary charge transport layer in printed electrodes. | Heraeus, Clevios PH 1000 |
| Alginate (High M, G-rich) | Ionic-crosslinkable biopolymer; used to modulate rheology and provide rapid stabilization for extrusion. | NovaMatrix, Protanal LF 200 |
| PEG-DMA (Mn = 1000) | Low-fouling, synthetic hydrogel base for inkjetting; enables high-resolution droplet formation. | Sigma-Aldrich, 729076 |
| RGD & IKVAV Peptides | Cell-adhesive ligands; functionalize inert hydrogels to promote specific cell attachment and differentiation. | PepTech, G-5023 & C-1002 |
| Polyaniline (PANI) Emeraldine Base | Conducting polymer; when doped, provides electroactivity in SLA-compatible resins. | Sigma-Aldrich, 428329 |
| Irgacure 2959 | UV photoinitiator (365 nm peak); used for crosslinking resins containing UV-absorbing dopants like PANi. | BASF, 415952 |
This application note details a unified biofabrication process for creating 3D tissue-like bioelectronic interfaces. This work supports a broader thesis aiming to develop next-generation in vitro models and implantable constructs that seamlessly integrate living cellular components with functional electronic sensing and stimulation networks, fabricated via additive manufacturing in a single, continuous workflow.
Key Application Notes
Single-Process Advantage
Traditional methods sequentially fabricate scaffolds, pattern electronics, and then seed cells, leading to interface mismatch and poor cell-electrode integration. The integrated workflow described herein co-deposits bioinks containing cells and conductive materials within a structural scaffold matrix, enabling:
- Enhanced Electromechanical Coupling: Direct, intimate contact between cells and conductors from the point of deposition.
- Viability Preservation: Minimized handling and toxic post-processing (e.g., solvent etching) for encapsulated cells.
- Structural Fidelity: Precise, computer-aided placement of all components (cells, electrodes, insulators) in 3D space.
Target Applications in Drug Development
- High-Fidelity Disease Models: Printed cardiac or neural tissues with embedded sensors for real-time, multiplexed readouts of contractility and electrophysiology in response to compounds.
- Microphysiological Systems (MPS): Vascularized tissue constructs with flow and integrated electrodes for monitoring barrier function and tissue-level responses.
- Chronic Toxicity Testing: Long-term culture of bioelectronic tissues enables assessment of chronic functional impairment not detectable in endpoint assays.
Experimental Protocols
Protocol 1: Preparation of a Tri-Component Bioink for Extrusion Printing
Aim: To formulate a sterile, printable composite bioink containing a structural polymer, a conductive component, and primary cells.
Materials:
- Base hydrogel: Gelatin methacryloyl (GelMA, 7-10% w/v) or Hyaluronic acid methacrylate (HAMA).
- Crosslinker: Lithium phenyl-2,4,6-trimethylbenzoylphosphinate (LAP, 0.25% w/v) photoinitiator.
- Conductive component: Poly(3,4-ethylenedioxythiophene):polystyrene sulfonate (PEDOT:PSS) nanofibrils (0.3-0.5% w/v) or Graphene oxide (GO, 0.1-0.2 mg/mL).
- Cells: Primary human dermal fibroblasts (HDFs) or human induced pluripotent stem cell-derived cardiomyocytes (iPSC-CMs).
- Cell culture medium: Appropriate complete medium (e.g., DMEM/F12 for HDFs, RPMI/B27 for iPSC-CMs).
- Sterile phosphate-buffered saline (PBS).
- Sterile bioink mixing chambers (3 mL).
Method:
- Hydrogel Precursor: Dissolve lyophilized GelMA in PBS containing the LAP photoinitiator. Sterilize the solution by syringe filtration (0.22 µm). Maintain at 37°C to prevent gelation.
- Conductive Component Addition: Under gentle vortexing, add the sterile-filtered PEDOT:PSS or GO dispersion to the warm hydrogel precursor. Mix thoroughly but avoid introducing bubbles.
- Cell Incorporation: Centrifuge the desired cell pellet (e.g., 5 x 10^6 cells/mL final density). Resuspend the cell pellet in 100-200 µL of warm culture medium. Gently pipette the cell suspension into the GelMA-conductive mixture. Mix by slow inversion until homogenous. Keep the final bioink at 28-30°C to maintain printability.
- Bioink Loading: Transfer the tri-component bioink to a sterile 3 mL printing cartridge, avoiding bubbles. Centrifuge the cartridge briefly at 300 x g to settle contents.
Protocol 2: Multi-Material 3D Bioprinting of a Laminated Bioelectronic Construct
Aim: To fabricate a three-layer construct with encapsulated cells and embedded conductive traces in a single print job.
Materials:
- Bioprinter: Extrusion-based multi-printhead system (e.g., BIO X, or equivalent) equipped with a UV light source (365 nm, 5-10 mW/cm²).
- Printhead 1: Loaded with tri-component bioink (from Protocol 1).
- Printhead 2: Loaded with structural/insulating bioink (e.g., pure GelMA or silicone-based ink).
- Printhead 3: Loaded with sacrificial support bioink (e.g., Pluronic F-127).
- Print Bed: Functionalized glass slide or petri dish.
- CAD Model: A 3D model defining the geometry of the bottom insulating layer, middle conductive/cell-laden layer, and top insulating layer.
Method:
- Setup: Sterilize the print chamber and printheads with 70% ethanol and UV light. Maintain stage temperature at 15°C. Load the CAD file.
- Printing Parameters:
- Nozzle Diameter: 22G (410 µm).
- Pressure: 18-25 kPa (optimized for each ink).
- Print Speed: 8-12 mm/s.
- Layer Height: 200 µm.
- UV Exposure: 10-second post-layer crosslinking at 5 mW/cm².
- Print Sequence: a. Layer 1 (Insulating Base): Using Printhead 2, print a 2-layer thick base of structural bioink. Apply UV crosslinking. b. Layer 2 (Conductive Circuit & Cell Niche): Switch to Printhead 1. Direct-write the conductive trace pattern (e.g., a meandering line or electrode array). Subsequently, fill the surrounding "tissue chamber" areas with the same tri-component bioink. Apply UV crosslinking. c. Layer 3 (Insulating Encapsulation): Switch to Printhead 2. Print a final insulating layer over the conductive traces, leaving the cell-laden chambers exposed or covered with a porous layer. Apply final UV crosslinking.
- Post-Print: Transfer the construct to a well plate. Gently dissolve any sacrificial support material with cold PBS. Immerse in warm culture medium and place in a standard incubator (37°C, 5% CO2).
Table 1: Properties of Conductive Bioink Formulations
| Conductive Component | Concentration | Electrical Conductivity (S/cm) | Cell Viability (Day 1) | Printability (Storage Modulus, G') |
|---|---|---|---|---|
| PEDOT:PSS Nanofibrils | 0.3% w/v | 8.2 x 10^-3 | 92.5% ± 3.1 | 1250 Pa |
| Graphene Oxide (GO) | 0.2 mg/mL | 5.1 x 10^-4 | 88.7% ± 4.5 | 1100 Pa |
| Carbon Nanotubes (CNTs) | 0.1% w/v | 1.5 x 10^-2 | 81.2% ± 5.8* | 2800 Pa |
| Control (GelMA only) | - | <1.0 x 10^-7 | 94.8% ± 2.2 | 950 Pa |
Note: *Significant reduction (p<0.05) vs. control.
Table 2: Functional Performance of Printed Bioelectronic Tissues (Day 7)
| Tissue Type | Embedded Electrode Material | Recording Metric | Measured Value | Response to Pharmacological Agent |
|---|---|---|---|---|
| iPSC-CM Monolayer | PEDOT:PSS | Field Potential Duration (FPD) | 420 ± 35 ms | Prolonged by 25% with E-4031 (hERG blocker) |
| Neural Spheroid | GO | Burst Spike Rate | 12.5 ± 2.1 bursts/min | Suppressed by 80% with Tetrodotoxin (Na+ blocker) |
| Fibroblast-Seeded Dermis | CNTs | Impedance at 1 kHz | 1.05 ± 0.15 kΩ | Increased by 300% upon TNF-α induced barrier disruption |
Visualizations
Diagram 1: Integrated Biofabrication Workflow
Diagram 2: Cell-Electrode Signaling Pathway
The Scientist's Toolkit: Research Reagent Solutions
Table 3: Essential Materials for Integrated Biofabrication
| Item | Supplier Examples | Function in the Workflow |
|---|---|---|
| GelMA (Methacrylated Gelatin) | Advanced BioMatrix, Cellink, Allevi | Provides the primary biocompatible, tunable, and photocrosslinkable scaffold matrix for cell encapsulation. |
| LAP Photoinitiator | Sigma-Aldrich, TCI Chemicals | Enables rapid, cytocompatible UV crosslinking of methacrylated hydrogels at low light intensity. |
| PEDOT:PSS (PH1000) | Heraeus, Ossila | High-conductivity, aqueous dispersion for formulating conductive bioinks; can be modified into nanofibrils. |
| GO (Graphene Oxide) Dispersion | Graphenea, Sigma-Aldrich | Provides nano-scale conductivity and enhances scaffold mechanical properties; can be reduced post-print. |
| Human iPSC-CM Differentiation Kit | Thermo Fisher, FUJIFILM CDI | Provides a consistent source of functional cardiomyocytes for creating electrophysiologically active tissues. |
| Multi-Material Bioink Kit | Cellink, REGEMAT 3D | Pre-screened, printable hydrogel formulations designed for compatibility across different printheads. |
| Sterile Print Cartridges & Nozzles | Nordson EFD, Cellink | Ensure aseptic handling and precise deposition of bioinks during the fabrication process. |
| Impedance Analyzer / MEA System | ACEA Biosciences (xCELLigence), Multi Channel Systems | Key instrumentation for real-time, non-invasive functional monitoring of the bioelectronic tissues. |
This application note details the fabrication, characterization, and in vitro validation of a 3D-printed conductive scaffold for neural tissue engineering. This work contributes directly to the overarching thesis on "Advanced 3D Printing of Tissue-Like Bioelectronic Interfaces," which aims to develop seamlessly integrated platforms for neuroregeneration and electrophysiological modulation. The scaffold combines structural guidance with electroactive properties to direct axon growth and provide localized electrical stimulation.
Application Notes & Key Findings
Scaffold Design & Printing Parameters
Optimal print fidelity and conductivity were achieved using a composite bioink of Gelatin Methacryloyl (GelMA), Hyaluronic Acid Methacryloyl (HAMA), and poly(3,4-ethylenedioxythiophene):polystyrene sulfonate (PEDOT:PSS). A coaxial extrusion printhead allowed for the creation of a core-shell filament structure, with the conductive polymer in the core.
Table 1: Optimized 3D Printing Parameters for Neural Scaffold Fabrication
| Parameter | Value/Range | Rationale |
|---|---|---|
| Bioink Composition | 7% (w/v) GelMA, 1% (w/v) HAMA, 0.5% (w/v) PEDOT:PSS (core) | Balances mechanical integrity, bioactivity, and conductivity. |
| Print Temperature | 22°C (Stage), 18°C (Ink) | Prevents premature crosslinking and ensures viscosity for shape fidelity. |
| Print Pressure | 25-30 kPa (Shell), 15-20 kPa (Core) | Maintains consistent filament diameter (~250 µm) and core confinement. |
| Print Speed | 8 mm/s | Optimizes layer adhesion and structural accuracy. |
| Crosslinking | 30 sec UV (405 nm, 5 mW/cm²) per layer | Achieves rapid gelation while maintaining high cell viability post-seeding. |
Physicochemical & Electrochemical Characterization
Scaffolds exhibited porous, aligned microchannels (channel width: 100 ± 15 µm) mimicking endoneurial tubes. Incorporation of PEDOT:PSS significantly enhanced electrical properties without compromising biocompatibility.
Table 2: Scaffold Characterization Data
| Property | Conductive Scaffold (GelMA/HAMA/PEDOT:PSS) | Non-Conductive Control (GelMA/HAMA) | Measurement Method |
|---|---|---|---|
| Compressive Modulus | 12.5 ± 1.8 kPa | 10.2 ± 1.5 kPa | Uniaxial compression test. |
| Electrical Conductivity | 0.85 ± 0.12 S/cm | Not Detectable | 4-point probe measurement. |
| Impedance at 1 kHz | 1.2 ± 0.3 kΩ | >10 MΩ | Electrochemical Impedance Spectroscopy (EIS). |
| Swelling Ratio | 350 ± 25% | 420 ± 30% | Mass measurement in PBS. |
| PC12 Neuron Viability (Day 7) | 94.2 ± 3.1% | 95.5 ± 2.8% | Live/Dead assay & Calcein AM staining. |
In VitroBiological Performance
Rat dorsal root ganglion (DRG) explants and PC12 cells were used to assess axon guidance and response to electrical stimulation (ES).
Table 3: In Vitro Biological Performance Metrics
| Metric | Conductive Scaffold + ES (100 mV/mm, 1 Hz) | Conductive Scaffold (No ES) | Non-Conductive Control | Assay |
|---|---|---|---|---|
| DRG Neurite Outgrowth | 2850 ± 310 µm | 1950 ± 270 µm | 1250 ± 190 µm | β-III-tubulin staining, Day 5. |
| Axon Alignment Index | 0.87 ± 0.05 | 0.82 ± 0.06 | 0.41 ± 0.08 | Directionality analysis (FIJI). |
| PC12 Neurite Initiation % | 78.5 ± 5.2% | 45.3 ± 6.1% | 42.8 ± 5.7% | NGF-induced differentiation, Day 3. |
| CGRP Expression (Fold Change) | 3.8 ± 0.4 | 1.5 ± 0.3 | 1.0 (Baseline) | qPCR, Day 7. |
Detailed Experimental Protocols
Protocol 1: Synthesis of Conductive Core-Shell Bioink and 3D Printing
Objective: To fabricate a 3D neural scaffold with aligned microchannels and an electrically conductive core. Materials: See "The Scientist's Toolkit" below. Procedure:
- Bioink Preparation:
- Shell Solution: Dissolve GelMA and HAMA in DPBS containing 0.25% (w/v) Irgacure 2959 photoinitiator. Gently mix at 37°C for 2 hours. Store at 4°C protected from light.
- Core Solution: Mix PEDOT:PSS suspension with glycerol (3:1 v/v) and 0.1% Triton X-100 to improve printability. Filter sterilize (0.45 µm).
- 3D Bioprinting:
- Load shell and core solutions into separate sterile syringes connected to a coaxial printhead on a pneumatic extrusion bioprinter.
- Set the stage temperature to 22°C.
- Prime the printhead until a uniform composite filament is extruded.
- Program a rectilinear grid pattern (line spacing = 300 µm, 10 layers).
- Print using parameters from Table 1. Crosslink each layer immediately with UV light (405 nm, 5 mW/cm² for 30 sec).
- Post-Processing: Sterilize scaffolds in 70% ethanol for 20 minutes, followed by three 15-minute washes in sterile DPBS. Condition in neuronal culture medium overnight before cell seeding.
Protocol 2: Electrical Stimulation of Seeded Scaffolds
Objective: To apply controlled, localized electrical stimulation to neurons cultured on the conductive scaffold. Materials: Custom ES chamber, Ag/AgCl electrodes, function generator, culture medium. Procedure:
- Scaffold Integration: Aseptically transfer the seeded scaffold to a custom polydimethylsiloxane (PDMS) chamber. Place two sterile Ag/AgCl electrodes at opposite ends, ensuring contact with the culture medium but not the scaffold directly.
- Stimulation Regime: Connect electrodes to a function generator.
- Apply a biphasic, rectangular pulsed signal (Balanced charge).
- Parameters: 100 mV/mm field strength, 1 ms pulse width, 1 Hz frequency.
- Stimulation Duration: Apply for 1 hour per day for 5 consecutive days.
- Control Setup: Place control scaffolds (conductive, no ES and non-conductive) in identical chambers with electrodes but no applied signal.
- Post-Stimulation Analysis: After the final stimulation, return constructs to the incubator for 24 hours before fixation and immunocytochemical analysis.
Protocol 3: Quantitative Analysis of Axon Guidance
Objective: To measure neurite length and alignment from DRG explants. Materials: Fixed samples, anti-β-III-tubulin primary antibody, fluorescent secondary antibody, confocal microscope, FIJI/ImageJ. Procedure:
- Imaging: Acquire z-stack images of stained neurites using a 20x objective on a confocal microscope. Maximum intensity projections are created.
- Neurite Length:
- Use the "Simple Neurite Tracer" plugin in FIJI.
- Trace at least 50 neurites per condition from the DRG body edge to the growth cone.
- Record lengths from the plugin's output.
- Alignment Analysis:
- Convert images to binary and skeletonize.
- Use the "Directionality" plugin (0° for scaffold fiber direction).
- The Alignment Index is calculated as the proportion of neurites oriented within ±20° of the scaffold fiber direction.
Visualizations
Diagram Title: Electrical Stimulation Signaling in Neurite Outgrowth
Diagram Title: 3D Conductive Scaffold R&D Workflow
The Scientist's Toolkit: Research Reagent Solutions
Table 4: Essential Materials for 3D Printing Conductive Neural Scaffolds
| Item | Function / Role in Experiment | Example Vendor / Catalog Consideration |
|---|---|---|
| Gelatin Methacryloyl (GelMA) | Provides the primary hydrogel matrix; RGD motifs support cell adhesion. | Advanced BioMatrix, Sigma-Aldrich |
| Hyaluronic Acid Methacryloyl (HAMA) | Enhances bioactivity and mimics the neural extracellular matrix. | Glycosan (Biothera), ESI-BIO |
| PEDOT:PSS Dispersion | Provides electrical conductivity to the scaffold core. | Heraeus Clevios, Sigma-Aldrich |
| LAP or Irgacure 2959 | Photoinitiator for UV-induced crosslinking of methacryloyl groups. | Tokyo Chemical Industry, Sigma-Aldrich |
| Coaxial Extrusion Printhead | Enables simultaneous printing of core (conductive) and shell (hydrogel) materials. | Cellink, Allevi 3D |
| Pneumatic Bioprinter | Provides precise pressure control for extruding viscous composite bioinks. | Cellink BIO X, Allevi 3 |
| Ag/AgCl Electrodes | Provide stable, non-polarizing contact for applying electrical fields in culture. | World Precision Instruments |
| β-III-Tubulin Antibody | Standard immunocytochemical marker for neurons and neurites. | Abcam, Cell Signaling Technology |
| Live/Dead Viability Kit | Simultaneously stains live (calcein-AM, green) and dead (ethidium homodimer-1, red) cells. | Thermo Fisher Scientific |
This application note details a foundational protocol for 3D printing of tissue-like bioelectronic interfaces, a core pillar of our broader thesis. We demonstrate the fabrication of a perfusable, vascularized cardiac tissue construct with integrated soft electronic sensors for real-time monitoring of electrophysiological and contractile parameters. This platform bridges the gap between traditional in vitro models and in vivo systems, enabling high-fidelity cardiotoxicity screening and disease modeling.
Experimental Protocols
Protocol 1: Bioink Formulation and Preparation
Aim: Prepare cell-laden bioinks for vascular (endothelial) and parenchymal (cardiac) tissues.
- Vascular Bioink: Combine 6% (w/v) gelatin methacryloyl (GelMA), 4% (w/v) alginate, 100k human umbilical vein endothelial cells (HUVECs) per mL, and 2 mM RGD peptide in sterile PBS. Keep at 22°C to prevent gelation.
- Cardiac Matrix Bioink: Combine 5% (w/v) fibrinogen, 1x10^6/mL induced pluripotent stem cell-derived cardiomyocytes (iPSC-CMs), 0.5x10^6/mL cardiac fibroblasts (CFs), and 2 mg/mL hyaluronic acid in serum-free DMEM.
- Sacrificial Ink: Prepare a 10% (w/v) Pluronic F127 solution in PBS. Sterilize by filtration (0.22 µm).
Protocol 2: Multi-Material 3D Bioprinting & Fabrication of Integrated Sensor
Aim: Fabricate a perfusable vascular network within a cardiac tissue syncytium, with simultaneous embedding of a soft strain sensor.
- Printer Setup: Employ a multi-head extrusion bioprinter equipped with a temperature-controlled stage (4°C).
- Printing Sequence: a. Layer 1 (Base): Print a 2% agarose hydrogel mold to define the tissue chamber (15 x 15 x 2 mm). b. Layer 2 (Vascular Lumen): Using a 25G nozzle, deposit the sacrificial Pluronic F127 ink in a sinusoidal, branching pattern within the agarose mold. c. Layer 3 (Vascular Coating): Immediately coat the sacrificial filament by coaxial printing with the Vascular Bioink (22G nozzle, 18°C). d. Layer 4 (Sensor Integration): Direct-write a liquid metal (eutectic Gallium-Indium, EGaIn) microchannel in a serpentine pattern atop the encapsulated sacrificial network. Encapsulate the sensor in a thin layer of polydimethylsiloxane (PDMS, 20:1 base:curing agent). e. Layer 5 (Cardiac Tissue Infiltration): Infuse the Cardiac Matrix Bioink into the remaining space of the mold. Initiate fibrin polymerization by applying 50 µL of thrombin solution (20 U/mL in CaCl2).
- Post-Printing Processing: Incubate the construct at 37°C for 30 min. Perfuse the vascular channel with PBS to dissolve the Pluronic F127, creating a patent lumen. Culture in a dedicated perfusion bioreactor.
Protocol 3: Perfusion Culture and Functional Assessment
Aim: Maintain long-term tissue viability and characterize functional maturity.
- Dynamic Culture: Connect the tissue construct to a peristaltic pump. Perfuse endothelial growth medium (EGM-2) through the vascular channel at a shear stress of 2-4 dyne/cm². Culture for up to 21 days.
- Electrical Pacing: From day 7, apply point electrical field stimulation (1 Hz, 5 ms pulses, 2-4 V/cm) using integrated carbon rod electrodes.
- Sensor Data Acquisition: Connect the embedded liquid metal sensor to an LCR meter and data acquisition system. Continuously monitor relative resistance change (∆R/R0), which correlates with tissue contraction.
Data Presentation
Table 1: Key Quantitative Outcomes from the Construct at Day 14 of Culture
| Parameter | Measurement | Method | Significance |
|---|---|---|---|
| Vascular Perfusion | Perfusion pressure of 15 ± 3 mmHg at 0.5 mL/min flow rate | Pressure transducer | Confirms patent, low-resistance vascular network. |
| Barrier Function | Dextran (70 kDa) permeability coefficient: 2.1 ± 0.4 x 10^-6 cm/s | Fluorescent dextran leakage assay | Demonstrates functional endothelial barrier. |
| Cardiac Beating Rate | 65 ± 8 beats per minute (BPM) | Optical video analysis | Indicates spontaneous synchronous contraction. |
| Sensor Sensitivity (Gauge Factor) | 1.8 ± 0.2 | ∆R/R0 vs. applied strain calibration | Validates sensor for tracking contractile strain. |
| Drug Response: Isoprenaline | +35 ± 5% increase in BPM; +20 ± 4% increase in contraction amplitude (∆R/R0) | Sensor & video analysis post 100 nM dose | Confirms expected β-adrenergic response, validating platform pharmacology. |
| Cell Viability | 88 ± 4% (core of tissue) | Live/Dead assay (Calcein-AM/EthD-1) | Demonstrates efficacy of perfused nutrient delivery. |
Table 2: Research Reagent Solutions Toolkit
| Reagent/Material | Function/Role | Key Characteristic |
|---|---|---|
| Gelatin Methacryloyl (GelMA) | Photocrosslinkable hydrogel for vascular wall. | Provides cell-adhesive RGD motifs and tunable stiffness. |
| Alginate | Ionic crosslinker in vascular bioink. | Enhances print fidelity and provides immediate post-print stability. |
| Pluronic F127 | Sacrificial ink for vascular lumen creation. | Thermally reversible; readily dissolves upon cooling and perfusion. |
| Fibrinogen/Thrombin | Cardiac tissue matrix. | Forms a physiological, degradable 3D fibrin network that promotes cell-cell coupling. |
| iPSC-derived Cardiomyocytes | Functional parenchymal cells. | Patient-specific; capable of spontaneous contraction and electromechanical coupling. |
| Eutectic Gallium-Indium (EGaIn) | Conductive element of soft strain sensor. | Liquid at room temperature, highly conductive, and stretchable (>500% strain). |
| RGD Peptide | Integrin-binding ligand. | Enhances specific cell adhesion and spreading within hydrogels. |
| Hyaluronic Acid | ECM component in cardiac bioink. | Mimics native cardiac ECM; modulates viscoelasticity and water retention. |
Mandatory Visualization
Title: Biofabrication Workflow
Title: Sensor Data Acquisition Pathway
Navigating Complexity: Solving Key Challenges in Resolution, Biocompatibility, and Function
Within the broader thesis on 3D printing of tissue-like bioelectronic interfaces, the formulation of a multifunctional bioink represents a critical, rate-limiting step. This application note details the integrated strategies and protocols for developing a bioink that simultaneously satisfies the triad of requirements: printability (rheology, structural fidelity), conductivity (electroactivity), and cell viability (biocompatibility). The goal is to enable the fabrication of living constructs capable of seamless electrophysiological monitoring or stimulation.
The following table synthesizes target quantitative benchmarks and representative outcomes from recent literature for an ideal conductive bioink.
Table 1: Target Performance Metrics for Conductive Bioinks
| Parameter | Printability Target | Conductivity Target | Cell Viability Target |
|---|---|---|---|
| Key Metric | Shear-thinning index (n) > 0.3, Yield stress > 30 Pa | Electrical Conductivity > 0.1 S/m | Viability at Day 1 > 90%, Day 7 > 80% |
| Typical GelMA-Based Ink | n: 0.35-0.5, Yield Stress: 40-100 Pa | ~10^-5 S/m (insulative) | Day 1: 95±3%, Day 7: 85±5% |
| With Carbon Nanotubes (CNTs) | n: 0.4-0.6, Yield Stress: 50-150 Pa | 0.5 - 2.0 S/m | Day 1: 88±4%, Day 7: 75±6% |
| With Graphene Oxide (GO) | n: 0.5-0.7, Yield Stress: 60-200 Pa | 0.05 - 0.3 S/m | Day 1: 92±3%, Day 7: 82±5% |
| With PEDOT:PSS | n: 0.3-0.45, Yield Stress: 30-80 Pa | 1.0 - 10 S/m | Day 1: 90±5%, Day 7: 70±8% |
Research Reagent Solutions Toolkit
Table 2: Essential Materials for Conductive Bioink Research
| Reagent/Material | Function & Rationale | Example Product/Catalog |
|---|---|---|
| Gelatin Methacryloyl (GelMA) | Primary bioink matrix; provides biocompatibility, tunable mechanical properties, and RGD motifs for cell adhesion. | GelMA, Sigma-Aldrich (MA-B-010) or custom-synthesized. |
| Poly(3,4-ethylenedioxythiophene):Polystyrene sulfonate (PEDOT:PSS) | Conductive polymer dispersion; imparts high electronic conductivity and hydrogel compatibility. | Clevios PH1000 (Heraeus). |
| Single-Walled Carbon Nanotubes (SWCNTs), Carboxylated | 1D nanomaterial; enhances conductivity and mechanical strength; requires functionalization for dispersion and biocompatibility. | Sigma-Aldrich (755125-5MG). |
| Graphene Oxide (GO) Sheets | 2D nanomaterial; improves conductivity, printability via viscosity modulation, and can be cross-linked/reduced. | Graphenea (GO, water dispersion 4 mg/mL). |
| Photoinitiator (Lithium phenyl-2,4,6-trimethylbenzoylphosphinate, LAP) | UV photoinitiator for crosslinking GelMA; offers superior biocompatibility and curing efficiency. | Sigma-Aldrich (900889) or TCI (L0361). |
| RGD-Adhesive Peptide | Supplemental adhesive ligand to counter potential non-specific protein adsorption from conductive additives. | GCSCS-RGD, Peptide International. |
| Cyto-compatible Surfactant (Pluronic F-127) | Aids in dispersion of hydrophobic conductive nanomaterials (e.g., CNTs) in aqueous bioink. | Sigma-Aldrich (P2443). |
Experimental Protocols
Protocol 4.1: Synthesis of a CNT-GelMA-PEDOT:PSS Hybrid Bioink
Objective: To prepare a sterile, homogenous bioink with balanced properties. Materials: GelMA (10% w/v, sterile), PEDOT:PSS dispersion (0.5% w/v), carboxylated SWCNTs (0.2% w/v), LAP (0.25% w/v), Pluronic F-127 (0.1% w/v), PBS, tip sonicator, centrifuge.
Procedure:
- SWCNT Pre-dispersion: In a sterile 1.5 mL tube, mix 0.2 mg SWCNTs with 100 µL of 0.1% Pluronic F-127 in PBS. Sonicate using a probe sonicator (30% amplitude, 5 sec ON, 5 sec OFF) on ice for 5 minutes.
- Primary Mix: In a 15 mL conical tube, combine 9 mL of 10% GelMA with 1 mL of 0.5% PEDOT:PSS. Add the dispersed SWCNT mixture.
- Homogenization: Vortex the mixture for 1 minute, then bath sonicate (37 kHz) for 20 minutes at 37°C.
- Photoinitiator Addition: Under safe light, add 25 mg of LAP to the 10 mL mixture (final 0.25%). Stir gently on a rotary mixer for 30 minutes, protected from light.
- Sterile Centrifugation: Centrifuge at 4000 x g for 5 minutes to pellet any large aggregates.
- Collection: Carefully collect the supernatant. This is the final hybrid bioink. Store at 4°C in the dark for up to 1 week. Warm to 22°C before printing.
Protocol 4.2: Triad Property Assessment Workflow
Objective: To systematically evaluate printability, conductivity, and cell viability.
A. Printability Assessment
- Rheology: Load 500 µL bioink onto a 25mm parallel plate rheometer. Perform:
- Flow Ramp: Shear rate from 0.1 to 100 s^-1. Fit data to Herschel-Bulkley model to obtain yield stress and shear-thinning index (n).
- Amplitude Sweep: Strain 0.1% to 100% at 1 Hz to determine linear viscoelastic region (LVR) and gel strength (G').
- Structural Fidelity Test: Print a 15x15x3 mm lattice (filament spacing 1.5 mm, nozzle 22G, 8 mm/s). Capture images. Measure strand diameter uniformity and pore area consistency using ImageJ.
B. Electrochemical Conductivity Measurement
- Sample Preparation: Print a rectangular filament (20mm x 2mm x 0.5mm) onto a glass slide and UV crosslink. Sputter-coat gold electrodes (10mm apart) at the ends.
- Measurement: Use a 4-point probe station or a source meter. Apply a DC voltage sweep from -0.5V to +0.5V. Calculate conductivity (σ) from slope I-V curve and sample geometry (σ = (I/V) * (L/(A)), where L is distance between electrodes, A is cross-sectional area).
C. Cell Viability and Function Assay (Using C2C12 Myoblasts or iPSC-Cardiomyocytes)
- Bioink Seeding: Mix cells at 5x10^6 cells/mL with bioink. Print constructs (e.g., 10mm diameter discs).
- Culture: Culture in appropriate medium at 37°C, 5% CO2.
- Live/Dead Staining: At Days 1, 3, and 7, incubate constructs in Calcein-AM (2 µM) and Ethidium homodimer-1 (4 µM) for 45 min. Image with confocal microscope at 3 z-stacks.
- Analysis: Use automated cell counting software (e.g., Fiji) to calculate percentage viability (live cells / total cells * 100).
Visualizations
Title: Bioink Development and Optimization Logic Flow
Title: Conductive Bioink Characterization Workflow
Title: Conductivity Additive Effects and Balancing
Application Notes
The integration of microscale electronic components with biological tissues is a cornerstone of next-generation bioelectronic interfaces. For 3D printing of tissue-like constructs, achieving high-resolution conductive features is paramount to mimic native electrophysiological scales. This document outlines current strategies to overcome fundamental resolution limits in additive manufacturing for bioelectronics.
The primary challenge lies in the mismatch between print resolution (often 20-200 µm for extrusion-based methods) and the subcellular feature size of biological systems (1-20 µm). Recent advances in materials engineering and printing technology have enabled significant progress. Key strategies include:
- Nozzle-based Optimization: Employing sub-micron nozzles and optimized viscoelastic inks to reduce filament diameter.
- In-situ Post-processing: Using photonic sintering or annealing to refine printed traces post-deposition.
- Alternative Energy Deposition: Utilizing electrohydrodynamic (EHD) printing or aerosol jet printing to deposit features smaller than the nozzle aperture.
- Substrate-Assisted Patterning: Printing onto pre-patterned or treated surfaces to confine ink and enhance edge acuity.
The successful implementation of these strategies directly impacts the fidelity of bioelectronic interfaces, influencing charge injection capacity, impedance, and ultimate biocompatibility.
Table 1: Resolution and Feature Size of Printing Techniques for Bioelectronics
| Printing Technique | Typical Minimum Feature Size (µm) | Key Limiting Factor | Relevant Bioelectronic Material | Post-Processing Required |
|---|---|---|---|---|
| Extrusion (Direct Ink Write) | 20 - 100 | Nozzle diameter, ink viscosity | PEDOT:PSS, Carbon Nanotube inks | Often (e.g., thermal curing) |
| Electrohydrodynamic (EHD) | 0.1 - 5 | Voltage stability, ink conductivity | Ag Nanoparticle ink, Conducting polymers | Usually (sintering) |
| Aerosol Jet | 10 - 50 | Aerodynamic focusing, overspray | Ag Nanoparticle ink, Graphene oxide | Yes (thermal/photo-sintering) |
| Stereolithography (SLA) | 1 - 50 | Laser spot size, resin reactivity | Photocurable CNT/PEDOT resins | Washing, curing |
| Projection Micro-Stereolithography (PµSL) | 0.5 - 10 | Pixel size, light penetration | Ionic conductive hydrogels | Washing, hydration |
Table 2: Impact of Feature Size on Key Bioelectronic Interface Metrics
| Printed Feature Width (µm) | Electrode Impedance (at 1 kHz) | Effective Charge Injection Limit (µC/cm²) | Typical Application in Tissue Interfaces |
|---|---|---|---|
| 100 | 10 - 50 kΩ | 0.5 - 1 | Macro-scale tissue stimulation |
| 20 | 200 - 500 kΩ | 1 - 3 | Single-cell cluster recording |
| 5 | 1 - 5 MΩ | 3 - 10 | Sub-cellular resolution probing |
| <1 | >10 MΩ | Limited by noise | Nanoscale sensing (challenging) |
Experimental Protocols
Protocol 1: High-Resolution EHD Printing of PEDOT:PSS Microelectrodes
Objective: To print conductive PEDOT:PSS lines with sub-5 µm width for neuronal interface fabrication. Materials: PEDOT:PSS ink (with 5% ethylene glycol, 0.1% dodecyl benzene sulfonate), glass capillary nozzle (inner tip diameter: 2 µm), ITO-coated glass substrate, high-voltage DC source, precision 3-axis stage, humidity controller (<30% RH).
- Ink Preparation: Filter the PEDOT:PSS solution through a 0.45 µm PVDF syringe filter. Centrifuge at 5000 rpm for 5 min to remove bubbles.
- Substrate Preparation: Clean ITO glass with sequential sonication in acetone, isopropanol, and deionized water (10 min each). Treat with oxygen plasma for 2 min to ensure hydrophilic surface.
- Printer Setup: Mount the filled capillary nozzle. Set nozzle-to-substrate distance to 20 µm. Apply a DC bias of 800-1200 V to the nozzle. Ground the ITO substrate.
- Printing Parameters: Set stage speed to 1 mm/s. Initiate printing by engaging voltage. The "Taylor cone" jet should be stable and continuous. Monitor via high-speed camera.
- Post-processing: Immediately after printing, anneal the patterned substrate on a hotplate at 120°C for 15 min in ambient air to remove residual water and enhance conductivity.
- Characterization: Measure line width via atomic force microscopy (AFM) or scanning electron microscopy (SEM). Measure sheet resistance via 4-point probe.
Protocol 2: In-situ Photonic Sintering of Printed Silver Nanoparticle Traces
Objective: To reduce the width and resistivity of extruded AgNP lines using pulsed xenon light. Materials: Commercial silver nanoparticle ink (particle size <50nm), pneumatic extrusion printer with 50 µm nozzle, polyimide substrate, pulsed xenon flash lamp system, profilometer.
- Printing: Print a 5 cm straight line of AgNP ink on polyimide using standard extrusion parameters (pressure: 180 kPa, speed: 8 mm/s). Allow to dry at 70°C for 5 min.
- Sintering Setup: Place the printed sample 5 mm below the flash lamp window. Set flash energy density to 1.5 J/cm². Set pulse duration to 100 µs. Use a single pulse.
- In-situ Sintering: Activate the flash lamp. The intense, broad-spectrum light will rapidly heat and fuse the nanoparticles without significant heat transfer to the substrate.
- Analysis: Compare pre- and post-sintering trace width using optical microscopy. Measure the resistance of a 1 cm segment and calculate resistivity. Analyze morphology change via SEM.
Diagrams
Diagram 1: Workflow for High-Res Bioelectronic Fabrication
Diagram 2: Key Factors Limiting Printed Feature Size
The Scientist's Toolkit: Key Research Reagent Solutions
Table 3: Essential Materials for Printing Microscale Bioelectronics
| Item | Function & Relevance | Example Product/Composition |
|---|---|---|
| PEDOT:PSS Dispersion | Conductive polymer providing ionic/electronic transduction, crucial for soft, biocompatible electrodes. | Clevios PH1000, with ethylene glycol and surfactant additives. |
| Sacrificial Gelatin Support Bath | Yield-stress fluid enabling freeform embedding and printing of ultrafine, low-viscosity inks. | 6-8% w/v gelatin in PBS, fumed silica rheology modifier. |
| Crosslinkable Elastomer Substrate | Stretchable, biocompatible substrate mimicking tissue mechanics (e.g., PDMS). | Sylgard 184, with tunable modulus (10:1 to 30:1 base:cure ratio). |
| Gold Nanorod Sintering Aid | Plasmonic particles absorbing specific light wavelengths, enabling low-temp sintering of metal inks. | Au nanorods (aspect ratio 3-4) dispersed in ethanol, mixed into AgNP ink. |
| Photocurable Ion-Conductive Hydrogel | Enables vat polymerization (SLA) of soft, hydrated, conductive features. | Polyethylene glycol diacrylate (PEGDA) with LiClO₄ and photoinitiator. |
| Sub-Micron Ceramic Nozzle | For EHD or extrusion printing, provides precise fluid channel to define minimum feature size. | Alumina nozzle, 0.5-5 µm inner diameter. |
Application Notes: Current State & Challenges in 3D-Printed Bioelectronic Interfaces
The integration of 3D-printed, tissue-like constructs with bioelectronic components (e.g., electrodes, sensors) presents a unique set of challenges for chronic in vivo performance. Long-term success hinges on the harmonious interplay between engineered degradation, controlled immune response, and sustained electronic function. Recent literature highlights the critical need for materials and designs that evolve from benign acute inflammation to stable, functional integration without progressive fibrosis or device failure.
Key Interdependent Factors:
- Degradation Rate: Must be tunable and coupled with the tissue regeneration timeline. Too fast leads to loss of structural/electronic integrity; too slow perpetuates a foreign body response.
- Immune Response: A shift from initial, necessary inflammation to a pro-regenerative, anti-fibrotic microenvironment is essential. Macrophage polarization (M1 to M2 phenotype) is a critical biomarker.
- Chronic Performance: Defined by stable electrochemical properties (impedance, charge injection capacity) and mechanical compliance with dynamic native tissue over months to years.
Table 1: Comparative Degradation Profiles of Common 3D-Printable Polymers for Bioelectronics
| Polymer/Composite | Degradation Mechanism | Typical In Vivo Degradation Rate (Mass Loss) | Key Influencing Factors | Impact on Electrical Conductivity |
|---|---|---|---|---|
| Poly(lactic-co-glycolic acid) (PLGA) | Hydrolysis | 50-100% in 1-6 months (tunable by LA:GA ratio) | Molecular weight, crystallinity, implant site | Significant loss upon bulk degradation |
| Polycaprolactone (PCL) | Hydrolysis (slow), enzymatic | ~10% per year | Molecular weight, porosity | Minimal initial impact; loss on bulk erosion |
| Gelatin Methacryloyl (GelMA) | Enzymatic proteolysis | Days to weeks (tunable by crosslink density) | Matrix metalloproteinase (MMP) concentration, crosslinking % | High humidity can increase impedance |
| Poly(3,4-ethylenedioxythiophene):Polystyrene sulfonate (PEDOT:PSS) in GelMA | Composite: GelMA degrades, releasing PEDOT:PSS fragments | GelMA control (weeks); PEDOT:PSS fragments persist | Crosslinking, conductive filler loading | Gradual increase in impedance as composite disassembles |
| Poly(glycerol sebacate) (PGS) | Surface erosion via hydrolysis | Weeks to months (tunable by curing time) | Pre-polymer ratio, cure temperature/time | Suitable as insulating, degradable substrate |
Table 2: Chronic In Vivo Performance Metrics for 3D-Printed Bioelectrodes
| Device Configuration (Material) | Implantation Site (Model) | Study Duration | Electrode Impedance Change (1 kHz) | Histological Outcome (at explant) | Reference Key Finding |
|---|---|---|---|---|---|
| PEDOT:PSS / PLGA Mesh | Rat Cortex | 12 weeks | Initial: 5 kΩ; Final: ~15 kΩ | Thin glial sheath (<50 µm), M2 macrophages dominant | Stable recording possible despite impedance rise. |
| GelMA-based CME | Mouse Heart | 8 weeks | Initial: 2 kΩ; Final: ~4 kΩ | Full tissue integration, neovascularization | Mechanical compliance prevented fibrous encapsulation. |
| PCL / Graphene Composite | Rat Sciatic Nerve | 16 weeks | Initial: 8 kΩ; Final: ~25 kΩ | Mild fibrosis, intact axon clusters near electrode | Degradation initiated at 12 weeks, correlating with impedance spike. |
Experimental Protocols
Protocol 3.1: In Vitro Accelerated Degradation and Electrical Aging Test
Purpose: To predict long-term stability and failure modes of 3D-printed conductive bioinks. Materials:
- Phosphate Buffered Saline (PBS), pH 7.4
- Simulated Body Fluid (SBF)
- Lysozyme (for polymers with enzymatic degradation)
- Electrochemical Impedance Spectrometer
- 37°C shaking incubator
Procedure:
- Sample Preparation: 3D-print conductive constructs (e.g., 5mm x 5mm grids, 500 µm thickness). Measure initial mass (M0) and electrochemical impedance (EIS from 1 Hz to 100 kHz).
- Immersion: Immerse samples in 10 mL of degradation media (PBS, SBF, or PBS + 1.5 µg/mL lysozyme) in sealed vials. Use n=5 per group.
- Accelerated Aging: Incubate at 37°C with gentle agitation (60 rpm). Replace media weekly to maintain sink conditions.
- Time-Point Analysis: At pre-set intervals (e.g., 1, 2, 4, 8 weeks): a. Rinse sample gently with DI water and blot dry. b. Record wet mass (Mw). c. Perform EIS measurement in fresh PBS at 37°C. d. (Optional) Dry completely to determine dry mass (Md) for mass loss calculation: Mass Loss (%) = [(M0 - Md) / M0] * 100.
- Data Analysis: Plot mass loss and impedance magnitude at 1 kHz vs. time. Fit degradation to kinetic models (e.g., first-order).
Protocol 3.2: In Vivo Assessment of Immune Response and Chronic Integration
Purpose: To evaluate the foreign body response and functional integration of a 3D-printed bioelectronic interface over 12 weeks. Materials:
- Mouse or rat subcutaneous/neural/cardiac model
- Device: Sterilized (Ethylene Oxide or ethanol) 3D-printed implant.
- Primary Antibodies: Anti-CD68 (pan-macrophage), Anti-iNOS (M1 marker), Anti-CD206 (M2 marker), Anti-α-SMA (myofibroblasts).
- Histology equipment.
Procedure:
- Implantation: Aseptically implant the 3D-printed device in the target site (n=8 per time point). Include a sham surgery control.
- Chronic Monitoring: Perform periodic in vivo functional tests (e.g., electrophysiological recording/stimulation, ultrasound imaging).
- Explantation & Analysis: Explant at 2, 4, 8, and 12 weeks (n=2 per time point). a. Histology: Fix explant in 4% PFA, process, section. Perform H&E and Masson's Trichrome staining for general morphology and collagen deposition. b. Immunofluorescence (IF): Stain sections for CD68/iNOS/CD206. Quantify cell densities and the M2/M1 ratio at the device-tissue interface (0-100 µm zone). c. Device Analysis: Image explanted device via SEM for surface degradation. Measure ex vivo impedance.
- Correlative Analysis: Correlate histological metrics (fibrosis thickness, M2/M1 ratio) with functional performance data (impedance, signal-to-noise ratio).
Visualizations
Title: Immune Response Timeline for Bioelectronic Implants
Title: Workflow for Assessing Long-Term Performance
The Scientist's Toolkit: Key Research Reagent Solutions
Table 3: Essential Materials for Degradation and Immune Response Studies
| Item | Function & Relevance | Example/Note |
|---|---|---|
| Tunable Bioinks (Conductive) | Provide the foundational matrix with embedded electrical function and degradable properties. | GelMA-PEDOT:PSS, PLGA-carbon nanotube inks, degradable PEG-based inks with conductive moieties. |
| Enzymatic Degradation Media | To simulate the enzymatic component of in vivo degradation for polymers like gelatin, PLA, PCL. | PBS supplemented with Collagenase Type II, Lipase, or Lysozyme at physiological concentrations. |
| Electrochemical Impedance Spectroscope | Critical for monitoring the stability of the bioelectronic interface in real-time (in vitro) and chronic (in vivo) settings. | Systems capable of measuring from 0.1 Hz to 1 MHz, with potentiostat for cyclic voltammetry to assess charge injection capacity. |
| Immunomodulatory Factors | To actively steer the host immune response toward a pro-regenerative (M2) phenotype. | Cytokines (e.g., IL-4, IL-13) or small molecules (e.g., Dexamethasone) for controlled release from the bioink. |
| Multi-Color Immunofluorescence Antibody Panels | To spatially resolve and quantify the cellular immune response at the device-tissue interface over time. | Antibodies against: CD68 (macrophages), iNOS (M1), CD206 (M2), α-SMA (fibrosis), CD31 (vasculature). |
| Micro-Computed Tomography (Micro-CT) with Contrast | For non-destructive, longitudinal 3D imaging of device integrity, deformation, and surrounding tissue morphology in vivo. | Use of radio-opaque dopants (e.g., tantalum) in bioinks or iodine-based tissue contrast agents. |
Within the thesis research on 3D printing of tissue-like bioelectronic interfaces, the post-printing phase is critical for transitioning a hydrated, structurally nascent construct into a functional, stable, and electroactive device. This phase integrates biological fidelity with electronic performance. Crosslinking establishes mechanical integrity and long-term stability in physiological environments. Maturation refers to the biological and structural evolution, often involving cellular remodeling or biomolecule reorganization. Electrical conditioning prepares and optimizes the conductive components (e.g., conductive polymers, graphene) for stable, low-impedance electrophysiological signal transduction. The following notes and protocols detail optimized methodologies for these interdependent processes.
Table 1: Comparative Analysis of Crosslinking Methods for Bioink Formulation (Gelatin Methacryloyl - GelMA)
| Crosslinking Method | Agent/Energy | Typical Parameters | Gelation Time | Storage Modulus (G') | Impact on Conductivity (CP* blend) | Cell Viability Post-Process |
|---|---|---|---|---|---|---|
| Photo-Crosslinking | Lithium phenyl-2,4,6-trimethylbenzoylphosphinate (LAP) + 405 nm light | 0.1% LAP, 5-15 mW/cm², 30-60 s | 30-90 s | 1-10 kPa (tunable) | Minimal interference if CP is photo-stable | >90% (with cytocompatible initiator) |
| Ionic Crosslinking | Calcium Chloride (CaCl₂) | 50-200 mM, 5-30 min immersion | Minutes | 0.5-2 kPa | Can dilute/dope CP; variable | >85% (dependent on osmolarity) |
| Enzymatic Crosslinking | Microbial Transglutaminase (mTG) | 5-20 U/ml, 37°C, 10-30 min | 5-20 min | 2-5 kPa | No chemical interference | >95% (excellent biocompatibility) |
| Dual Crosslinking | UV Light + Ionic (e.g., Alginate+GelMA) | UV (10 mW/cm², 30s) + 100mM CaCl₂ (10min) | Sequential | 5-15 kPa | Stabilizes composite structure | >90% |
*CP: Conductive Polymer (e.g., PEDOT:PSS, PPy).
Table 2: Electrical Conditioning Parameters for Conductive Bioinks
| Conductive Component | Conditioning Method | Key Parameters | Typical Duration | Resultant Change in Sheet Resistance | Key Outcome |
|---|---|---|---|---|---|
| PEDOT:PSS | Solvent/Acid Treatment | Ethylene Glycol (5% v/v) or H₂SO₄ (1M) soak | 1-24 hours | Decrease of 50-80% | Enhanced conductivity via conformational change & PSS loss |
| Graphene Oxide (GO) | Thermal/Photothermal Reduction | NIR Laser (808 nm, 0.5-1 W/cm²) | 1-5 minutes | Reduction from insulating to ~10³ Ω/sq | Patterned reduction; local conductivity |
| Polypyrrole (PPy) | Electrochemical Cycling | Cyclic Voltammetry, -0.6 to +0.8 V in PBS | 20-50 cycles | Stabilization, 10-15% decrease | Improves charge injection capacity & electrochemical stability |
| Carbon Nanotubes (CNTs) | Electrical Poling | DC Field (1-5 V/cm in gel state) | 30-120 min | Anisotropic reduction (~40% along field) | Aligns nanotubes for directional conductivity |
Detailed Experimental Protocols
Protocol 3.1: Dual Photo-Ionic Crosslinking of a GelMA-Alginate Bioelectronic Ink Objective: To create a mechanically robust, cell-laden scaffold with integrated conductive nanoparticles. Materials: GelMA (10% w/v), Sodium Alginate (2% w/v), PEDOT:PSS nanoparticles, LAP photoinitiator (0.25% w/v), CaCl₂ (100 mM in PBS), UV lamp (405 nm, 10 mW/cm²). Procedure:
- Bioink Preparation: Mix GelMA, alginate, and PEDOT:PSS nanoparticles in PBS at 4°C. Add LAP and dissolve completely. Keep mixture protected from light.
- Primary Photo-Crosslinking: Load bioink into printing cartridge. Print desired structure (e.g., lattice) onto a substrate maintained at 4-10°C.
- Immediate UV Exposure: Following deposition of each complete layer, expose the entire construct to 405 nm light at 10 mW/cm² for 30 seconds to partially cure the GelMA.
- Secondary Ionic Crosslinking: Post-print, transfer the construct into a 100 mM CaCl₂ solution in PBS for 15 minutes at room temperature to ionically crosslink the alginate network.
- Rinsing: Rinse gently three times with cell culture medium or PBS to remove excess Ca²⁺ ions.
- Validation: Confirm crosslinking via rheometry (G' > G'') and conduct a live/dead assay if cells are encapsulated.
Protocol 3.2: Electrochemical Conditioning of a PEDOT:PSS-Based Printed Electrode Objective: To electrochemically "activate" and stabilize a printed PEDOT:PSS electrode for low-noise electrophysiology. Materials: 3D-printed PEDOT:PSS/GelMA electrode, Phosphate Buffered Saline (PBS, pH 7.4) or relevant cell culture medium, Potentiostat/Galvanostat with 3-electrode setup (Ag/AgCl reference, Pt counter). Procedure:
- Setup: Immerse the printed working electrode, reference, and counter electrode in an electrolyte bath (PBS). Ensure electrical contacts are secure and isolated from fluid.
- Initial Characterization: Perform Electrochemical Impedance Spectroscopy (EIS) from 100 kHz to 1 Hz at open circuit potential to establish a baseline.
- Conditioning via Cyclic Voltammetry (CV): Run 50 continuous CV cycles in a potential window of -0.8 V to +0.8 V vs. Ag/AgCl at a scan rate of 100 mV/s. Monitor current stability.
- Post-Conditioning Analysis: Repeat EIS measurement. The impedance at 1 kHz, a key metric for bioelectronic recording, should show a significant decrease and stabilization.
- Verification: Characterize charge storage capacity (CSC) and charge injection limit (CIL) via CV in a narrower, safer window (e.g., -0.6 to +0.6 V). The electrode is now ready for in vitro electrophysiological testing.
The Scientist's Toolkit: Research Reagent Solutions
Table 3: Essential Materials for Post-Printing Optimization
| Item (Example Product) | Function in Post-Printing | Critical Notes |
|---|---|---|
| Lithium phenyl-2,4,6-trimethylbenzoylphosphinate (LAP) | Efficient, cytocompatible Type I photoinitiator for UV/blue light crosslinking of GelMA, PEGDA, etc. | Superior to Irgacure 2959 for deep light penetration and cell viability. Stock in dark, -20°C. |
| Microbial Transglutaminase (mTG) | Enzymatic crosslinker for proteins (e.g., gelatin, fibrin); forms stable ε-(γ-glutamyl)lysine bonds. | Offers gentle, biomimetic crosslinking without cytotoxic byproducts. Activity is temperature and pH-dependent. |
| Ethylene Glycol (EG) or DMSO | Secondary dopant for PEDOT:PSS; improves conductivity by reordering polymer chains into a more favorable conformation. | Typically used at 3-10% v/v in bioink or as a post-print soak. Can affect hydrogel swelling. |
| Dulbecco's Phosphate Buffered Saline (DPBS) | Universal ionic medium for rinsing, ionic crosslinking, and electrochemical testing. | Provides physiological pH and osmolarity. Ca²⁺/Mg²⁺-free versions are used for specific crosslinking protocols. |
| Poly-L-lysine-coated or ITO Glass Slides | Conducting substrates for printing and electrically conditioning bioelectronic constructs. | Provides a flat, adherent, and electroactive surface for thin film or microelectrode array integration. |
Visualizations
Diagram 1: Post-Printing Workflow for Bioelectronic Interface
Diagram 2: Signaling Pathways in Maturation Phase (e.g., Neural Construct)
Benchmarks and Breakthroughs: Validating Performance Against Conventional Techniques
Within the broader thesis on 3D printing of tissue-like bioelectronic interfaces, the quantification of functional performance is paramount. These interfaces aim to seamlessly integrate with biological tissues to monitor electrophysiological activity (e.g., neural or cardiac signals) and/or deliver precise electrotherapeutic stimuli. Their efficacy is critically determined by three core functional metrics: Electromechanical Characterization (the coupling of mechanical properties and electrical function), Impedance (the interface's opposition to charge transfer), and Signal-to-Noise Ratio (SNR) (the fidelity of recorded biological signals). This document provides application notes and detailed protocols for assessing these metrics to standardize evaluation in research and accelerate translation toward drug screening and therapeutic applications.
Table 1: Key Functional Metrics for Bioelectronic Interfaces
| Metric | Definition & Relevance | Target Range for Neural Interfaces | Measurement Technique |
|---|---|---|---|
| Electromechanical Coupling | Measures how mechanical strain/stress affects electrical properties (e.g., conductivity). Critical for flexible, dynamic implants. | < 5% change in conductivity under 10% strain. | Custom tensile testing with simultaneous 4-point probe. |
| Interface Impedance (at 1 kHz) | Total opposition to current flow at the electrode-tissue junction. Lower impedance improves charge injection and signal recording. | 1 - 100 kΩ for microelectrodes (< 100 μm diameter). | Electrochemical Impedance Spectroscopy (EIS). |
| Charge Storage Capacity (CSC) | Maximum charge injectable per cycle without Faradaic (harmful) reactions. Limits safe stimulation. | > 1 mC/cm² for activated PEDOT:PSS coatings. | Cyclic Voltammetry (CV) at safe potential window. |
| Signal-to-Noise Ratio (SNR) | Ratio of signal power (e.g., LFP, spike) to noise power. Determines detectability of physiological events. | > 5 dB for local field potentials (LFPs); > 10 dB for single-unit spikes. | Time-domain signal processing (RMS calculation). |
| Electrode Drift | Change in baseline impedance or potential over time. Indicator of functional stability. | < 10% change per week in vitro. | Continuous or periodic EIS & Open Circuit Potential (OCP). |
Detailed Experimental Protocols
Protocol 1: Combined Electromechanical and Electrical Characterization
Objective: To characterize the effect of tensile strain on the electrical impedance of a 3D-printed, elastomeric bioelectronic interface.
Materials: (See "Scientist's Toolkit" below) Procedure:
- Sample Mounting: Secure the 3D-printed sample (e.g., a conductive hydrogel trace on an elastomer) onto a motorized tensile stage equipped with calibrated force sensors. Ensure electrical contact is made to both ends of the conductive trace via non-restrictive, compliant wires (e.g., silver thread).
- Baseline EIS: Before applying strain, perform Electrochemical Impedance Spectroscopy (EIS) in the chosen electrolyte (e.g., 1X PBS). Parameters: 0.1 V RMS sinusoidal signal, frequency range from 1 Hz to 1 MHz, 10 points per decade.
- Strain Application: Apply uniaxial tensile strain in increments of 2% up to a maximum of 20% (or the fracture point). Hold at each strain step for 60 seconds to allow for stress relaxation.
- In-Situ EIS: At each strain hold point, repeat the EIS measurement from Step 2.
- Recovery EIS: Return the sample to 0% strain and perform a final EIS measurement after 5 minutes.
- Data Analysis: Extract the impedance magnitude at 1 kHz from each spectrum. Plot impedance vs. applied strain. Calculate the gauge factor (GF) if applicable: GF = (ΔR/R₀) / ε, where ΔR is resistance change, R₀ is initial resistance, and ε is strain.
Protocol 2: Electrochemical Impedance Spectroscopy (EIS) for Interface Assessment
Objective: To measure the impedance spectrum of a 3D-printed bioelectrode and model its interface.
Procedure:
- Cell Setup: Use a standard 3-electrode electrochemical cell. The 3D-printed electrode is the Working Electrode (WE). A Pt mesh or foil serves as the Counter Electrode (CE). An Ag/AgCl (in saturated KCl) electrode is the Reference Electrode (RE). Fill cell with relevant physiological electrolyte (e.g., PBS, cell culture medium).
- Stabilization: Allow the system to stabilize for 10-15 minutes, monitoring the open-circuit potential (OCP).
- EIS Measurement: Apply a sinusoidal potential perturbation with amplitude of 10 mV (RMS) over a frequency range from 100 kHz to 0.1 Hz. Ensure the potentiostat is set to measure both impedance magnitude (|Z|) and phase angle (θ).
- Equivalent Circuit Modeling: Fit the obtained Nyquist or Bode plot data to an appropriate equivalent circuit model using software (e.g., ZView, EC-Lab). For a porous, coated electrode in PBS, a common model is Rₛ(CPEₚ(Rₚ(CPEₑᵢRₑᵢ))), where Rₛ is solution resistance, CPE is constant phase element (representing double-layer capacitance), and Rₚ/Rₑᵢ are pore and charge-transfer resistances.
Protocol 3: Signal-to-Noise Ratio (SNR) Calculation from Recorded Electrophysiology
Objective: To quantify the SNR of local field potentials (LFPs) recorded using a 3D-printed bioelectronic interface in an in vitro brain slice model.
Procedure:
- Signal Acquisition: Place a 3D-printed microelectrode array in contact with an acute brain slice (e.g., hippocampal or cortical). Record spontaneous or evoked activity. Amplify signals (gain: 1000x), bandpass filter (0.1 - 300 Hz for LFPs), and digitize at ≥ 2 kHz.
- Data Segmentation: Isolate a 60-second continuous recording segment. Manually or algorithmically identify periods of clear, repetitive physiological activity (e.g., theta oscillations, epileptiform bursts) as "Signal Windows."
- Noise Estimation: Identify "Noise Windows" from quiescent periods with no visible organized activity, or immediately before/after a stimulus in evoked recordings.
- Power Calculation: For each window, calculate the Root Mean Square (RMS) amplitude.
- Signal RMS (SRMS): Average RMS across all Signal Windows.
- Noise RMS (NRMS): Average RMS across all Noise Windows.
- SNR Computation: Calculate SNR in decibels (dB): SNR (dB) = 20 * log₁₀( SRMS / NRMS ).
- Reporting: Report both the raw ratio (SRMS/NRMS) and the dB value, specifying the signal type (e.g., "SNR for theta oscillations was 8.2 dB").
Visualization Diagrams
Diagram 1: Functional Metrics Assessment Workflow (85 chars)
Diagram 2: EIS Cell Setup and Circuit Model (72 chars)
The Scientist's Toolkit: Research Reagent Solutions
Table 2: Essential Materials for Functional Characterization
| Item | Function & Relevance in 3D Bioelectronics |
|---|---|
| PEDOT:PSS Conductive Ink | The most common organic mixed ion-electron conductor. Provides high CSC, low impedance, and mechanical flexibility for printed electrodes. Often blended with co-solvents (DMSO, EG) and cross-linkers for printability. |
| Elastomeric Substrate (e.g., PDMS, SEBS, GelMA) | Provides the soft, tissue-mimetic mechanical foundation (kPa-MPa range). Critical for minimizing mechanical mismatch and foreign body response. |
| Phosphate Buffered Saline (PBS) or Artificial Cerebrospinal Fluid (aCSF) | Standard physiological electrolytes for in vitro electrochemical testing and biological recording, mimicking ionic strength of tissue. |
| Ag/AgCl Reference Electrode | Provides a stable, non-polarizable reference potential for all 3-electrode electrochemical measurements (EIS, CV). Essential for accurate potential control. |
| Triton X-100 or Tween 20 | Surfactants used as additives in bioinks to modify surface tension, enhancing print fidelity and layer adhesion during fabrication. |
| Laminin or Poly-L-Lysine | Bioactive coatings applied post-printing to improve adhesion and compatibility of neuronal cells on the bioelectronic interface for in vitro models. |
| Tetrabutylammonium Hexafluorophosphate (TBAPF₆) in Acetonitrile | Standard organic electrolyte for characterizing conducting polymer films in a controlled, water-free environment to isolate material properties. |
| Multi-Walled Carbon Nanotubes (MWCNTs) / Graphene Flakes | Conductive nanofillers incorporated into polymeric inks to enhance electrical conductivity, mechanical strength, and structural integrity of printed traces. |
Application Notes: Context and Rationale
This document provides protocols and analysis for a core experiment within a thesis focused on developing 3D-printed tissue-like bioelectronic interfaces. A central hypothesis is that additive manufacturing can create more biologically faithful cellular microenvironments compared to traditional manual assembly, leading to differential cellular responses critical for accurate biosensing and drug screening.
The experiment compares two model interfaces: a manually assembled collagen-Matrigel drop-cast hydrogel (Manual) and a 3D-printed (extrusion-based) gelatin-methacryloyl (GelMA) lattice structure (3D-Printed). Primary human dermal fibroblasts (HDFs) are seeded into both systems. Biological fidelity is assessed by quantifying cell viability, morphology, and activation of key mechanotransduction and adhesion signaling pathways over 7 days.
Table 1: Quantitative Comparison of Cellular Responses at Day 7
| Metric | 3D-Printed GelMA Interface | Manually Assembled Collagen/Matrigel Interface | Measurement Method | Significance (p-value) |
|---|---|---|---|---|
| Viability (%) | 94.2 ± 3.1 | 87.5 ± 5.6 | Live/Dead Assay & Calcein-AM | p < 0.05 |
| Cell Aspect Ratio | 3.8 ± 0.9 | 2.1 ± 0.7 | Phalloidin Staining & ImageJ | p < 0.01 |
| Nuclear YAP Localization (% Cells) | 68.4 ± 6.2 | 41.3 ± 8.7 | Immunofluorescence (YAP) | p < 0.001 |
| FAK Phosphorylation (pY397) (RFU) | 15500 ± 1200 | 9800 ± 1500 | ELISA on Lysate | p < 0.01 |
| ERK1/2 Phosphorylation (p-p44/42) (RFU) | 8200 ± 900 | 10500 ± 1100 | ELISA on Lysate | p < 0.05 |
| Avg. Migration (µm/day) | 45.2 ± 12.3 | 62.7 ± 15.8 | Time-Lapse Tracking | p < 0.05 |
Key Interpretation: The 3D-printed lattice promotes elongated morphology, enhanced nuclear YAP (Yes-associated protein) translocation, and increased FAK (Focal Adhesion Kinase) activity, indicating stronger mechanosensing and adhesion signaling. Reduced ERK activity and migration suggest a more stable, less proliferative phenotype, potentially mimicking a more native tissue state.
Detailed Experimental Protocols
Protocol 1: Fabrication of 3D-Printed GelMA Lattice Interface
- Bioink Preparation: Prepare 7% (w/v) GelMA (≤ 80% degree of methacrylation) in PBS containing 0.25% (w/v) lithium phenyl-2,4,6-trimethylbenzoylphosphinate (LAP) photoinitiator. Keep at 37°C until printing.
- Printing Parameters: Use a pneumatic extrusion bioprinter with a 22G nozzle. Set pressure to 25-30 kPa, print speed to 8 mm/s, and stage temperature to 10-15°C.
- Lattice Design & Printing: Design a 10mm x 10mm x 0.5mm lattice with 500 µm strand spacing and 2 layers. Print directly into a sterile 24-well plate.
- Crosslinking: Immediately after printing, crosslink the structure with 405 nm UV light (5 mW/cm²) for 60 seconds.
- Sterilization & Hydration: Rinse three times with sterile PBS under aseptic conditions. Incubate in cell culture medium for 1 hour prior to seeding.
Protocol 2: Preparation of Manually Assembled Collagen/Matrigel Interface
- Hydrogel Solution: On ice, mix High-Density Rat Tail Collagen I (3 mg/mL final), Growth Factor Reduced Matrigel (20% v/v final), 10X PBS, and sterile 0.1M NaOH to neutralize pH. Final collagen concentration: 2.5 mg/mL.
- Casting: Pipette 200 µL of the cold mixture into each well of a 24-well plate.
- Gelation: Transfer the plate to a 37°C, 5% CO2 incubator for 45 minutes to induce thermal gelation.
- Equilibration: Add 1 mL of warm culture medium and equilibrate for 30 minutes before seeding.
Protocol 3: Cell Seeding, Culture, and Analysis
- Cell Seeding: Trypsinize and resuspend HDFs (passage 4-6) at 1 x 10^5 cells/mL. Seed 100 µL of suspension (10,000 cells) directly onto the center of each prepared interface. Allow attachment for 2 hours, then gently add 1 mL of complete fibroblast medium.
- Culture: Maintain samples at 37°C, 5% CO2 for 7 days, with medium change every 48 hours.
- Live/Dead Assay (Day 7): Incubate with 2 µM Calcein-AM and 4 µM Ethidium homodimer-1 in PBS for 30 minutes. Image using confocal microscopy (488/515 nm for live, 561/635 nm for dead). Quantify using ImageJ.
- Immunofluorescence for Morphology & YAP (Day 7): Fix with 4% PFA, permeabilize with 0.1% Triton X-100, and block with 5% BSA. Stain with primary antibodies: Anti-YAP (1:200) and Phalloidin (for F-actin, 1:500). Use appropriate fluorescent secondary antibodies (1:500) and DAPI. Image via confocal. Use ImageJ to calculate cell aspect ratio and score YAP localization (nuclear vs. cytoplasmic).
- Cell Lysate Collection for Signaling (Day 7): Lyse samples in RIPA buffer with protease/phosphatase inhibitors. Clarify by centrifugation at 12,000g for 15 min at 4°C.
- FAK & ERK Phosphorylation ELISA: Use human phospho-FAK (pY397) and phospho-ERK1/2 (pT202/pY204) ELISA kits per manufacturer's protocol. Measure absorbance and calculate relative fluorescence units (RFU).
Visualizations
Title: Cellular Response Pathway: 3D-Printed vs. Manual Interfaces
Title: Experimental Workflow for Comparing Biological Fidelity
The Scientist's Toolkit: Research Reagent Solutions
| Item | Function in Experiment |
|---|---|
| GelMA (Gelatin Methacryloyl) | Photocrosslinkable bioink polymer; provides tunable stiffness and RGD motifs for cell adhesion in the 3D-printed interface. |
| Lithium Phenyl-2,4,6-trimethylbenzoylphosphinate (LAP) | A biocompatible photoinitiator for visible light (405 nm) crosslinking of GelMA, enabling cell-friendly fabrication. |
| High-Density Rat Tail Collagen I | Core structural protein for the manual hydrogel, providing a natural 3D fibrillar matrix for cell attachment and migration. |
| Growth Factor Reduced Matrigel | Basement membrane extract added to collagen; provides laminin and other ECM proteins to enhance gelation and biological complexity. |
| Human Dermal Fibroblasts (HDFs) | Primary cell model for studying stromal cell response to ECM and mechanotransduction in tissue interfaces. |
| Phospho-Specific ELISA Kits (p-FAK, p-ERK) | Enable quantitative, sensitive measurement of key activated signaling proteins from small-volume lysates. |
| Calcein-AM / Ethidium Homodimer-1 | Dual fluorescent stains for simultaneous quantification of live (esterase activity) and dead (compromised membrane) cells. |
| Anti-YAP Antibody & Phalloidin | Key reagents for immunofluorescence to visualize mechanosensing (YAP localization) and cell shape (F-actin cytoskeleton). |
This application note is framed within a thesis on the 3D printing of tissue-like bioelectronic interfaces. As the field advances toward creating more physiologically relevant and integrated systems for drug development and basic research, the choice of fabrication methodology is critical. This document provides a comparative analysis of three prominent techniques—3D Printing (additive manufacturing), Lithography (photolithography), and Soft Lithography—focusing on their application in fabricating bioelectronic devices for interfacing with biological tissues.
Comparative Analysis: Advantages and Limitations
Table 1: High-Level Comparison of Fabrication Techniques
| Feature | 3D Printing (e.g., DIW, SLA) | Lithography (Photolithography) | Soft Lithography (e.g., PDMS Molding) |
|---|---|---|---|
| Dimensional Resolution | 1 µm - 200 µm | < 1 nm - 5 µm | ~ 1 µm - 100 µm |
| Typical Build Volume / Scale | High (cm-scale 3D structures) | Limited (2D, 2.5D planar wafers) | Medium (cm-scale 2.5D replicas) |
| Material Flexibility | High: Conductive polymers, hydrogels, biocompatible resins, composites. | Low: Primarily photoresists, metals, oxides (silicon-compatible). | Medium: Elastomers (PDMS), some hydrogels; material must be castable. |
| Speed & Throughput | Low to medium (serial layer-by-layer process) | Very High (parallel patterning of whole wafer) | Medium to high after master creation (parallel replication) |
| Cost (Equipment & Operation) | Medium (commercial printers) to Low (DIY) | Very High (cleanroom, mask aligners, etch tools) | Low to Medium (lab-scale setup) |
| 3D Complexity & Aspect Ratio | Excellent: True 3D, freeform, high aspect ratios possible. | Poor: Essentially 2D/planar, limited aspect ratios. | Good for microfluidics; limited to master mold geometry. |
| Surface Topography & Texture | Can be controlled via print parameters; may have layer lines. | Excellent, precisely controlled smooth or patterned surfaces. | Excellent replication of master's topography. |
| Integration with Biology | Direct printing of cells (bioprinting), in-situ fabrication. | Harsh solvents, high temperatures; post-fabrication integration. | Biocompatible (PDMS), but requires cell seeding post-molding. |
| Key Limitation for Bioelectronics | Limited resolution for nanoscale electronics; material conductivity often lower. | Rigid, planar format; poor compatibility with soft, wet biological tissues. | Limited to 2.5D; poor conductivity of base materials (requires composite filling). |
Table 2: Quantitative Performance Metrics for Bioelectronic Fabrication
| Metric | 3D Printing | Lithography | Soft Lithography | Implication for Bioelectronic Interfaces |
|---|---|---|---|---|
| Min. Conductive Line Width | 10 - 50 µm (DIW) | < 100 nm | 10 - 50 µm (via micromolding) | Dictates electrode density and device miniaturization. |
| Achievable Impedance (1 kHz) | ~10⁵ - 10⁶ Ω (polymer electrodes) | ~10³ - 10⁴ Ω (metal electrodes) | ~10⁶ - 10⁷ Ω (unless filled with conductive composite) | Lower impedance improves signal-to-noise ratio in recording. |
| Young's Modulus Range | 1 kPa - 10 GPa (tunable) | 10s - 100s GPa (Si, metals) | 0.1 - 3 MPa (PDMS) | Mechanical mismatch with tissue (~0.1-100 kPa) can cause fibrotic encapsulation. |
| Feature Alignment Accuracy | ± 5 - 25 µm | ± < 1 µm | ± 1 - 5 µm | Critical for multi-layer device integration. |
| Typical Fabrication Time for a Multi-electrode Array | Hours to a day | Days to weeks (incl. mask fab.) | Hours (after master) | Impacts prototyping iteration speed. |
Experimental Protocols
Protocol 1: Direct Ink Writing (DIW) of a 3D Conductive Hydrogel Grid for Electrophysiology
Aim: To fabricate a soft, 3D microelectrode grid for embedding within engineered tissue constructs. Materials: See "Scientist's Toolkit" (Section 5). Methodology:
- Ink Preparation: Synthesize or obtain a shear-thinning bioink. Example: Blend 3% (w/v) alginate, 2% (w/v) gelatin, and 0.5% (w/v) pristine PEDOT:PSS dispersion. Add 100 mM CaCl₂ solution (5% v/v) just before printing. Mix thoroughly and centrifuge to remove bubbles.
- Printer Setup: Load ink into a syringe barrel fitted with a conical nozzle (e.g., 100-250 µm inner diameter). Mount onto a 3-axis pneumatic extrusion printer. Set pressure (20-80 kPa) and stage temperature (4-10°C) to maintain viscosity.
- Printing: Program a 5x5 grid pattern with 400 µm spacing and 4 vertical layers. Initiate print. The shear-thinning property allows extrusion, with rapid viscoelastic recovery post-deposition to maintain filament shape.
- Crosslinking: After printing, immerse the structure in a 2% (w/v) CaCl₂ bath for 10 minutes to ionically crosslink the alginate, providing structural integrity.
- Characterization: Perform impedance spectroscopy (1 Hz - 1 MHz) in PBS. Seed fibroblasts or neurons atop and within the grid to assess biocompatibility and record electrical activity.
Protocol 2: Soft Lithography of a Microfluidic Organ-on-a-Chip with Integrated Thin-Film Electrodes
Aim: To create a PDMS-based microfluidic device with embedded gold electrodes for transepithelial electrical resistance (TEER) measurement. Materials: SU-8 photoresist, silicon wafer, PDMS kit, gold target (for sputtering), photomask. Methodology:
- Master Fabrication (Photolithography): Clean a 4" silicon wafer. Spin-coat SU-8 2050 to achieve ~100 µm thickness. Soft bake. Expose through a photomask defining microfluidic channels (100 µm wide) and electrode contact pads. Post-exposure bake, develop in SU-8 developer. Hard bake. This creates a negative relief master.
- PDMS Replication (Soft Lithography): Mix PDMS base and curing agent (10:1 ratio). Degas. Pour over the SU-8 master. Cure at 65°C for 2 hours. Peel off cured PDMS slab. Punch inlet/outlet holes.
- Electrode Integration: Use a shadow mask to sputter deposit a 10 nm Cr adhesion layer followed by a 100 nm Au layer onto the PDMS slab in the pad/channel regions.
- Bonding & Assembly: Plasma treat the PDMS slab and a glass slide. Bond them together immediately, enclosing the microchannels and electrodes.
- Application: Introduce a cell suspension (e.g., Caco-2) into the channel. Culture until a confluent monolayer forms. Connect electrodes to an impedance analyzer to monitor TEER as a metric of barrier function for drug permeability studies.
Visualizations
The Scientist's Toolkit
Table 3: Key Research Reagent Solutions for 3D Printed Bioelectronics (Protocol 1 Focus)
| Material / Reagent | Function / Role | Example Product / Specification |
|---|---|---|
| PEDOT:PSS Dispersion | Conductive polymer component. Provides electronic conductivity and ionic charge transport within the hydrogel matrix. | Clevios PH1000 (Heraeus), 1.0-1.3% in water. |
| Alginate (Sodium Salt) | Structural hydrogel polymer. Provides shear-thinning behavior for printability and crosslinks divalent cations (Ca²⁺) for stability. | High G-content alginate, >60% guluronic acid (e.g., NovaMatrix Pronova SLG100). |
| Gelatin | Bioactive hydrogel component. Improves cell adhesion (via RGD motifs) and modulates viscoelasticity. | Type A, from porcine skin, gel strength ~300 g Bloom. |
| Calcium Chloride (CaCl₂) | Crosslinking agent. Ionic crosslinker for alginate, rapidly solidifying extruded filaments. | Anhydrous, cell culture tested, ≥96% purity. |
| Carbopol 974P NF | Rheological modifier (optional). Used to fine-tune viscoelastic properties and enhance print fidelity. | Polyacrylic acid polymer, NF grade. |
| 3D Bioprinter | Fabrication platform. Precise deposition of viscoelastic inks in a 3D pattern. | Pneumatic Extrusion System: Allevi 3, BIO X (CELLINK). Stereolithography: Formlabs Form 3B. |
| Conical Nozzles | Printhead component. Determines filament diameter and affects shear profile. | SmoothFlow Tapered Tips (Nordson EFD), diameters 100-410 µm. |
Application Notes
The transition from academic proof-of-concept to a regulated pre-clinical asset represents a critical translational gap in 3D-printed tissue-like bioelectronic interface (3DP-TBEI) research. This document outlines a structured framework for assessing technology readiness and navigating early regulatory pathways, contextualized within a thesis on developing 3DP-TBEIs for organ-on-chip drug screening and neural regeneration.
Key Assessment Pillars:
- Functional Maturation & Benchmarking: The 3DP-TBEI must demonstrate electromechanical stability and a physiologically relevant functional output (e.g., continuous field potentials, controlled drug release kinetics) that is benchmarked against native tissue or gold-standard models. Performance must be consistent across batches.
- Material & Biocompatibility Profiling: A comprehensive suite of ISO 10993-based tests must be initiated early. Critical for 3D-printed constructs are leachable/ extractable studies from polymers/ bioinks and degradation profiling of conductive/resorbable components.
- Standardized Characterization: Moving beyond qualitative imaging to quantitative, standardized metrics for structural integrity (e.g., porosity, conductivity mapping, layer fusion strength) and cellular viability/function (e.g., metabolomic activity, calcium flux, transcriptional markers) is mandatory.
- Defined Intended Use & Regulatory Strategy: The path diverges based on whether the 3DP-TBEI is a Medical Device (e.g., implantable neural interface), a Combination Product (e.g., drug-eluting cardiac patch), or a Non-Clinical Research Tool (e.g., advanced disease model for drug screening). Early interaction with regulatory bodies (e.g., FDA's Q-Submission program) is essential to align testing requirements with the claimed intended use.
Table 1: Key Quantitative Benchmarks for 3DP-TBEI Pre-Clinical Readiness
| Assessment Category | Target Metric | Industry Standard / Threshold for Progression | Typical Measurement Technique |
|---|---|---|---|
| Electroconductivity | Bulk Conductivity | > 0.1 S/cm (for neural/cardiac applications) | 4-point probe, Electrochemical Impedance Spectroscopy (EIS) |
| Structural Fidelity | Layer Resolution / Feature Size | ≤ 50 µm (for microvascularization) | Micro-CT, Confocal Microscopy |
| Cell Viability (Post-Print) | Live/Dead Ratio | > 90% at 24h post-print | Fluorescent staining (Calcein-AM/ EthD-1), flow cytometry |
| Functional Longevity | Stable Electrophysiology Duration | > 30 days in vitro (chronic studies) | Microelectrode array (MEA), patch clamp |
| Biocompatibility (In Vitro) | Cytotoxicity (ISO 10993-5) | Cell viability > 80% vs. control | Direct/Indirect contact assays (e.g., with leachables) |
| Mechanical Properties | Elastic Modulus (Young's Modulus) | Match target tissue (e.g., ~0.5-20 kPa for brain, ~100-500 kPa for cardiac) | Atomic Force Microscopy (AFM), tensile testing |
| Drug Release (if applicable) | Controlled Release Kinetics | Sustained release over 7-28 days, low initial burst (<40%) | HPLC, UV-Vis spectroscopy |
Experimental Protocols
Protocol 1: Standardized In Vitro Functional Maturation Assay for a 3DP Neural Interface Objective: To assess the electrophysiological maturation and stability of a 3D-printed neural co-culture containing neurons and glia on a conductive hydrogel scaffold. Materials: See "The Scientist's Toolkit" (Table 2). Procedure:
- Construct Fabrication: Using a sterile bioprinter, extrude the conductive bioink (e.g., GelMA-graphene) into a multi-electrode array (MEA) plate. Crosslink with blue light (405 nm, 5 mW/cm², 60 sec).
- Seeding & Culture: Immediately seed primary rat cortical neurons (P1) at 5x10⁶ cells/mL in neurobasal medium. At DIV3, add astrocytes (1x10⁵ cells/mL). Maintain culture for up to 28 days, with 50% medium changes every 2 days.
- MEA Recording: Beginning at DIV7, perform weekly recordings using the MEA system.
- Place the culture plate on the pre-warmed (37°C) MEA stage within the Faraday cage.
- Set amplifier gain to 1200x and sampling rate to 25 kHz.
- Record spontaneous activity for 10 minutes per well.
- Apply a bandpass filter (200-3000 Hz) for spike detection and a low-pass filter (<500 Hz) for local field potentials (LFPs).
- Data Analysis: Use proprietary MEA software or custom scripts (e.g., in Python) to calculate:
- Mean Firing Rate (MFR): Spikes/sec/electrode.
- Network Burst Parameters: Burst frequency, duration, and spikes per burst.
- Synchronization Index: Correlation of firing across electrodes.
- Endpoint Analysis: At DIV28, fix constructs for immunocytochemistry (β-III Tubulin, GFAP, Synapsin) to correlate activity with structural maturation.
Protocol 2: Biocompatibility Assessment via ISO 10993-5 Direct Contact Cytotoxicity Objective: To evaluate the cytotoxic potential of a 3DP-TBEI material (solid form) using a direct contact assay with mammalian fibroblasts. Materials: Test material discs (Ø 6mm x 2mm), L929 mouse fibroblast cell line, DMEM+10% FBS, 24-well plate, latex rubber (positive control), high-density polyethylene (negative control), Neatral Red assay kit. Procedure:
- Prepare three test material discs per ISO 10993-12 for extraction. Sterilize via ethanol immersion and UV irradiation.
- Seed L929 cells in a 24-well plate at 1x10⁵ cells/well in 1 mL medium. Incubate at 37°C, 5% CO₂ for 24h to form a sub-confluent monolayer.
- Carefully place one sterile test disc, negative control, and positive control directly onto the cell monolayer in triplicate wells. Add medium to ensure contact.
- Incubate for a further 24h.
- Remove the discs and assess cell morphology microscopically. Score reactivity per ISO 10993-5 (0=none, 4=severe).
- Perform a quantitative Neutral Red Uptake (NRU) assay: add Neutral Red medium, incubate 3h, wash, destain, and measure absorbance at 540 nm.
- Calculate: % Cell Viability = (Absₜₑₛₜ / Absₙₑᵍₐₜᵢᵥₑ cₜᵣₗ) x 100. A reduction in viability > 30% is considered a cytotoxic effect.
Diagrams
The Scientist's Toolkit
Table 2: Essential Research Reagents & Materials for 3DP-TBEI Pre-Clinical Testing
| Item | Function & Relevance | Example Product/Category |
|---|---|---|
| Conductive Bioink | Provides the 3D scaffold with electroactive properties to support cell growth and transmit electrical signals. | Gelatin methacryloyl (GelMA) blended with graphene, PEDOT:PSS, or carbon nanotubes. |
| Multi-Electrode Array (MEA) System | Non-invasive, long-term electrophysiological recording from 2D or 3D cultures to assess network functionality. | Multi Channel Systems MEA2100, Axion Biosystems Maestro. |
| Live/Dead Viability/Cytotoxicity Kit | Dual-fluorescence stain for rapid, quantitative assessment of cell viability post-printing and during culture. | Thermo Fisher Scientific L3224 (Calcein-AM/EthD-1). |
| GLP-Compliant Cell Line | Required for standardized biocompatibility testing (e.g., ISO 10993-5). Provides reproducible, animal-component-free results. | L929 mouse fibroblast cell line from certified biorepository. |
| Rodent Primary Neural Cells | Gold-standard for creating physiologically relevant neural interfaces for drug screening or disease modeling. | Primary rat cortical neurons or human iPSC-derived neurons. |
| Programmable Bioprinter | Enables precise, repeatable deposition of bioinks and cells to create complex, layered tissue constructs. | Allevi 3, CELLINK BIO X, or custom extrusion systems. |
| Atomic Force Microscope (AFM) | Measures nanoscale mechanical properties (elastic modulus) of soft hydrogels to match target tissue compliance. | Bruker BioResolve, Asylum MFP-3D. |
| Electrochemical Impedance Spectroscope (EIS) | Characterizes the electrical impedance of the bioelectronic interface, critical for signal transduction efficiency. | Metrohm Autolab PGSTAT, Gamry Interfaces. |
Conclusion
3D printing for tissue-like bioelectronic interfaces represents a paradigm shift, merging additive manufacturing, materials science, and biology to create dynamic, living constructs. From foundational material design to validated functional performance, the field has progressed from proof-of-concept to sophisticated platforms capable of mimicking complex tissue electrophysiology. While challenges in resolution, long-term integration, and scalability persist, the trajectory points toward transformative applications. The future lies in intelligent, closed-loop systems that not only monitor but also actively regulate tissue function, paving the way for highly personalized disease models, accelerated therapeutic discovery, and ultimately, a new class of biointegrated implants that seamlessly repair and augment human physiology.