Bridging the Gap: Advanced Strategies to Overcome Mechanical Mismatch in Tissue-Electrode Interfaces
This comprehensive review addresses the critical challenge of mechanical mismatch at the tissue-electrode interface, a primary obstacle to stable long-term performance of neural, cardiac, and muscular implants.
Bridging the Gap: Advanced Strategies to Overcome Mechanical Mismatch in Tissue-Electrode Interfaces
Abstract
This comprehensive review addresses the critical challenge of mechanical mismatch at the tissue-electrode interface, a primary obstacle to stable long-term performance of neural, cardiac, and muscular implants. We explore the fundamental biomechanical principles of mismatch, its consequences on tissue damage and signal degradation, and systematically detail current and emerging solutions. For researchers, scientists, and drug development professionals, we provide a methodological analysis of material innovations (conductive hydrogels, porous scaffolds, flexible electronics) and engineering approaches. The article further offers troubleshooting frameworks for device failure and a comparative validation of commercial and research-grade solutions. Finally, we synthesize key directions for next-generation bioelectronics with enhanced biocompatibility and functional longevity.
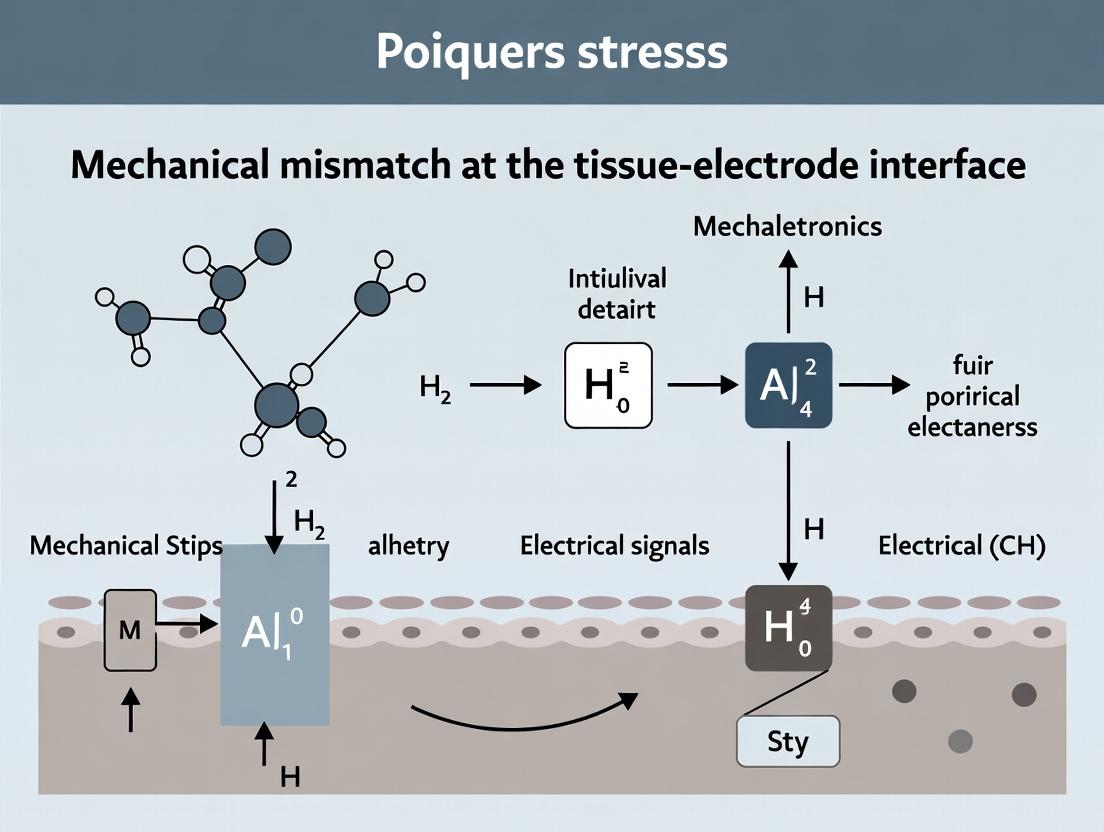
Understanding Mechanical Mismatch: The Core Challenge in Bioelectronic Integration
Troubleshooting & FAQ Center
Q1: In our in vitro cell culture model on PDMS substrates, we observe significant cell death or neurite retraction around the simulated electrode site. We suspect mechanical mismatch is the cause. How can we confirm this and what are the key parameters to measure? A: This is a classic symptom of a high-modulus mismatch. Your electrode-mimicking material is likely much stiffer than the surrounding substrate, creating a damaging stress concentration. To confirm and diagnose:
- Map the Mechanical Landscape: Use Atomic Force Microscopy (AFM) in force spectroscopy mode to create a spatial modulus map of your construct. Compare the Young's modulus (E) at the "electrode" site versus the "tissue" substrate.
- Key Quantitative Parameters:
- Young's Modulus (E, in Pa or kPa): The intrinsic material property describing tensile/compressive stiffness.
- Effective Stiffness (k, in N/m): The system-level resistance to deformation (depends on E and geometry).
- Dynamic Compliance (C*, in m/N): The reciprocal of complex modulus, measured via oscillatory rheology. It describes frequency-dependent deformation under cyclic load (critical for pulsatile tissue).
Q2: We are fabricating a conductive hydrogel coating for neural electrodes. How do we accurately measure its dynamic mechanical properties to ensure it mimics brain tissue? A: Static modulus measurements are insufficient. You must characterize the viscoelasticity using oscillatory shear rheology. Experimental Protocol: Frequency Sweep Test
- Sample Preparation: Cast or mold your hydrogel to fit the rheometer geometry (e.g., 8mm parallel plate).
- Conditioning: Apply a small, constant normal force to ensure contact, then equilibrate at 37°C in a hydrated chamber.
- Strain Amplitude Validation: First, run an amplitude sweep (e.g., 0.1% - 10% strain at 1 Hz) to identify the linear viscoelastic region (LVR).
- Frequency Sweep Execution: Within the LVR, run a frequency sweep from 0.1 Hz to 100 Hz. Measure:
- Storage Modulus (G'): Elastic (solid-like) response.
- Loss Modulus (G''): Viscous (liquid-like) response.
- Complex Modulus |G*| = √(G'² + G''²).
- Dynamic Compliance |J| = 1 / |G|.
- Analysis: Compare your hydrogel's |G*| and phase angle (δ = arctan(G''/G')) to published values for brain tissue across the frequency spectrum.
Q3: Our in vivo microelectrode array shows a decline in signal-to-noise ratio (SNR) and increased impedance after 4 weeks. Histology suggests glial scarring. Could dynamic mechanical mismatch during brain pulsation be a factor? A: Absolutely. Static implantation ignores the continuous, small-amplitude strains from cardiovascular and respiratory cycles. A material with mismatched dynamic compliance causes chronic interfacial strain, driving inflammation and encapsulation. Mitigation Strategy & Workflow: Develop coatings with matched viscoelasticity and measure their performance in a dynamic bioreactor.
Diagram: Workflow for Developing Dynamically Matched Neural Interfaces
Q4: What are the essential reagents and materials for creating substrates with a controlled modulus gradient to study mechanotaxis? A: Research Reagent Solutions Toolkit:
| Item | Function & Rationale |
|---|---|
| Sylgard 184 (PDMS) Kit | Base polymer and cross-linker. Varying the base:curing agent ratio (e.g., 30:1 to 5:1) creates a stiffness range from ~30 kPa to ~2 MPa. |
| Acrylamide-Bisacrylamide Stock Solutions | For polyacrylamide hydrogels. The % total acrylamide and the bisacrylamide cross-linker ratio jointly control modulus (0.1 - 50 kPa). |
| Methacrylated Gelatin (GelMA) | UV-crosslinkable bioink. Modulus tuned by concentration and UV exposure. Provides inherent cell adhesion motifs. |
| Sulfo-SANPAH (N-Sulfosuccinimidyl 6-(4'-azido-2'-nitrophenylamino)hexanoate) | Photoactivatable heterobifunctional crosslinker. Used to covalently attach proteins (e.g., collagen, fibronectin) to inert hydrogels like polyacrylamide. |
| Atomic Force Microscope (AFM) with Soft Cantilevers | Critical for validation. Use spherical tip cantilevers (e.g., 5-10µm diameter) to measure local Young's modulus via force-indentation. |
| Microfluidic Gradient Generator | Device to create smooth spatial gradients of cross-linker or polymer concentration during substrate fabrication. |
Diagram: Signaling Pathway from Mismatch to Fibrosis
Technical Support Center
Troubleshooting Guide: Chronic Inflammation & Fibrosis at the Neural Interface
Issue: Unacceptable increase in electrochemical impedance at 1 kHz post-implantation (Weeks 2-4).
- Q1: Our chronic in vivo recordings show a progressive decline in signal-to-noise ratio (SNR) and an increase in electrode impedance starting around week 2. What is the likely cause and how can we confirm it?
- A1: This pattern is characteristic of the foreign body response (FBR), progressing from acute inflammation to chronic inflammation and fibrosis. The decline is likely due to the formation of a dense, insulating fibrous capsule (composed primarily of collagen deposited by myofibroblasts) and persistent inflammatory cells (e.g., reactive macrophages) degrading the local microenvironment.
- Confirmation Protocol: Perform endpoint histology.
- Perfusion & Extraction: At terminal time point, transcardially perfuse with 4% paraformaldehyde (PFA). Extract the brain/implant site.
- Sectioning: Cryosection tissue to 20-30 µm thickness.
- Staining: Use immunofluorescence (IF) or combined IF/Histochemistry.
- Fibrosis: Stain for Collagen I/IV (e.g., antibody anti-Col1a1, Sirius Red).
- Chronic Inflammation: Stain for pan-macrophages (Iba1), pro-inflammatory M1 phenotype (CD86, iNOS), and anti-inflammatory M2 phenotype (CD206, Arg1). Also stain for GFAP (astrocytes) and NeuN (neuronal health).
- Analysis: Quantify capsule thickness (µm) and cell density within a 150 µm radius using image analysis software (e.g., ImageJ, QuPath).
Issue: Failure of drug-eluting coating to mitigate fibrosis.
- Q2: We coated our electrode with an anti-inflammatory drug (e.g., Dexamethasone), but capsule thickness at 8 weeks was not significantly reduced compared to controls. Why might this be?
- A2: This suggests either inappropriate drug pharmacokinetics or targeting of the wrong pathway. Chronic fibrosis is driven by a cascade beyond initial inflammation.
- Troubleshooting Steps:
- Assess Drug Release Profile: Use in vitro elution testing (UV-Vis/HPLC) to confirm the release duration matches the in vivo study length. A burst release may only affect the acute phase.
- Check Target Pathway: The drug may suppress early inflammation but not the subsequent TGF-β1 driven fibroblast-to-myofibroblast transition. Consider combinational therapy targeting TGF-β signaling or mechanical mismatch itself.
- Experimental Control: Include a group with a systemic (oral/injected) drug administration to rule out coating efficacy issues.
Issue: Inconsistent in vitro to in vivo correlation for glial scarring.
- Q3: Our soft hydrogel electrodes show excellent glial cell biocompatibility in 2D culture, but in vivo they still trigger significant astrogliosis. What are we missing?
- A3: 2D cultures lack the integrated immune response and mechanical stress of the in vivo environment. The persistent mechanical mismatch at the interface, despite material softness, can activate mechanotransduction pathways (e.g., via YAP/TAZ) in astrocytes and pericytes.
- Advanced Protocol: Establish a more predictive 3D co-culture model.
- Setup: Use a transwell system or 3D collagen/Matrigel matrix.
- Cell Types: Co-culture primary astrocytes, microglia, and fibroblasts.
- Stimulation: Apply cyclic mechanical strain (using a flexer system) to simulate brain micromotion or implant rigidity.
- Readouts: Analyze changes in cytokine secretion (IL-1β, TNF-α, TGF-β1 via ELISA) and expression of fibrosis markers (α-SMA, Fibronectin) via qPCR.
Frequently Asked Questions (FAQs)
Q: What is the most critical time window for intervening in the fibrotic process?
- A: The transition from week 1 to week 3 post-implantation is critical. This is when the response shifts from acute inflammation (neutrophils, M1 macrophages) to chronic inflammation and fibrosis (M2 macrophages, fibroblast activation). Interventions before day 7 are most likely to alter long-term outcomes.
Q: Which signaling pathways are most relevant for targeted drug development?
- A: Three key pathways are:
- TGF-β/Smad Pathway: The master regulator of fibroblast activation and collagen production.
- NF-κB Pathway: Central to the initiation and maintenance of chronic inflammation.
- YAP/TAZ Mechanotransduction Pathway: Activated by mechanical stiffness, promoting pro-fibrotic gene expression.
- A: Three key pathways are:
Q: How do we accurately measure the 'mechanical mismatch' at the interface?
- A: You need to characterize both the implant and the tissue.
- Implant: Use nanoindentation or AFM to measure the effective Young's modulus at the surface.
- Tissue: Use in vivo or ex vivo indentation (e.g., with a micro-sensor probe) to measure the modulus of brain tissue at the implantation site (typically ~0.1-3 kPa).
- The mismatch ratio is calculated as: Eimplant / Etissue. A ratio >> 1 indicates high mismatch.
- A: You need to characterize both the implant and the tissue.
Q: What are the key quantitative metrics to track fibrosis and signal degradation?
- A: Correlate these histological metrics with electrophysiological recordings:
| Metric Category | Specific Measurement | Typical Method/Tool | Target Value for Optimal Interface |
|---|---|---|---|
| Structural (Histology) | Fibrous Capsule Thickness | Immunofluorescence / Trichrome | < 50 µm |
| Neuronal Density within 150 µm | NeuN+ cell count | > 70% of distant baseline | |
| Cellular (Histology) | M1/M2 Macrophage Ratio | Iba1+CD86+ / Iba1+CD206+ | Ratio trending toward ~1 over time |
| Astrocyte Activation Index | GFAP+ area intensity | < 2-fold increase from baseline | |
| Functional (Electrical) | Electrode Impedance at 1 kHz | Electrochemical Impedance Spectroscopy | Stable, < 2x initial implant value |
| Single-Unit Yield | Spike sorting & thresholding | > 50% of channels recording units | |
| Signal-to-Noise Ratio (SNR) | RMS calculation | > 5 (for clear unit discrimination) |
The Scientist's Toolkit: Research Reagent Solutions
| Item | Function & Relevance to Interface Research |
|---|---|
| Polyethylene Glycol (PEG) Hydrogels | Tunable, soft substrate material used to reduce mechanical mismatch (E ~ 1-50 kPa). Can be functionalized with peptides and used for drug elution. |
| TGF-β1 Neutralizing Antibody | Used to inhibit the core pro-fibrotic signaling pathway in vivo (local delivery) or in vitro to validate mechanism. |
| Dexamethasone (water-soluble) | A common glucocorticoid for controlling initial inflammatory response. Used as a positive control in anti-inflammatory coating studies. |
| CellTracker Dyes (CM-DiI, etc.) | For in vivo cell migration studies. Can label injected fibroblasts or immune cells to track their recruitment to the implant site. |
| SiRNA against CTGF or α-SMA | For in vitro knockdown studies in fibroblast/astrocyte cultures to investigate specific pro-fibrotic gene function. |
| Matrigel / 3D Collagen Matrices | For establishing more physiologically relevant 3D cell culture models of the peri-implant glial scar. |
| Pimonidazole HCl | Hypoxia marker. Administered in vivo before endpoint to identify regions of poor vascularization within the fibrous capsule. |
| Conductive Polymer Coatings (PEDOT:PSS) | Used to improve charge injection capacity and lower impedance, partially counteracting the insulating effects of fibrosis. |
Experimental Protocol: Assessing Fibrosis and Neuronal Loss
Title: In Vivo Evaluation of Chronic Tissue Response to Implanted Electrodes
Objective: To quantitatively assess the degree of chronic inflammation, fibrosis, and neuronal loss around an implanted neural device at a defined time point (e.g., 8 weeks).
Materials: Stereotaxic setup, neural implant, adult rodent model, perfusion pump, 4% PFA, sucrose solutions, OCT compound, cryostat, slides, primary antibodies (Iba1, GFAP, Collagen IV, NeuN, CD86/CD206), fluorescent secondary antibodies, DAPI, mounting medium, confocal/fluorescent microscope.
Methodology:
- Implantation: Aseptically implant device into target brain region using standard stereotaxic surgery.
- Chronic Recording: Monitor impedance and neural signal quality weekly.
- Terminal Perfusion & Tissue Harvest (Week 8):
- Deeply anesthetize animal.
- Transcardially perfuse with 0.1M PBS followed by ice-cold 4% PFA.
- Carefully extract the brain, leaving the implant in situ.
- Post-fix in 4% PFA for 24h at 4°C.
- Sectioning:
- Cryoprotect in 30% sucrose until sunk.
- Embed tissue in OCT, freeze.
- Using a cryostat, carefully section coronally (30 µm thickness) through the implant tract. Use a tungsten needle to gently remove the implant during sectioning if necessary.
- Immunohistochemistry:
- Perform free-floating staining.
- Block in 10% normal serum + 0.3% Triton X-100 for 2h.
- Incubate in primary antibody cocktail (e.g., Collagen IV + NeuN + Iba1) for 48h at 4°C.
- Wash and incubate with appropriate secondary antibodies for 2h at RT.
- Counterstain with DAPI, mount slides.
- Imaging & Analysis:
- Acquire z-stack images using a confocal microscope at set distances (0-50µm, 50-150µm, >150µm) from the implant interface.
- Use image analysis software to:
- Measure the Collagen IV+ capsule thickness.
- Count NeuN+ nuclei to calculate neuronal density/depletion.
- Quantify Iba1+ area and M1/M2 macrophage ratio.
Signaling Pathway & Experimental Workflow Diagrams
Diagram Title: Core Signaling Pathways Leading to Fibrosis & Signal Loss
Diagram Title: Experimental Workflow for Evaluating Tissue-Device Interface
Technical Support Center
Troubleshooting Guides & FAQs
Neural Probes
Q1: My chronic neural probe recordings show a significant decline in signal-to-noise ratio (SNR) and unit yield after 2-4 weeks. What are the primary causes and mitigation strategies?
A: This is typically due to the foreign body response (FBR), leading to glial scar formation and neuronal death. Key strategies include:
- Probe Material & Size: Use smaller, flexible probes (e.g., based on polyimide or SU-8) with cross-sections < 100 µm² to reduce mechanical strain. Coating with conductive polymers like PEDOT:PSS can improve charge injection capacity.
- Surface Modification: Apply anti-inflammatory drug coatings (e.g., dexamethasone) or bioactive coatings (e.g., laminin) to modulate the immune response.
- Implantation Protocol: Optimize insertion speed (typically 0.5-1 mm/s) and use temporary, dissolvable coatings (e.g., polyethylene glycol) to minimize acute trauma.
Q2: How do I address electrochemical impedance instability during long-term electrophysiology?
A: Impedance drift often stems from protein fouling, delamination, or electrode dissolution.
- Pre-implantation: Perform rigorous electrochemical impedance spectroscopy (EIS) and cyclic voltammetry (CV) in PBS to establish a baseline. Acceptable impedance for cortical recording is often in the 0.1-1 MΩ range at 1 kHz.
- Troubleshooting: A sustained increase suggests encapsulation. A sharp drop may indicate insulation failure. Regular, gentle cleaning in enzymatic solutions (e.g., protease in PBS) post-explant can help diagnose fouling. Consider using more stable materials like sputtered iridium oxide films (SIROFs).
Cardiac Patches
Q3: My engineered cardiac patch exhibits poor electromechanical integration with the host myocardium post-implantation. What factors should I investigate?
A: Focus on the mechanical and electrical mismatch at the interface.
- Conductivity & Anisotropy: Ensure the patch scaffold (e.g., gelatin methacryloyl, chitosan) incorporates conductive materials (e.g., gold nanofibers, carbon nanotubes) at > 50 S/m and mimics the anisotropic structure of native myocardium.
- Mechanical Compliance: Match the patch's Young's modulus to native cardiac tissue (~10-20 kPa for diastolic phase). Use dynamic mechanical analysis to verify.
- Integration Protocol: Apply sustained mechanical pacing (e.g., 1 Hz, 2V/cm) for 24-48 hours post-attachment in vitro to promote connexin 43 gap junction formation before in vivo implantation.
Q4: The patch causes arrhythmias upon implantation. How can this be minimized?
A: Arrhythmias often arise from a conduction block at the mismatched interface.
- Interface Engineering: Create a border zone using a gradient hydrogel that gradually transitions from patch stiffness to native tissue stiffness over 100-200 µm.
- Cell Source: Use a high purity (>90%) cardiomyocyte population derived from iPSCs to prevent ectopic firing from non-myocytes.
- Pre-conditioning: Subject the patch to a period of simulated ischemia-reperfusion in a bioreactor prior to implantation to improve its resilience.
Myoelectric Electrodes
Q5: Surface EMG electrodes show crosstalk and motion artifact in dynamic movement studies, corrupting the signal. What solutions are available?
A: This is a classic mechanical decoupling issue.
- Electrode Design: Use dry, multi-electrode arrays with spacing < 2 mm to allow for spatial filtering. Textured electrode surfaces (microneedles) can improve skin contact and reduce impedance shift with movement.
- Interface Material: Employ skin-interfacing materials like soft, silicone-based conductive composites that stretch > 50% without significant conductivity loss.
- Signal Processing: Implement a real-time, adaptive noise cancellation algorithm referenced to an accelerometer placed adjacent to the electrode.
Q6: For implanted myoelectric sensors, how do I prevent fibrotic encapsulation from attenuating the signal amplitude?
A: Similar to neural probes, the FBR is the culprit.
- Material Strategy: Use textured or porous surfaces at the micro-scale (features 5-20 µm) on your electrode casing, which has been shown to disrupt fibrous capsule continuity.
- Drug Elution: Incorporate a localized, sustained release of TGF-β inhibitors (e.g., SB-431542) from a coating on the device body (not the electrode site) to mitigate fibrosis.
- Mechanical Mismatch: Ensure the device's bulk modulus matches the muscle tissue. Consider using a core-shell design with a rigid electronics core encapsulated in a soft silicone (E ~ 20-50 kPa).
Summarized Quantitative Data
Table 1: Key Interface Material Properties & Performance Metrics
| Interface Type | Target Young's Modulus | Typical Impedance (1 kHz) | Optimal Feature Size | Chronic Stability Benchmark |
|---|---|---|---|---|
| Cortical Neural Probe | 0.1 - 5 GPa (Flexible: < 1 GPa) | 0.1 - 1 MΩ | Shank width: < 50 µm | > 70% single-unit yield at 8 weeks |
| Cardiac Patch | 10 - 20 kPa | N/A (Bulk Conductivity > 50 S/m) | Fiber diameter: 1-5 µm | Synchronized contraction > 4 weeks |
| Myoelectric Electrode | 20 - 100 kPa (Skin/Muscle-like) | < 10 kΩ (Surface), < 100 kΩ (Implanted) | Contact diameter: 2-10 mm | SNR > 20 dB under 30% strain |
Table 2: Common Failure Modes and Diagnostic Tests
| Symptom | Likely Cause (Neural) | Likely Cause (Cardiac) | Likely Cause (Myoelectric) | Diagnostic Experiment |
|---|---|---|---|---|
| Signal Amplitude Drop | Glial scar, electrode erosion | Fibrotic layer, loss of gap junctions | Fibrotic encapsulation, contact delamination | EIS, explant histology (H&E, IHC for GFAP/α-SMA) |
| Increased Baseline Noise | Insulation failure, fluid leakage | Ischemic cell death, inflammation | Motion artifact, poor skin adhesion | Visual inspection under microscope, accelerometer correlation |
| Loss of Functional Units | Neuronal death, probe migration | Cardiomyocyte apoptosis, arrythmia | Muscle atrophy, nerve damage | Stimulus-response test, ultrasound imaging, EMG-force correlation |
Detailed Experimental Protocols
Protocol 1: Assessing Foreign Body Response to an Implanted Neural Probe
- Objective: Quantify glial scarring and neuronal density around the implant over time.
- Materials: Flexible polymer probe, stereotaxic frame, mouse/rat model, perfusion setup, antibodies (Iba1, GFAP, NeuN).
- Method:
- Implant probe in target region (e.g., motor cortex).
- At time points (e.g., 1, 4, 12 weeks), transcardially perfuse with 4% PFA.
- Extract and section brain (40 µm cryosections).
- Perform immunohistochemistry for Iba1 (microglia), GFAP (astrocytes), NeuN (neurons).
- Image with confocal microscopy and quantify cell density/distance profiles from the probe track using software (e.g., ImageJ).
- Key Metrics: Neuronal density within 100 µm, glial scar thickness.
Protocol 2: Evaluating Electromechanical Integration of a Cardiac Patch
- Objective: Measure conduction velocity and mechanical force transfer at the patch-host interface.
- Materials: Engineered cardiac patch, Langendorff perfusion system or in vivo infarction model, optical mapping setup, pressure-volume catheter.
- Method:
- Surgically attach patch to epicardium of infarcted rodent heart.
- Optical Mapping: Load tissue with voltage-sensitive dye (e.g., Di-4-ANEPPS). Pace the heart. Measure conduction velocity across the patch-host border using high-speed camera.
- Functional Integration: Use a miniature pressure-volume catheter inserted into the left ventricle to measure hemodynamic parameters (e.g., ejection fraction, stroke work) before and after patch implantation.
- Histologically assess interface for connexin 43 expression and collagen deposition.
- Key Metrics: Border conduction velocity delay (< 20 ms preferred), improvement in ejection fraction.
Visualizations
Title: Foreign Body Response to Chronic Implant
Title: Cardiac Patch Integration Workflow
The Scientist's Toolkit: Research Reagent Solutions
Table 3: Essential Materials for Tissue-Electrode Interface Research
| Item | Function | Example Product/Note |
|---|---|---|
| PEDOT:PSS Dispersion | Conductive polymer coating for electrodes. Dramatically lowers impedance and improves charge injection capacity. | Clevios PH 1000. Often mixed with cross-linkers (GOPS) for stability. |
| Dexamethasone-Eluting Coating | Anti-inflammatory drug release to suppress acute foreign body response at implant interface. | Poly(lactic-co-glycolic acid) (PLGA) microspheres loaded with dexamethasone. |
| Gelatin Methacryloyl (GelMA) | Photocrosslinkable hydrogel for creating soft, cell-adhesive cardiac patches or neural encapsulants. | Sigma-Aldrich or sourced from custom synthesis; tune stiffness via concentration. |
| Iridium Oxide Coating Sputter Target | For depositing highly stable, high charge-capacity electrode surfaces for chronic stimulation. | Kurt J. Lesker Company; used in sputter coating systems. |
| Voltage-Sensitive Dyes (e.g., Di-4-ANEPPS) | For optical mapping of electrical conduction velocity in cardiac or neural tissues. | Thermo Fisher Scientific; requires specific excitation/emission filters. |
| Conductive Silicone Composite | For creating stretchable, skin-conformal myoelectric electrodes. | Mixes of silicone elastomer (Ecoflex) with carbon black or silver flakes. |
| Anti-GFAP / Iba1 / NeuN Antibodies | Key immunohistochemistry markers for quantifying glial scarring and neuronal survival. | Available from Abcam, MilliporeSigma; species-specific secondary antibodies required. |
| TGF-β Inhibitor (SB-431542) | Small molecule to inhibit fibrosis around implanted devices. | Tocris Bioscience; can be incorporated into polymer coatings. |
Technical Support Center: Troubleshooting & FAQs for Tissue-Electrode Interface Experiments
Q1: During in-vitro mechanical testing of brain tissue, our measurements of Young's modulus show high variability between samples. What could be causing this, and how can we improve consistency?
A: High variability in brain tissue mechanical properties is common due to its extreme softness and heterogeneity. Key troubleshooting steps:
- Sample Preparation: Ensure precise, consistent dissection protocols. Use a vibratome for slicing to minimize pre-strain and damage. Maintain hydration with artificial cerebrospinal fluid (aCSF) throughout.
- Testing Environment: Perform all testing in a temperature-controlled bath (37°C) with appropriate physiological solution. Exposure to air dramatically alters properties.
- Testing Protocol: Use a pre-conditioning cycle (5-10 cycles of 1-5% strain) before data acquisition to achieve a repeatable mechanical state. Ensure contact detection is ultra-sensitive; consider using micro-indentation with spherical tips (≥500µm diameter) to reduce local variation.
- Post-Mortem Time: Standardize the time between tissue extraction and testing. Properties change significantly with time post-mortem.
Q2: We are testing cardiac patch electrodes. Our impedance readings increase dramatically after cyclic stretching that simulates heartbeats. What is the likely failure mode?
A: This indicates a loss of conductive pathways, likely due to:
- Crack Formation in Conductive Layer: The metallic or PEDOT:PSS layer may not have the necessary stretchability (<30% cyclic strain). The mismatch between the stiff electrode and soft myocardium causes delamination or micro-cracking.
- Solution: Incorporate stretchable conductive composites (e.g., silver nanowires in silicone, graphene-polymer hybrids) or use intrinsically conductive polymers with elastic additives. Design mesh or serpentine structures to accommodate strain.
Q3: When implanting electrodes into skeletal muscle, we observe significant fibrotic encapsulation and a rise in electrochemical impedance over 4 weeks. How can we mitigate this?
A: Fibrosis is a response to mechanical mismatch and chronic injury. Mitigation strategies include:
- Reduce Mechanical Mismatch: Fabricate electrodes with a lower effective modulus to better match muscle (~10-100 kPa). Use soft substrates like PDMS or hydrogels.
- Surface Modification: Coat electrodes with anti-inflammatory drugs (e.g., dexamethasone) or bio-active coatings (e.g., laminin, collagen) to promote integration.
- Size and Geometry: Minimize the cross-sectional area and use needle-like geometries to reduce tissue displacement during insertion and movement.
Q4: What are the critical parameters to measure when characterizing the viscoelastic stress-relaxation behavior of these tissues for interface design?
A: Capture these parameters in a stress-relaxation test (apply a step strain, hold, and record stress decay):
- Instantaneous Modulus (E₀): The initial, purely elastic response.
- Equilibrium Modulus (E_∞): The modulus after stress has fully relaxed.
- Relaxation Time Constant (τ): Characterizes the rate of relaxation, often fit with a Prony series (multiple time constants).
- Percent Stress Relaxation:
(σ₀ - σ_∞)/σ₀ * 100%. This indicates the fluid-dominated vs. solid-dominated behavior.
Key Quantitative Data: Biomechanical Properties
Table 1: Typical Biomechanical Properties of Target Tissues
| Tissue | Young's Modulus (E) | Ultimate Tensile Strength | Failure Strain | Key Viscoelastic Feature | Testing Common Method |
|---|---|---|---|---|---|
| Brain (Grey Matter) | 0.5 - 2 kPa | ~0.1 - 0.3 kPa | 15 - 50% | Pronounced stress relaxation (~60-80%) | Indentation, Shear Rheometry |
| Heart (Myocardium) | 10 - 100 kPa (varies with direction) | 20 - 100 kPa | 15 - 25% | Active contraction, anisotropic | Biaxial Tensile Testing |
| Skeletal Muscle | 10 - 300 kPa (along fiber) | 0.1 - 0.5 MPa | 10 - 20% (passive) | Highly anisotropic, non-linear | Uniaxial/Biaxial Testing |
Table 2: Desired Mechanical Properties for Matched Interface Materials
| Target Tissue | Ideal Interface Modulus | Key Design Challenge | Common Biomaterial Candidates |
|---|---|---|---|
| Brain | 0.5 - 5 kPa | Ultra-soft, biocompatible, conformal | Silicone gels, Alginate/PEG hydrogels, Porous PDMS |
| Heart | 10 - 50 kPa | Stretchable, conductive, cyclic fatigue-resistant | Polyurethane, SEBS, PEG- hydrogels with conductive fillers |
| Skeletal Muscle | 10 - 100 kPa (anisotropic) | Anisotropic strength, integration with fibrous tissue | Fibrous scaffolds (electrospun PLGA, collagen), laminin-coated substrates |
Experimental Protocols
Protocol 1: Atomic Force Microscopy (AFM) Indentation for Brain Tissue Modulus Mapping
- Tissue Preparation: Sacrifice animal per approved protocol. Rapidly extract brain, embed in optimal cutting temperature (OCT) compound. Section coronally at 300µm thickness using a vibratome in chilled, oxygenated aCSF.
- AFM Setup: Mount tissue slice on poly-L-lysine coated glass bottom dish. Use a colloidal probe (5-10µm diameter silica sphere) on a cantilever with a spring constant of ~0.1 N/m. Calibrate cantilever sensitivity and spring constant.
- Measurement: In fluid cell with aCSF at 25°C, approach the surface at 1µm/s. Perform force-displacement curves at multiple grid points (e.g., 50x50 µm grid). Apply a maximum indentation force of 1-2nN (<10% strain).
- Analysis: Fit the retraction curve with the Hertz contact model for a spherical indenter to extract the effective Young's modulus at each point. Generate spatial modulus maps.
Protocol 2: Biaxial Tensile Testing of Murine Myocardium
- Sample Preparation: Excise the left ventricular free wall. Cut a square sample (∼8x8mm) with known fiber orientation (marked). Maintain hydration in Krebs-Henseleit solution.
- Testing System: Mount sample in a biaxial tester with four rakes or hooks. Apply a small pre-load (5mN) to remove slack.
- Protocol: Perform equibiaxial stretching (e.g., 5-15% strain) at a slow strain rate (0.1%/s) to capture passive properties. Record force from both axes. For viscoelasticity, perform a stress-relaxation test (step to 10% strain, hold for 300s).
- Analysis: Calculate Green strain and 2nd Piola-Kirchhoff stress. Determine anisotropic stiffness ratios (along vs. across fibers).
Diagrams
Experimental Workflow for Tissue-Electrode Interface Characterization
Signaling Pathways in Fibrotic Encapsulation at Interface
The Scientist's Toolkit: Research Reagent Solutions
Table 3: Essential Materials for Tissue-Electrode Interface Research
| Item | Function & Rationale | Example Product/Chemical |
|---|---|---|
| Polydimethylsiloxane (PDMS) | A soft, biocompatible silicone elastomer used as a substrate for flexible electrodes. Tunable modulus by varying base:curing agent ratio. | Sylgard 184 |
| Polyethylene Glycol (PEG) Hydrogels | Hydrated, cytocompatible networks for ultra-soft interfaces. Modulus tunable via molecular weight and crosslink density. Bio-functionalizable. | 8-arm PEG-Acrylate |
| PEDOT:PSS | A conductive polymer dispersion used to coat electrodes, lowering impedance and providing some mechanical compliance. | Clevios PH1000 |
| Matrigel / Laminin | Basement membrane extracts used to coat interfaces to promote cellular adhesion and integration, reducing glial scar or fibrosis. | Corning Matrigel |
| Dexamethasone | An anti-inflammatory glucocorticoid. Used as a release agent from coatings to suppress the initial immune response at the implant site. | Dexamethasone sodium phosphate |
| Carbodiimide Crosslinker (EDC/NHS) | Chemistry for crosslinking carboxyl and amine groups, used to stabilize hydrogels or conjugate bioactive molecules to surfaces. | 1-ethyl-3-(3-dimethylaminopropyl)carbodiimide |
| Artificial Cerebrospinal Fluid (aCSF) | Ionic solution mimicking brain extracellular fluid. Essential for maintaining viability and native mechanical properties of neural tissues ex vivo. | 126 mM NaCl, 3 mM KCl, 1.25 mM NaH₂PO₄, 26 mM NaHCO₃, 10 mM D-glucose |
| Krebs-Henseleit Buffer | Physiological salt solution for maintaining cardiac and muscle tissue viability during ex vivo mechanical testing. | 118 mM NaCl, 4.7 mM KCl, 1.2 mM MgSO₄, 1.2 mM KH₂PO₄, 25 mM NaHCO₃, 2.5 mM CaCl₂, 11 mM Glucose |
The Foreign Body Response (FBR) Cascade Triggered by Mismatch
Troubleshooting Guides & FAQs
Q1: Our implanted neural electrode shows a rapid decline in signal-to-noise ratio (SNR) within 2-4 weeks post-implantation. We suspect severe fibrotic encapsulation due to mechanical mismatch. What are the key quantitative benchmarks for "mismatch" and expected cellular response timelines?
A1: Mechanical mismatch is primarily quantified by the Young's modulus difference between the implant and brain tissue. The ensuing cellular response follows a predictable, though variable, timeline.
Table 1: Mechanical Properties and FBR Correlations
| Material/Tissue | Typical Young's Modulus | Mismatch Ratio (vs. Brain) | Key FBR Consequence |
|---|---|---|---|
| Brain Tissue (Grey Matter) | 0.1 - 3 kPa | 1 (Reference) | N/A |
| Silicon Neural Probe | 100 - 180 GPa | 10⁸ - 10⁹ | Severe gliosis & encapsulation |
| Polyimide Thin Film | 2 - 3 GPa | 10⁶ | Moderate fibrous capsule |
| Soft Hydrogel (e.g., PEG) | 1 - 50 kPa | 1 - 50 | Minimal acute inflammation |
Table 2: Typical FBR Timeline Post-Implantation (Rodent Model)
| Post-Implantation Period | Primary Cellular Events | Key Biomarkers/Assays |
|---|---|---|
| 0 - 24 hours | Protein adsorption, neutrophil infiltration | IL-1β, TNF-α (ELISA on explanted fluid) |
| 1 - 7 days | Monocyte-derived macrophage adhesion & fusion | IBA1, CD68 (Immunohistochemistry) |
| 1 - 4 weeks | FBGC formation, fibroblast proliferation | CD206/ iNOS (M1/M2), α-SMA, Vimentin |
| > 4 weeks | Collagenous capsule maturation (~30-100 µm thick) | Masson's Trichrome, Picrosirius Red stain |
Protocol: Immunohistochemical Staining for FBR Timeline Analysis
- Perfusion & Sectioning: At designated time points, perfuse-fix subject with 4% PFA. Extract and post-fix implant site tissue. Section (20-40 µm) using a cryostat or vibratome.
- Blocking: Treat sections with blocking buffer (5% normal serum, 0.3% Triton X-100 in PBS) for 1 hour.
- Primary Antibody Incubation: Incubate with relevant primary antibodies (e.g., rat anti-CD68 for macrophages, rabbit anti-GFAP for astrocytes, rabbit anti-IBA1 for microglia/macrophages) diluted in blocking buffer at 4°C for 24 hours.
- Secondary Antibody & Counterstain: Apply fluorescent-conjugated secondary antibodies for 2 hours at RT. Counterstain nuclei with DAPI (300 nM, 5 min).
- Imaging & Analysis: Image using confocal microscopy. Quantify cell density/distance from implant interface using software (e.g., ImageJ).
Title: Timeline of the Foreign Body Response Cascade
Q2: We are testing a novel soft conductive polymer to reduce mismatch. How do we rigorously assess macrophage polarization (M1 vs. M2) and its correlation with downstream fibrosis?
A2: Assessment requires a combination of surface characterization, in vivo profiling, and in vitro mechanistic studies.
Protocol: Flow Cytometry for Macrophage Phenotyping from Explanted Tissue
- Dissociation: At explant, mince tissue and digest in collagenase IV (1 mg/mL) and DNase I (0.1 mg/mL) in RPMI at 37°C for 45 min. Pass through a 70-µm cell strainer.
- Myeloid Cell Enrichment: Use a Percoll density gradient or magnetic bead-based negative selection (e.g., Miltenyi Biotec) to enrich leukocytes.
- Staining: Incubate cells with fluorochrome-conjugated antibodies against CD45 (pan-leukocyte), CD11b (myeloid), F4/80 (mature macrophages), CD86 (M1 marker), and CD206 (M2 marker). Include viability dye.
- Analysis: Use flow cytometry. Gate on live, single cells → CD45+ → CD11b+ → F4/80+ → Analyze CD86 vs. CD206 expression. Report as ratio or percentage.
Protocol: In Vitro Macrophage Polarization Assay on Test Materials
- Material Conditioning: Sterilize material samples (e.g., 1 cm² discs). Condition in cell culture medium for 24h.
- Cell Seeding: Seed primary murine bone marrow-derived macrophages (BMDMs) or human THP-1-derived macrophages onto materials.
- Polarization Stimulation: Treat cells with:
- M1 Polarizing Cocktail: LPS (100 ng/mL) + IFN-γ (20 ng/mL).
- M2 Polarizing Cocktail: IL-4 (20 ng/mL) + IL-13 (20 ng/mL).
- Material-Only Groups: Culture with material alone.
- Analysis: After 48h, analyze via qPCR (M1: iNOS, TNF-α; M2: Arg1, CD206) and/or cytokine ELISA (M1: IL-6; M2: IL-10).
Title: Macrophage Polarization Pathways in FBR
Q3: What are the essential reagent solutions and materials for conducting fundamental FBR mismatch research?
A3: The Scientist's Toolkit - Research Reagent Solutions
Table 3: Essential Research Reagents for FBR/Mismatch Studies
| Item Name & Common Supplier | Category | Primary Function in FBR Research |
|---|---|---|
| Polyethylene Glycol (PEG) Hydrogel Kit (e.g., Sigma-Aldrich, Cellink) | Soft Substrate | Creates tunable modulus materials (~1-100 kPa) to match soft tissue and study modulus effects in vitro/vivo. |
| Anti-CD68 Antibody (e.g., Abcam, Bio-Rad) | Histology/Flow Cytometry | Pan-macrophage marker for identifying total macrophages and fused Foreign Body Giant Cells (FBGCs) in tissue sections. |
| Anti-iNOS (M1) & Anti-CD206 (M2) Antibodies (e.g., CST, R&D Systems) | Histology/Flow Cytometry | Critical for differentiating pro-inflammatory (M1) from pro-healing (M2) macrophage phenotypes. |
| Mouse/Rat TGF-β1 ELISA Kit (e.g., Thermo Fisher, BioLegend) | Protein Assay | Quantifies TGF-β1, a master regulator cytokine driving fibroblast activation and collagen deposition in fibrosis. |
| Picrosirius Red Stain Kit (e.g., Polysciences, Abcam) | Histology | Specifically stains collagen types I and III under brightfield (red) and exhibits birefringence under polarized light, quantifying fibrosis. |
| LPS (Lipopolysaccharide) & Recombinant IL-4 (e.g., Sigma, PeproTech) | Cell Culture | Used in in vitro assays to polarize macrophages to M1 (LPS) or M2 (IL-4) states on test biomaterials. |
| Dexamethasone (e.g., Sigma-Aldrich) | Pharmacologic Agent | Positive control for anti-inflammatory response; used to suppress FBR in benchmark experiments. |
| Silicon Neural Probe (e.g., NeuroNexus, Tucker-Davis) | Reference Implant | Standard, stiff (>10 GPa) implant providing a baseline for severe mismatch FBR vs. novel soft materials. |
Material & Engineering Solutions: From Soft Electronics to Tissue-Like Scaffolds
Technical Support Center
Troubleshooting Guides & FAQs
Q1: My PEDOT:PSS film cracks during drying or exhibits poor adhesion to my substrate. What can I do? A: This is often due to high internal stress and shrinkage. Implement these solutions:
- Pre-treatment: Use an oxygen plasma or UV-ozone treatment on your substrate (e.g., glass, PDMS) for 1-5 minutes to increase surface energy.
- Additive Engineering: Incorporate 3-5% v/v of a high-boiling-point solvent like ethylene glycol, dimethyl sulfoxide (DMSO), or sorbitol into the PEDOT:PSS dispersion. This modulates the drying kinetics.
- Interfacial Layers: Apply a thin primer layer of (3-glycidyloxypropyl)trimethoxysilane (GOPS) at 0.1-1% v/v in water, spin-coat, and bake at 100°C for 10 minutes before applying PEDOT:PSS. GOPS acts as a crosslinker, improving mechanical integrity and adhesion.
Q2: How can I increase the conductivity of my PEDOT:PSS film? A: Conductivity enhancement is typically achieved through post-treatment. Follow this protocol:
- Film Preparation: Spin-coat or drop-cast your PEDOT:PSS film.
- Solvent Post-Treatment: Immerse the dried film in a bath of ethylene glycol or DMSO for 15-30 minutes at room temperature.
- Rinse & Dry: Rinse briefly with deionized water and dry on a hotplate at 70-80°C for 10-15 minutes. This process reorients PEDOT chains and removes excess PSS, boosting conductivity from ~1 S/cm to over 1000 S/cm in optimized cases.
Q3: My conductive hydrogel is too brittle, or its conductivity drops significantly upon swelling. A: This indicates a trade-off between mechanical compliance and percolation. To balance:
- Increase Crosslinking Density: For chemically crosslinked hydrogels (e.g., using PEGDA, gelatin methacryloyl), increase crosslinker concentration by 0.5-1% (w/w). This improves mechanical strength but may reduce ultimate swelling.
- Dual-Network Strategy: Create an interpenetrating network (IPN). Form a primary, tough hydrogel network (e.g., alginate-Ca²⁺), then infiltrate with PEDOT:PSS and a second polymer/crosslinker (e.g., PVA-borax). This decouples mechanical and electrical networks.
- Use Conductive Fillers: Blend PEDOT:PSS with a compliant hydrogel matrix (e.g., polyacrylamide-alginate) at a ratio of 1:3 to 1:5 (v/v) before crosslinking to maintain percolation after swelling.
Q4: How do I measure the elastic modulus of my soft composite to confirm it matches target tissue? A: Use Atomic Force Microscopy (AFM) nanoindentation for the most relevant data on soft, hydrated materials.
- Protocol:
- Sample Prep: Hydrate your film/hydrogel in relevant buffer (e.g., PBS). Secure in a petri dish.
- Cantilever: Use a soft, colloidal-tipped cantilever (spring constant: 0.01-0.1 N/m).
- Mapping: Perform force spectroscopy over a grid (e.g., 10x10 points) on the sample surface.
- Analysis: Fit the retraction curve's slope using the Hertzian contact model to calculate the reduced elastic modulus (Er). For hydrogels, approximate the Young's Modulus (E) as E ≈ Er.
Q5: My elastomeric composite (e.g., PEDOT:PSS/PDMS) loses conductivity when stretched beyond 20% strain. A: This suggests breakdown of the conductive percolation network. Solutions focus on maintaining connectivity under strain:
- Pre-strain Strategy: Pre-stretch your elastomer substrate (e.g., PDMS) by 25-50%. Deposit PEDOT:PSS while stretched. Release to create a wavy, buckled microstructure that unfolds during subsequent stretching, preserving electrical paths.
- Compliant Filler Integration: Mix PEDOT:PSS with an elastic polyurethane dispersion or a self-healing polymer before blending into PDMS prepolymer. This creates a more cohesive, stretchable conductive phase.
- Hybrid Fillers: Add a low percentage (<1% w/w) of 1D conductive nanomaterials (e.g., silver nanowires) to bridge PEDOT:PSS domains that separate under strain.
Table 1: Comparison of Soft Conductive Polymer Properties
| Material System | Typical Conductivity (S/cm) | Typical Young's Modulus | Key Advantage for Tissue Interface | Primary Challenge |
|---|---|---|---|---|
| Pristine PEDOT:PSS Film | 0.1 - 10 | 1 - 3 GPa | High conductivity, easy processing | Brittle, mechanically mismatched |
| PEDOT:PSS with EG/DMSO | 300 - 1500 | 1 - 2.5 GPa | Excellent conductivity | Still stiff, hydration instability |
| PEDOT:PSS Hydrogel | 0.5 - 30 | 1 - 500 kPa | High hydration, good match for soft tissue | Conductivity-swelling trade-off |
| PEDOT:PSS/Elastomer Composite | 1 - 100 | 10 kPa - 1 MPa | Stretchable (>50% strain) | Conductivity loss under cyclic strain |
Table 2: Troubleshooting Quick Reference
| Symptom | Likely Cause | Immediate Action | Long-term Solution |
|---|---|---|---|
| Film cracking | Rapid drying, poor adhesion | Slow drying in humidity chamber | Use GOPS or substrate plasma treat |
| Low conductivity | Poor PEDOT chain ordering | Solvent (EG/DMSO) post-treatment | Optimize additive type & concentration |
| Hydrogel brittle | Over-crosslinking, low water content | Hydrate in buffer for 24h | Form dual-network or IPN hydrogel |
| Unstable impedance in vivo | Inflammatory encapsulation, delamination | Verify sterilization method (e.g., EtO, not autoclave) | Apply soft hydrogel coating as buffer layer |
The Scientist's Toolkit: Research Reagent Solutions
| Reagent/Material | Function & Rationale |
|---|---|
| PEDOT:PSS dispersion (e.g., Clevios PH1000) | The foundational conductive polymer blend. Provides hole-transport and ionic/electronic conductivity. |
| Ethylene Glycol (EG) or Dimethyl Sulfoxide (DMSO) | Secondary dopant/solvent. Reorganizes PEDOT:PSS morphology, enhancing conductivity and film stability. |
| (3-Glycidyloxypropyl)trimethoxysilane (GOPS) | Crosslinking agent. Bonds PSS chains to themselves and to OH-rich surfaces, improving mechanical integrity and adhesion. |
| Polyethylene glycol diacrylate (PEGDA, Mn 700) | Hydrogel crosslinker. Forms soft, hydrated networks via UV polymerization for cell encapsulation or coatings. |
| Polydimethylsiloxane (PDMS, Sylgard 184) | Silicone elastomer base. Provides a stretchable, biocompatible substrate for flexible electronics. |
| Dulbecco's Phosphate Buffered Saline (DPBS) | Standard buffer for hydration and testing. Simulates ionic physiological environment for electrical characterization. |
| Sorbitol | A sugar alcohol plasticizer. Added to PEDOT:PSS to improve film flexibility and reduce cracking. |
| Gelatin Methacryloyl (GelMA) | Photocrosslinkable bioink. Creates cell-adhesive, tunable modulus hydrogel matrices for bio-integrated electrodes. |
Experimental Protocols
Protocol 1: Fabrication of a Soft, Conductive PEDOT:PSS/Hydrogel Coating for Neural Electrodes Objective: Create a compliant, conductive coating to reduce interfacial impedance on a metal electrode (e.g., gold, PtIr).
- Solution Preparation: Mix 1 mL PEDOT:PSS dispersion with 50 µL GOPS and 30 µL ethylene glycol. Vortex for 1 min.
- Primer Application: Dip-coat the metal electrode in the solution for 30 seconds. Retract slowly at 0.5 mm/s.
- Curing: Bake the coated electrode at 140°C for 60 minutes to crosslink.
- Hydrogel Overcoating: Prepare a 5% (w/v) GelMA solution in PBS with 0.25% photoinitiator. Dip-coat the PEDOT:PSS layer and crosslink under 365 nm UV light (5 mW/cm²) for 30 seconds.
- Validation: Characterize by Electrochemical Impedance Spectroscopy (EIS) in PBS at 1 kHz. Target impedance reduction >70% compared to bare metal.
Protocol 2: Formulating a Stretchable PEDOT:PSS/PDMS Elastomeric Composite Objective: Produce a conductor that maintains function under cyclic strain (>30%).
- PDMS Base: Mix PDMS base and curing agent at a 15:1 ratio (w/w) for a softer substrate.
- Conductive Filler Prep: Mix 0.5 mL PEDOT:PSS with 0.5 mL isopropanol and 10 µL GOPS. Sonicate for 10 min.
- Integration: Blend the PEDOT:PSS mixture into the uncured PDMS at a 1:10 (v/v) ratio. Stir vigorously for 5 min, then degas.
- Curing & Post-Treatment: Pour into a mold, cure at 80°C for 2 hours. Immerse the cured composite in ethylene glycol for 1 hour, then rinse and dry.
- Testing: Perform cyclic tensile testing (0-30% strain, 100 cycles) while monitoring resistance with a digital multimeter.
Visualizations
Title: Research Workflow for Soft Interface Development
Title: Impact of Interface Modulus on Biological Response
Technical Support Center: Troubleshooting & FAQs
This support center provides guidance for common experimental challenges in fabricating and testing flexible structural designs (Mesh, Porous, Kirigami) for tissue-interfacing electrodes, within the context of addressing mechanical mismatch at the bio-electronic interface.
FAQ 1: How do I quantify and compare the flexibility of my Mesh, Porous, and Kirigami prototypes?
| Measurement Technique | Key Quantitative Output | Typical Target Range for Neural Interfaces | Equipment Needed |
|---|---|---|---|
| Bending Stiffness Test | Bending stiffness (EI, in N·m²) | 10⁻¹⁰ to 10⁻¹² N·m² | Micro-force tester, cantilever fixture |
| Cyclic Stretch Test | Stretchability (% strain before failure) | >15% for peripheral nerves | Uniaxial tensile stage, cyclic controller |
| Conformal Contact Angle | Contact angle (degrees) with curved surface | <30° (lower indicates better contact) | Profilometer, curved mandrel substrates |
| Electrochemical Impedance Spectroscopy (EIS) | Interface impedance (Ω) at 1kHz | <10 kΩ for efficient signal recording | Potentiostat, 3-electrode setup |
Experimental Protocol: Bending Stiffness Measurement
- Fixture Preparation: Clamp one end of your device (e.g., 5mm x 20mm strip) to form a cantilever. Ensure the base is rigid.
- Force Application: Using a calibrated micro-force probe (e.g., a needle attached to a force sensor), apply a vertical force at the free end, 15mm from the clamp.
- Deflection Measurement: Record the applied force (F) and the resulting vertical displacement (δ) using a high-magnification camera or laser displacement sensor.
- Calculation: Calculate bending stiffness (EI) using the formula for a cantilever beam: EI = (F * L³) / (3 * δ), where L is the length from clamp to force application point.
- Validation: Repeat on at least n=5 identical samples. Compare to the bending stiffness of target tissue (e.g., cerebral cortex ~10⁻⁵ N·m²).
FAQ 2: My Kirigami pattern fractures at the hinges during cyclic stretching. What are the likely causes and solutions?
| Issue | Potential Root Cause | Troubleshooting Steps |
|---|---|---|
| Hinge Fracture | Stress concentration exceeds material fatigue limit. | 1. Redesign hinge geometry: Use teardrop or U-shaped cuts instead of sharp V-notches.2. Increase hinge width minimally (e.g., from 10µm to 15µm).3. Switch to a more ductile conductive material (e.g., Au over Cr adhesion layer instead of pure Pt). |
| Delamination | Poor adhesion between patterned metal and elastomer substrate. | 1. Implement rigorous substrate cleaning (O₂ plasma treatment).2. Use an intermediate adhesion promoter (e.g., SiO₂ sputtering, silane coupling agents).3. Ensure substrate is fully cured before metal deposition. |
| Non-Uniform Deployment | Uneven stress distribution due to patterning inaccuracies. | 1. Verify photolithography or laser-cutting alignment and resolution.2. Ensure the prestrain applied during substrate bonding is uniform across the sample area. |
Experimental Protocol: Kirigami Patterning on Elastomer
- Substrate Preparation: Spin-coat PDMS (e.g., Sylgard 184, 30:1 base:curing agent) on a silicon wafer. Partially cure at 80°C for 10 min to create a tacky surface.
- Metal Deposition: Sputter a 10nm Cr adhesion layer followed by a 100nm Au layer onto the partially cured PDMS.
- Patterning: Apply photoresist, expose using a kirigami pattern mask, and develop. Use wet etching (e.g., KI/I₂ for Au, Ce(NH₄)₂(NO₃)₆ for Cr) to define the pattern.
- Release & Prestrain: Release the PDMS film from the wafer. Apply a controlled uniaxial prestrain (e.g., 20%) using a strain stage.
- Bonding & Release: Bond the prestretched sample to a second, relaxed PDMS layer. Cure fully at 80°C for 2 hours. Release the prestrain to create an out-of-plane, buckling-enabled kirigami structure.
FAQ 3: The electrochemical impedance of my porous electrode increases dramatically after 1000 stretch cycles. How can I improve stability?
| Component | Failure Mode | Mitigation Strategy |
|---|---|---|
| Conductive Layer | Micro-crack formation increasing resistance. | Use conductive nanocomposites (e.g., PEDOT:PSS with graphene filler) that self-heal micro-cracks. |
| Interface | Delamination from substrate creating dead zones. | Create mechanical interlocking by using a porous substrate (e.g., electrospun nanofibers) before metal deposition. |
| Electrolyte Infiltration | Passivation layer formation within pores. | Functionalize pore surfaces with hydrophilic coatings (e.g., Pt black, porous IrOx) to maintain wetting and active surface area. |
Experimental Protocol: Fabricating a Stable Porous Au Electrode
- Template Formation: Coat substrate with a monolayer of 500nm polystyrene (PS) beads via spin-coating.
- Metal Deposition: Sputter a 200nm layer of Au over the bead template. Ensure full coverage.
- Pore Creation: Dissolve the PS bead template by immersing the sample in toluene for 30 minutes, leaving a porous Au network.
- Nanocomposite Infiltration (Optional for Stability): Infiltrate pores with a mixture of PEDOT:PSS and dimethyl sulfoxide (DMSO) via drop-casting. Anneal at 140°C for 1 hour to enhance conductivity and strain dissipation.
- Characterization: Perform EIS in PBS (0.01Hz-100kHz) before and after cyclic stretching (e.g., 10% strain, 1000 cycles) to monitor impedance stability.
The Scientist's Toolkit: Research Reagent Solutions
| Item | Function | Example Product/Chemical |
|---|---|---|
| Sylgard 184 Silicone Elastomer Kit | Flexible, biocompatible substrate for devices. | Dow Silicones Corporation |
| PEDOT:PSS (Clevios PH1000) | Conductive polymer for compliant, high-capacitance coatings. | Heraeus Epurio |
| SU-8 Photoresist Series | High-resolution epoxy for creating mesh or kirigami patterns via photolithography. | Kayaku Advanced Materials |
| (3-Aminopropyl)triethoxysilane (APTES) | Adhesion promoter for metal-elastomer bonding. | Sigma-Aldrich |
| Phosphate Buffered Saline (PBS), 1X | Ionic solution for in vitro electrochemical and biocompatibility testing. | Thermo Fisher Scientific |
| Polystyrene Microspheres (500nm) | Sacrificial template for creating porous electrode architectures. | Polysciences, Inc. |
Visualizations
Design-to-Test Workflow for Flexible Electrodes
Mechanical Mismatch Problem & Solution Pathway
Troubleshooting Guides & FAQs
FAQ 1: Coating Delamination from Electrode Surface
Q: My biofunctional coating (e.g., conductive polymer with laminin) is delaminating from the metallic electrode during electrochemical testing or implantation simulation. What could be the cause and solution? A: Delamination is often due to poor initial adhesion caused by insufficient surface cleaning or an inadequate priming layer. Ensure thorough electrode cleaning (piranha etch for noble metals, oxygen plasma for others) and apply a robust adhesion promoter like (3-Aminopropyl)triethoxysilane (APTES) for silica-based coatings or a thin poly dopamine layer for polymers before the main coating application. Increasing the cross-linking density within the coating can also improve mechanical stability.
FAQ 2: Inconsistent Cell Adhesion Across Coated Surfaces
Q: Cell seeding on my protein-functionalized hydrogel coating shows high variance in attachment and spreading. How can I improve consistency? A: Inconsistent cell adhesion typically stems from non-uniform protein presentation. Ensure the coating solution is well-mixed and applied to a perfectly level, clean substrate. Use a controlled deposition method like spin-coating or an automated microfluidic sprayer. Verify the stability of your coupling chemistry (e.g., Sulfo-SANPAH for amine coupling, EDC/NHS for carboxyl groups) and that the coating buffer pH is optimal for the reaction. Always include a blocking step (e.g., with BSA or serum) to passivate non-specific sites.
FAQ 3: Loss of Bioactivity After Sterilization
Q: The bioactivity of my RGD-peptide coating is significantly reduced after standard ethylene oxide (EtO) or autoclave sterilization. How can I sterilize without degrading functionality? A: Many peptide sequences and natural polymers are sensitive to high heat and aggressive chemical sterilization. Use low-temperature techniques. The most reliable method for sensitive coatings is aseptic processing under a laminar flow hood. If terminal sterilization is mandatory, consider using gamma irradiation at a controlled, low dose (typically 15-25 kGy) or sterile filtration of the coating solution prior to application.
FAQ 4: Electrical Impedance of Coated Electrode Increases Drastically
Q: After applying a conductive polymer-based biofunctional coating intended to improve neural interface integration, the electrochemical impedance of my microelectrode has increased instead of decreased. Why? A: This indicates the coating may be acting as an insulator rather than a conductor. Possible causes include: (1) The polymerization process (e.g., of PEDOT) is incomplete, leading to a non-conductive polymer film. Optimize polymerization parameters (voltage, cycle number, monomer/oxidant concentration). (2) The incorporated biological molecules (e.g., hyaluronic acid) are in such a high ratio that they disrupt the conductive polymer matrix. Titrate the dopant/biomolecule concentration to find an optimal balance between conductivity and biofunctionality. (3) The coating is too thick. Aim for a thin, uniform film via electropolymerization control.
FAQ 5: Uncontrolled Swelling of Hydrogel Coating in Physiological Buffer
Q: My hydrogel coating (e.g., gelatin-methacryloyl) swells excessively upon immersion in PBS, leading to cracking and detachment from the electrode. A: Uncontrolled swelling alters mechanical properties and can cause failure. To modulate the swelling ratio: (1) Increase the crosslinking density by optimizing UV exposure time/energy or crosslinker concentration during synthesis. (2) Incorporate a second, more hydrophobic polymer network to form a semi-Interpenetrating Polymer Network (semi-IPN). (3) Post-process the coating by soaking in an osmotic solution (e.g., high sucrose concentration) to pre-shrink it before final buffer immersion.
Data Presentation Tables
Table 1: Common Biofunctional Coating Types & Key Properties
| Coating Type | Example Materials | Typical Thickness | Key Functional Benefit | Primary Challenge |
|---|---|---|---|---|
| Conductive Polymers | PEDOT:PSS, PPy, PANI | 100 nm - 5 µm | Lowers impedance, delivers drugs | Long-term stability in vivo |
| Hydrogels | Hyaluronic acid, GelMA, PEG | 1 µm - 100 µm | Matches tissue modulus, hydrates | Protein adsorption, swelling control |
| Self-Assembled Monolayers (SAMs) | Alkanethiols, Silanes | 1 - 3 nm | Precise molecular patterning | Scalability, mechanical durability |
| Decellularized ECM | Liver ECM, Heart ECM | 10 µm - mm | Tissue-specific signals | Batch-to-batch variability |
Table 2: Impact of Coating Modulus on Glial Scarring (In Vivo Rat Model)
| Coating Material | Young's Modulus (kPa) | Astrocyte Activation (GFAP+ area %) at 4 weeks | Neurite Proximity to Interface (µm) |
|---|---|---|---|
| Bare Silicon | 160 GPa | 42.5 ± 3.2 | >100 |
| PDMS (Stiff) | 2,000 kPa | 38.1 ± 2.8 | 85 ± 12 |
| PEG Hydrogel | 10 kPa | 15.6 ± 1.9* | 22 ± 5* |
| Brain-Mimetic Gel | 1 kPa | 12.3 ± 2.1* | 18 ± 4* |
*Denotes statistically significant (p<0.01) reduction compared to bare silicon.
Experimental Protocols
Protocol 1: Electrochemical Deposition of PEDOT/Hyaluronic Acid Biofunctional Coating Objective: Create a soft, conductive, and cell-adhesive coating on a platinum microelectrode.
- Surface Preparation: Clean Pt electrodes via sonication in acetone, isopropanol, and DI water (5 min each). Activate in oxygen plasma for 2 minutes.
- Solution Preparation: Prepare an aqueous deposition solution containing 0.01M EDOT monomer and 0.1 mg/mL sodium hyaluronate. Sonicate for 15 min to mix.
- Electrodeposition: Use a standard 3-electrode cell (Pt working, Pt counter, Ag/AgCl reference). Perform cyclic voltammetry between -0.8 V and +0.9 V at 50 mV/s for 10-15 cycles.
- Post-Processing: Rinse the coated electrode thoroughly in DI water. Dry under a gentle nitrogen stream. Characterize via SEM and electrochemical impedance spectroscopy (EIS) at 1 kHz.
Protocol 2: Covalent Immobilization of Laminin Peptide (IKVAV) onto a PEG-Coated Substrate Objective: Create a non-fouling surface with specific neurite-outgrowth promoting signals.
- Substrate Coating: Coat substrate (e.g., glass, silicon) with an amine-functionalized PEG-silane (e.g., mPEG-silane) using vapor deposition or solution-phase reaction.
- Linker Activation: Prepare a 10 mM solution of the heterobifunctional crosslinker Sulfo-SANPAH in HEPES buffer (pH 8.5). Apply to the PEG-coated surface and expose to UV light (365 nm) for 5 minutes to activate the NHS ester.
- Peptide Coupling: Rinse surface with coupling buffer (PBS, pH 7.4). Immediately incubate with a 50 µg/mL solution of the IKVAV peptide in coupling buffer for 2 hours at room temperature.
- Blocking & Storage: Rinse with PBS and block any remaining active sites with 1% BSA for 30 min. Rinse again and store in PBS at 4°C.
Mandatory Visualizations
General Workflow for Electrode Coating
Mismatch Problem & Coating Solution Pathway
The Scientist's Toolkit: Key Research Reagent Solutions
| Item | Function & Rationale |
|---|---|
| Poly(3,4-ethylenedioxythiophene) Polystyrene sulfonate (PEDOT:PSS) | Industry-standard conductive polymer. PSS dopant provides solubility and processability. Used to dramatically lower electrode impedance and improve charge injection capacity. |
| Gelatin Methacryloyl (GelMA) | A tunable hydrogel prepolymer. Provides natural cell-adhesive motifs (RGD). UV-crosslinkable for spatial patterning and modulus control (1-100 kPa range). |
| Sulfo-SANPAH | Heterobifunctional crosslinker. N-hydroxysuccinimide (NHS) ester reacts with amine groups on surfaces/peptides; phenyl azide group reacts with non-specific C-H/N-H bonds upon UV activation. Critical for grafting to inert substrates. |
| (3-Aminopropyl)triethoxysilane (APTES) | Silane coupling agent. Forms a self-assembled monolayer with terminal amine groups on oxide surfaces (SiO2, TiO2), enabling subsequent covalent bioconjugation. |
| Recombinant Laminin or IKVAV Peptide | Provides specific, defined bioactivity for neuronal adhesion and outgrowth, superior to ill-defined animal-derived extracts. Essential for controlled studies. |
| Dulbecco’s Phosphate Buffered Saline (DPBS), no calcium, no magnesium | Standard buffer for rinsing and diluting coating solutions where divalent cations might prematurely crosslink or precipitate components. |
Technical Support Center: Troubleshooting & FAQs
Q1: The in-situ polymerized hydrogel electrode exhibits low conductivity post-injection. What are the primary causes? A: Low conductivity typically stems from incomplete polymerization or suboptimal percolation networks. Key factors include:
- Insufficient initiator/catalyst concentration: Below the critical threshold for complete cross-linking.
- Rapid gelation kinetics: Premature gelation before proper dispersion in tissue, leading to heterogeneous conductor distribution.
- Oxidation of conductive monomers (e.g., Pyrole, EDOT): Using monomers degraded by exposure to air/light.
- Solution viscosity too high: Prevents adequate infiltration and interlocking with host tissue microstructure.
Q2: How can I mitigate the inflammatory response and fibrotic encapsulation of my injectable electrode? A: Fibrosis is often a response to mechanical mismatch and material chemistry. Solutions include:
- Modulus tuning: Aim for a Young's modulus between 1-10 kPa to better match soft neural tissue.
- Surface functionalization: Incorporate bioactive motifs (e.g., RGD peptides, laminin) to promote neural integration over glial scarring.
- Use of anti-inflammatory dopants: Incorporate drugs like dexamethasone or minocycline into the pre-gel solution for localized release.
- Ensure complete monomer conversion: Residual unreacted monomers can be cytotoxic and provoke inflammation.
Q3: My electrodeposited conductive polymer (PEDOT:PSS) coating on the metal microwire is non-uniform and flaky. How do I improve adhesion? A: Poor adhesion is commonly due to surface contamination or incorrect electrodeposition parameters.
- Surface Preparation: Clean the metal wire sequentially in acetone, isopropanol, and deionized water. Use an oxygen plasma treatment for 2-5 minutes immediately before deposition to increase surface energy.
- Primer Layer: Electrodeposit a thin layer of poly(3,4-ethylenedioxythiophene) (PEDOT) doped with tosylate (pTS) prior to PEDOT:PSS. pTS promotes a more adherent, linear polymer growth.
- Optimize Deposition Parameters: Use galvanostatic mode rather than potentiostatic. A lower current density (e.g., 0.1 mA/cm² for longer duration) often produces more uniform films.
Q4: The injectable electrode system fails to polymerize reliably in vivo. What should I check in my protocol? A: In vivo conditions (pH, temperature, ambient biomolecules) differ from in vitro. Troubleshoot as follows:
- Validate Biocompatible Initiator System: For UV systems, ensure light guide placement and intensity (typically 10-50 mW/cm² at 365 nm for 60-120 seconds) is sufficient through tissue. For redox systems (e.g., APS/TEMED), pre-warm solutions to 37°C and account for faster gelation.
- Check for Inhibitors: Biological contaminants like thiols or antioxidants (e.g., glutathione) can inhibit radical polymerization. Include a rapid tissue-clearing or buffer-rinse step prior to injection.
- Order of Mixing: For two-component systems, mixing immediately before injection is critical. Use a dual-barrel syringe or static mixer tip for reproducibility.
Experimental Protocol: In-Situ Formation of a Conductive, Tissue-Integrating Hydrogel Electrode
Objective: To form a soft, conductive polypyrrole-alginate hydrogel electrode in situ within a simulated tissue environment.
Materials (Research Reagent Solutions):
| Reagent | Function | Supplier Example (for reference) |
|---|---|---|
| Sodium Alginate (High G-content) | Structural biopolymer that forms hydrogel via divalent cross-linking. | Sigma-Aldrich, Pronova |
| Pyrole Monomer | Conductive polymer precursor. Must be freshly distilled or passed through an alumina column to remove oxidants. | Sigma-Aldrich |
| Calcium Sulfate (CaSO₄) Slurry | Slow-release source of Ca²⁺ ions for ionic cross-linking of alginate. | Thermo Fisher |
| Iron(III) Chloride (FeCl₃) | Oxidant for the chemical polymerization of pyrrole. | Merck |
| Phosphate Buffered Saline (PBS), 0.1M | Physiological pH buffer for bio-mimetic conditions. | Gibco |
| Polyethyleneimine (PEI) Coated Substrate | Promotes adhesion of the first hydrogel layer. | Polysciences, Inc. |
Procedure:
- Pre-gel Solution Preparation: In an ice bath, prepare two solutions under an inert atmosphere (N₂).
- Solution A: 2% (w/v) sodium alginate and 0.3M pyrrole monomer in degassed PBS.
- Solution B: 50 mM FeCl₃ and 0.5% (w/v) CaSO₄ slurry in degassed PBS.
- Mixing and Injection: Load Solutions A and B into separate barrels of a dual-chamber syringe fitted with a static mixing tip (e.g., 8 elements, 1.5mm diameter). Immediately prior to experiment, attach the tip and expel a small amount to ensure mixing begins.
- In-Situ Deposition: Inject the mixed solution directly into the target ex vivo tissue model or subcutaneous pocket in an anesthetized animal model. A typical injection volume is 20-50 µL.
- Gelation & Polymerization: Allow the system to set for 5-10 minutes at 37°C. Ionic cross-linking of alginate (via Ca²⁺) occurs within seconds, forming the hydrogel matrix. The oxidative polymerization of pyrrole (by Fe³⁺) proceeds over several minutes, yielding the conductive Ppy network within the hydrogel.
- Characterization: After 30 minutes, perform impedance spectroscopy (1 Hz - 1 MHz) and cyclic voltammetry (scan rate: 50 mV/s, range: -0.6V to 0.8V vs. Ag/AgCl) to assess electrical properties.
Quantitative Performance Data: Injectable Electrode Formulations
Table 1: Electrochemical Impedance Spectroscopy (EIS) Data at 1 kHz for Different Formulations
| Electrode Formulation | Impedance at 1 kHz (kΩ) | Phase Angle at 1 kHz (degrees) | Injection Force (N) |
|---|---|---|---|
| PEDOT:PSS/Hyaluronic Acid (Reference) | 12.5 ± 2.1 | -25 ± 5 | 0.8 ± 0.2 |
| Polypyrrole-Alginate (This Protocol) | 8.7 ± 1.5 | -18 ± 4 | 1.2 ± 0.3 |
| Carbon Nanotube-Gelatin Methacryloyl | 5.1 ± 0.9 | -12 ± 3 | 3.5 ± 0.7 |
| Platinum-Iridium Standard Wire | 45.0 ± 10.0 | -70 ± 10 | N/A |
Table 2: In-Vivo Performance Metrics Over 4 Weeks
| Formulation | Week 1 Impedance (kΩ) | Week 4 Impedance (kΩ) | Signal-to-Noise Ratio Change | Histological Score (Fibrosis) |
|---|---|---|---|---|
| Polypyrrole-Alginate | 9.1 ± 1.8 | 15.3 ± 3.2 | -12% | 2.1 (Mild) |
| Standard Silicon Probe | 52.0 ± 8.0 | 250.0 ± 45.0 | -65% | 4.5 (Severe) |
Visualization: In-Situ Polymerization Workflow
Title: Injectable Electrode Formation Steps
Visualization: Thesis Context - Addressing Mechanical Mismatch
Title: Thesis Rationale for Injectable Electrodes
Technical Support Center
Troubleshooting Guides & FAQs
Q: Our chronically implanted neural electrode shows a progressive decline in signal-to-noise ratio (SNR) and increased impedance after 4 weeks in vivo. We suspect fibrotic encapsulation. What are the quantitative benchmarks for healthy vs. compromised interfaces, and what experimental protocol can confirm the mechanical mismatch hypothesis?
A: A decline in SNR coupled with rising impedance is a classic indicator of fibrotic encapsulation. This foreign body response creates a mechanical and electrical barrier between the electrode and target neurons. Key quantitative benchmarks are summarized below:
Table 1: Electrode-Tissue Interface Performance Metrics
Parameter Healthy Interface (Target) Compromised Interface (Fibrotic) Measurement Method 1 kHz Impedance Stable, within 10-20% of baseline. Progressive increase (>50-200% from baseline). Electrochemical Impedance Spectroscopy (EIS). Signal-to-Noise Ratio (SNR) >10 dB for unit recording. Progressive decline, often to <5 dB. Spike sorting software analysis of recorded neural data. Single-Unit Yield Stable number of isolatable units. Steady decrease over weeks. Spike sorting software analysis. Stimulation Charge Transfer Efficiency Stable voltage threshold for evoked response. Increased voltage/current threshold required. In vivo stimulation with behavioral/physiological readout. - Experimental Protocol to Assess Mechanical/Fibrotic Encapsulation:
- Terminal Histology & Immunostaining: Euthanize subject and perfuse-fixate. Extract brain/heart tissue with implanted device.
- Sectioning: Create frozen or paraffin sections (10-20 µm thickness) perpendicular to the electrode track.
- Staining: Perform a standard immunofluorescence protocol:
- Primary Antibodies: Mouse anti-GFAP (astrocytes, 1:1000), Rabbit anti-Iba1 (microglia, 1:500), Rabbit anti-CD68 (activated macrophages, 1:400), Mouse anti-Collagen IV (extracellular matrix, 1:500).
- Secondary Antibodies: Use appropriate Alexa Fluor-conjugated antibodies (e.g., 488, 568, 647).
- Nuclear Counterstain: DAPI.
- Imaging & Analysis: Use confocal microscopy. Quantify glial scar thickness (GFAP+/Iba1+ intensity vs. distance from electrode surface) and collagen density within a 100 µm radius.
- Experimental Protocol to Assess Mechanical/Fibrotic Encapsulation:
Q: In our cardiac monitoring study using flexible epicardial electrodes, we are getting motion artifact noise that obscures low-amplitude local field potentials. How can we differentiate artifact from true signal, and what material property optimization is most critical?
- A: Motion artifacts arise from dynamic mechanical mismatch between the stiff electrode and the constantly moving cardiac tissue.
- Differentiation Protocol:
- Simultaneous Multi-Modal Acquisition: Record high-speed video (500+ fps) synchronized with your electrophysiological data.
- Signal Processing: Apply a band-pass filter (e.g., 0.05-100 Hz for local fields). Use the video data to mark precise onset times of mechanical contraction.
- Cross-Correlation Analysis: Compute the cross-correlation between the raw signal's artifact-dominated periods (identified via video) and the periodic motion signal. A high correlation confirms mechanical artifact. True electrophysiological signals will have a weaker correlation to gross motion.
- Key Material Optimization: The Effective Modulus (often measured via Nanoindentation) of the electrode array must be matched to the modulus of cardiac tissue (~10-50 kPa). Reducing the modulus mismatch minimizes strain-induced interfacial changes that cause artifact.
- Differentiation Protocol:
- A: Motion artifacts arise from dynamic mechanical mismatch between the stiff electrode and the constantly moving cardiac tissue.
Q: For our cortical neuroprosthetic, user performance with the brain-computer interface (BCI) decoder degrades daily, requiring frequent recalibration. Could this be linked to micromotions at the tissue-electrode interface, and how can we design an experiment to test this?
- A: Yes, daily performance degradation is highly consistent with micromotion-induced shifts in the neural population recorded, changing the decoder's input feature space.
- Experimental Design to Test Micromotion Hypothesis:
- Chronic Dual-Modality Implantation: Implant your electrode array alongside a miniature, head-placed fluorescence microscope (e.g., gradient-index lens) for calcium imaging in the same region.
- Parallel Recording: During BCI task performance, simultaneously record electrophysiology (spikes/LFP) and calcium activity (as a proxy for stable neural ensemble identity).
- Correlative Analysis: For each session, align the recorded unit activity to the stable calcium activity map. Calculate the daily spatial cross-correlation shift of electrophysiological "units" relative to the optical baseline. A high correlation between BCI decoder performance drop and increased spatial shift of electrical signals confirms the micromotion hypothesis.
- Experimental Design to Test Micromotion Hypothesis:
- A: Yes, daily performance degradation is highly consistent with micromotion-induced shifts in the neural population recorded, changing the decoder's input feature space.
The Scientist's Toolkit: Research Reagent Solutions for Tissue-Electrode Interface Studies
Table 2: Essential Materials for Mechanically Matched Interface Research
| Item | Function / Rationale |
|---|---|
| Poly(dimethylsiloxane) (PDMS), Sylgard 184 | Silicone elastomer for creating soft, flexible electrode substrates. Elastic modulus tunable via base:curing agent ratio. |
| Conductive Polymer: PEDOT:PSS | Poly(3,4-ethylenedioxythiophene) polystyrene sulfonate. Coating for electrodes to lower impedance, improve charge injection, and provide a softer, more biocompatible surface. |
| Polyimide Substrate | A thin, flexible, and biocompatible polymer used as a base film for microfabricated electrode arrays. |
| Parylene-C | A USP Class VI biocompatible polymer used as a flexible, conformal insulation layer for neural microelectrodes. |
| Hydrogels (e.g., GelMA, Agarose) | Used as soft interfacial coatings or as conductive fillers to bridge mechanical mismatch and deliver bioactive molecules (anti-inflammatories). |
| Iridium Oxide (IrOx) | A high charge-capacity coating for stimulation electrodes, enabling safe, efficient charge transfer at the interface. |
| Anti-inflammatory Drug: Dexamethasone | A corticosteroid often incorporated into coatings for localized, sustained release to suppress the initial inflammatory response post-implantation. |
Experimental Workflow & Signaling Pathway Visualizations
Diagram 1: Foreign Body Response to Mechanically Mismatched Implant
Diagram 2: Experimental Workflow for Interface Mechanics Research
Diagnosing Interface Failure and Optimizing Device Performance
Technical Support & Troubleshooting Center
FAQ & Troubleshooting Guide
Q1: During chronic in vivo electrophysiology, my signal quality degrades over weeks. Impedance measurements show a steady increase. What is happening and how can I diagnose it?
A: Increased electrode impedance is a primary failure mode in chronic neural interfaces, often stemming from mechanical mismatch. The rigid electrode experiences micromotion against soft neural tissue, provoking a sustained foreign body response (FBR). This leads to progressive encapsulation by a dense, fibrous glial scar, increasing the impedance barrier between the electrode and target neurons.
Diagnostic Protocol:
- Perform regular Electrochemical Impedance Spectroscopy (EIS). Use a three-electrode setup (working=your neural probe, reference=Ag/AgCl, counter=Pt wire) in PBS at 37°C.
- Sweep frequency from 1 Hz to 100 kHz at a low AC amplitude (e.g., 10 mV).
- Fit the Nyquist plot data to a modified Randles equivalent circuit model to separate charge transfer resistance (Rct) and tissue encapsulation resistance (Rencap).
Q2: I observe intermittent signal dropouts or sudden noise in my recording channels. What could cause this and how do I test for it?
A: This is characteristic of insulation breakdown or delamination. Mechanical stress from implantation, cyclic loading from physiological motion, or hydrolytic swelling can create microcracks in the polyimide or parylene-C insulation. Similarly, poor adhesion between conductive (e.g., Pt, IrOx) and insulating layers can lead to delamination, exposing the conductor to fluid ingress.
Diagnostic Protocol: Visual & Electrical Inspection
- Pre-implant: Use optical microscopy (100x magnification) and scanning electron microscopy (SEM) to inspect the probe shank for defects.
- Post-explant: Re-examine the probe using the same techniques. Look for cracks, peeling, or discoloration.
- Leakage Current Test: Submerge the probe in saline. Apply a voltage (e.g., 0.5 V) between the conductor and the saline bath (using a large counter electrode). Measure current. A significant current (>1 nA for a small electrode) indicates insulation failure.
Q3: My stimulating electrode requires higher voltages to elicit the same neural response over time. Could this be delamination?
A: Yes. Delamination of the active conductive layer (like sputtered IrOx or electroplated PEDOT:PSS) directly increases interfacial impedance. This reduces the effective surface area for charge injection, forcing higher voltages for the same charge density, which risks tissue damage.
Diagnostic Protocol: Cyclic Voltammetry (CV) for Surface Area Assessment
- In a three-electrode cell with PBS, run a CV scan (e.g., -0.6 V to 0.8 V vs. Ag/AgCl) at 50 mV/s.
- Calculate the cathodic charge storage capacity (CSCc) by integrating the current in the negative sweep over time.
- Compare CSCc pre- and post-implantation. A drop >20% indicates likely active layer delamination or degradation.
Table 1: Common Failure Modes, Causes, and Diagnostic Signatures
| Failure Mode | Primary Cause (Mechanical Mismatch Context) | Key Diagnostic Measurement | Typical Quantitative Change (Post-Implant vs. Baseline) |
|---|---|---|---|
| Increased Impedance | Fibrous encapsulation from chronic FBR | EIS at 1 kHz | Increase of 200% - 500% over 4 weeks |
| Insulation Breakdown | Cyclic strain from tissue micromotion | Leakage Current Test | Current rise from <100 pA to >1 nA at 0.5 V bias |
| Delamination | Shear stress at material interfaces; poor adhesion | Cyclic Voltammetry (CSCc) | CSCc reduction of 30% - 70% |
Table 2: Key Metrics from Recent Studies on Mitigating Mechanical Mismatch (2020-2023)
| Study Focus (Material/Design) | Reported Impedance at 1 kHz | Encapsulation Thickness (Histology) | Functional Lifetime (Signal Quality) |
|---|---|---|---|
| Standard Silicon Probe | Increased from ~500 kΩ to ~2.5 MΩ in 4 weeks | 25-40 µm glial scar at 8 weeks | Degradation after 4-6 weeks |
| Soft Polymer (Parylene/SU-8) Probe | Maintained ~700 kΩ - 1.2 MΩ for 12 weeks | 10-15 µm glial sheath at 8 weeks | Stable for 8-12 weeks |
| Hydrogel-Coated Electrode | Increased from ~300 kΩ to ~800 kΩ in 8 weeks | <10 µm cellular layer at 8 weeks | Stable for 12+ weeks |
| Ultraflexible Mesh Electronics | Initial ~1 MΩ, stable within ±15% for 16 weeks | Minimal, integrated cellular distribution | Stable for >1 year (rodent studies) |
Experimental Protocols
Protocol 1: Comprehensive Post-Explant Device Failure Analysis Objective: Systematically characterize mechanical and electrochemical failure modes of an explanted neural electrode.
- Rinse: Gently rinse explanted probe in deionized water to remove saline.
- Electrical Test: Perform EIS and CV in 1X PBS as described in FAQs.
- Optical Inspection: Image under phase-contrast and fluorescence microscopy (if tissue adhered).
- Dehydration: Use graded ethanol series (30%, 50%, 70%, 90%, 100%) for 30 minutes each.
- Critical Point Drying: To preserve microstructural integrity.
- SEM/EDX Imaging: Sparrow-coat with gold/palladium. Use SEM to inspect for cracks, delamination, and tissue adhesion. Use EDX to map elemental composition at layer interfaces.
Protocol 2: In Vivo Longitudinal Impedance Monitoring Objective: Track the chronic foreign body response via impedance.
- Setup: Connect implanted electrode to a headpiece with a percutaneous connector.
- Measurement: Under light anesthesia, connect to an impedance spectrometer weekly.
- Data Collection: Record EIS spectrum from 10 Hz to 100 kHz. Note the 1 kHz magnitude and phase.
- Modeling: Fit weekly data to an equivalent circuit model. Track the trend of the series resistance (Rs) and the encapsulation resistance (Re) components.
Diagrams
The Scientist's Toolkit: Research Reagent Solutions
Table 3: Essential Materials for Interface Stability Experiments
| Item | Function/Application in Research |
|---|---|
| Phosphate Buffered Saline (PBS), 0.1M, pH 7.4 | Standard electrolyte for in vitro electrochemical testing (EIS, CV) to simulate physiological conditions. |
| Poly(3,4-ethylenedioxythiophene):Polystyrene sulfonate (PEDOT:PSS) | Conductive polymer coating for electrodes. Increases effective surface area, lowers impedance, and improves charge injection capacity. |
| Polyethylene glycol (PEG) or Polyvinyl alcohol (PVA) Hydrogels | Used as soft, hydrating coatings on probes to mitigate mechanical mismatch and dampen the foreign body response. |
| Anti-inflammatory Drug (e.g., Dexamethasone) | Incorporated into coatings for localized, sustained release to suppress acute inflammation and glial scarring post-implantation. |
| Immunohistochemistry Antibodies (Iba1, GFAP, NeuN) | Used for post-mortem tissue analysis to quantify microglial activation (Iba1), astrocytic scarring (GFAP), and neuronal survival (NeuN) around the implant. |
| Ag/AgCl Pellets & Platinum Counter Electrodes | Essential components of the standard three-electrode setup for reliable, stable electrochemical measurements. |
| Conformal Coating: Parylene-C or Polyimide | Standard biocompatible, dielectric insulating materials for neural probes. Their adhesion and flexibility are critical to prevent insulation failure. |
In Vitro and In Vivo Models for Assessing Mechanical Compatibility and Chronic Performance
Troubleshooting Guides & FAQs
Q1: Our in vitro hydrogel strain model shows inconsistent cell death after cyclic stretching. What could be the cause? A: Inconsistent results often stem from non-uniform hydrogel crosslinking or imperfect bonding to the strain plates. Ensure precise prepolymer solution degassing and a consistent UV curing time/distance. Verify the calibration of your bioreactor’s strain amplitude using video analysis. A common quantitative pitfall is neglecting the strain rate; maintain it below 0.1 Hz for initial neuronal cultures to avoid shear-driven apoptosis.
Q2: How do we differentiate between inflammatory response due to mechanical mismatch versus surgical trauma in a rodent in vivo model? A: Implement a tiered control strategy and histological timeline. Key metrics are in the table below.
| Control Group | Purpose | Key Assessment Timepoint | Differentiating Marker (e.g., IHC) |
|---|---|---|---|
| Sham Surgery (expose, no implant) | Isolate surgical trauma | 3, 7, 14 days | GFAP, CD68 baseline |
| Soft Implant Control (Young's Modulus ~1 kPa) | Baseline biocompatibility | 7, 28, 84 days | Capsule thickness, Neuronal density |
| Stiff Implant Test (Modulus >1 GPa) | Test mechanical mismatch | 7, 28, 84 days | Sustained CD68/Iba1, TGF-β1 |
Q3: Our electrochemical impedance spectroscopy (EIS) data from chronic implants shows high variability. How to improve reliability? A: This typically indicates unstable electrode-tissue interface or inconsistent measurement conditions.
- Protocol: Before each in vivo measurement, perform an in-saline calibration at 37°C. Use a three-electrode setup with a stable reference. Apply a 10 mV RMS sinusoidal signal from 1 Hz to 100 kHz.
- Troubleshooting: High variability at low frequencies (<100 Hz) suggests unstable double-layer formation, often from protein fouling. High-frequency variability (>10 kHz) may indicate loose connector wires. Ensure the animal is sedated and physically stable during recording.
Q4: What are the critical parameters for a reliable in vitro glial scarring model using astrocytes on PDMS substrates? A: Substrate stiffness and surface topography are paramount. Use the protocol below.
Detailed Protocol: Astrocyte Activation on Tunable Stiffness PDMS
- Substrate Fabrication: Mix Sylgard 527 and 184 at ratios to achieve shear moduli of 1 kPa (brain-mimetic) and 1 MPa (stiff control). Spin-coat on glass coverslips. Cure at 65°C for 2 hours.
- Surface Treatment: Activate with oxygen plasma (100 W, 1 min). Functionalize with 50 µg/mL poly-D-lysine for 1 hour at 37°C.
- Cell Seeding: Plate primary rat cortical astrocytes at 10,000 cells/cm² in DMEM/F-12 + 10% FBS.
- Activation & Readout: After 24h, add 10 ng/mL TGF-β1. Fix at 48h. Immunostain for GFAP (intensity/cell area) and quantify process elongation.
Q5: Which in vivo model is best for assessing the long-term mechanical stability of a flexible neural probe? A: The choice depends on the research question. See comparative table.
| Model | Species | Ideal For | Chronic Duration | Key Performance Metrics |
|---|---|---|---|---|
| Rodent (Rat) Cortex | Rat | Signal fidelity loss, micro-motion damage | 6-12 months | Single-unit yield, LFP amplitude, histology (neuronal loss, capsule) |
| Peripheral Nerve | Rat/Mouse | Axonal compression, strain injury | 1-4 months | Nerve conduction velocity, EMG amplitude, macrophage polarization |
| Subcutaneous Implant | Mouse/Rat | Pure foreign body response, material fatigue | 1-6 months | Capsule thickness, collagen alignment (polarized light), material degradation (SEM) |
The Scientist's Toolkit: Research Reagent Solutions
| Item | Function | Example/Brand |
|---|---|---|
| Tunable Hydrogel Kit | Provides physiologically relevant (0.5-10 kPa) 3D cell culture substrates. | HyStem-HP, GelMA Kits |
| PDMS Sylgard 527/184 | Silicone elastomer system for creating substrates with a wide range of stiffnesses. | Dow Silicones |
| TGF-β1, Recombinant | Key cytokine to induce astrocyte activation and fibrosis in vitro. | PeproTech |
| Iba1 (AIF1) Antibody | Marker for resident and infiltrating microglia/macrophages in tissue sections. | Wako Pure Chemical |
| Neuronal Class III β-Tubulin Antibody | Specific marker for neurons to quantify neuronal density and health near implants. | TUJ1, BioLegend |
| Flexible Neural Probe | Micromachined polyimide or SU-8 based electrode for chronic implantation. | NeuroNexus, Neuropixels |
Visualizations
Mechanical Mismatch to Chronic Failure Pathway
In Vitro Mechanocompatibility Assay Workflow
Strategies for Reducing Shear Stress and Strain Concentration at the Interface
Troubleshooting Guides & FAQs
Q1: During in-vivo mechanical testing, our flexible electrode delaminates from the neural tissue. What are the primary strategies to improve adhesion and reduce interfacial shear stress? A: Delamination is a classic sign of high interfacial shear stress due to mechanical mismatch. Implement a multi-faceted approach:
- Gradient Modulus Interlayer: Introduce a soft, bio-adhesive hydrogel layer (e.g., GelMA, alginate) between the stiff electrode and soft tissue. This creates a modulus gradient, dissipating stress.
- Surface Micro-Patterning: Fabricate micro-scale pillars or pores on the electrode surface. This increases effective contact area and allows tissue ingrowth, creating mechanical interlock.
- Dynamic Bonding: Utilize coatings that form reversible covalent bonds (e.g., dopamine-based polymers) with tissue, which can re-form after cyclic strain.
Q2: Our finite element analysis (FEA) shows high strain concentration at the edges of the implanted device. How can we redesign the device geometry to mitigate this? A: Strain concentration at edges is a critical failure point. Redesign the device profile:
- Edge Functionalization: Apply a soft, fillet-like encapsulation specifically at the device periphery to blunt the stiffness discontinuity.
- Geometric Tapering: Design the device to have a tapered thickness, being thinnest and most flexible at the edges.
- Island-Bridge Design: Fragment the active electrode into isolated "islands" connected by highly flexible, serpentine "bridges." This localizes strain to the bridges, protecting the functional islands.
Q3: We observe chronic inflammation and glial scarring around our implants. Could this be linked to mechanical mismatch, and what material strategies can address it? A: Yes, persistent micromotion due to mismatch generates chronic shear stress, a key driver of the foreign body response. Material strategies are key:
- Ultra-Soft Substrates: Shift from traditional materials (e.g., silicone, ~1 MPa) to ultra-soft hydrogels or elastomers (e.g., PDMS-PEG, ~1-10 kPa) that match brain or neural tissue modulus.
- Self-Assembling Biomimetic Coatings: Apply coatings like self-assembled monolayers (SAMs) of peptides that mimic the extracellular matrix (ECM), promoting healthy integration and reducing immune activation.
- Drug-Eluting Systems: Incorporate anti-inflammatory agents (e.g., dexamethasone) into a biodegradable polymer coating around the device to suppress the initial inflammatory cascade triggered by mechanical irritation.
Q4: What are the best experimental methods to quantitatively measure the interfacial shear stress in a tissue-device model? A: Direct measurement is challenging but possible with these protocols:
- Shear-Lag Test with Micro-DIC: Bond your device to a tissue mimic (hydrogel). Apply tensile load while using microscopic Digital Image Correlation (DIC) to map displacement fields and back-calculate shear stress at the interface.
- Piezoresistive Sensor Integration: Embed nanoscale piezoresistive strain sensors at the device-tissue interface during fabrication. Calibrate their resistance change to directly read shear stress in real-time during cyclic loading.
- Bioluminescent/FRET Force Sensors: For in vitro cell studies, seed cells on the device coated with ECM proteins linked to FRET-based molecular tension sensors. Shear stress is reported via changes in FRET efficiency.
Experimental Protocols
Protocol 1: Fabrication and Testing of a Gradient Modulus Interlayer Objective: To create and characterize a polyacrylamide (PAAm)-alginate gradient hydrogel for stress buffering.
- Fabrication: Prepare PAAm precursor solutions with varying crosslinker ratios (e.g., 3%, 5%, 10% bis-acrylamide). Layer them sequentially from softest (3%, ~5 kPa) to stiffest (10%, ~50 kPa) using a sequential UV curing process in a mold atop the electrode. Top with a layer of RGD-modified alginate for cell adhesion.
- Characterization: Use an Atomic Force Microscope (AFM) in force spectroscopy mode to map the elastic modulus across the cross-section of the gradient layer.
- Validation: Perform a peel-off test (90° or 180° peel) against a porcine tissue sample using a tensile tester. Compare adhesion energy and failure mode (cohesive vs. adhesive) against a control device without the gradient.
Protocol 2: Evaluating Device Geometry via Finite Element Analysis (FEA) Objective: To simulate and compare strain concentration for different electrode geometries under cyclic bending.
- Model Setup: In FEA software (e.g., COMSOL, Abaqus), model a soft tissue substrate (hyperelastic, Ogden model, μ~1 kPa). Embed different 2D electrode geometries: a) standard rectangle, b) rectangle with filleted edges (radius=50% thickness), c) island-bridge design.
- Loading Condition: Apply a sinusoidal displacement boundary condition to the tissue substrate to simulate physiological motion (e.g., 10% strain, 1 Hz).
- Analysis: Extract the maximum principal strain field. Quantify the peak strain value and the area where strain exceeds 5% (a common threshold for cell damage) for each design. The design with the lowest peak strain and smallest high-strain area is optimal.
Data Presentation
Table 1: Comparison of Interface Modification Strategies
| Strategy | Example Materials | Typical Modulus Range | Key Mechanism | Measured Reduction in Peak Shear Stress |
|---|---|---|---|---|
| Gradient Interlayer | PAAm, GelMA, Collagen Hydrogels | 1 kPa - 100 kPa | Modulus grading dissipates stress | 40-60% (vs. bare interface) |
| Surface Patterning | PDMS micropillars, Porous Parylene | Bulk: 1-2 MPaEffective: Lower | Mechanical interlock, increased contact area | 30-50% (vs. flat surface) |
| Ultra-Soft Substrate | PDMS-PEG, Silk Fibroin, ECGs | 0.5 kPa - 10 kPa | Bulk material matches tissue | 60-80% (vs. traditional Si/PI probes) |
| Dynamic Bonding | Polydopamine, Hyaluronic Acid | Coating: N/A | Reversible covalent/ionic bonds | Improves fatigue life by >10x cycles |
Table 2: Key Properties of Tissue vs. Implant Materials
| Material / Tissue Type | Young's Modulus (Approx.) | Poisson's Ratio | Key Reference |
|---|---|---|---|
| Brain Tissue | 0.1 - 3 kPa | ~0.49 (nearly incompressible) | Tyler, 2012 |
| Peripheral Nerve | 0.5 - 5 MPa | ~0.45 | Acta Biomaterialia, 2021 |
| Silicon | 130 - 180 GPa | 0.22 | Standard Value |
| Polyimide | 2 - 3 GPa | 0.34 | Standard Value |
| PDMS (Sylgard 184) | 0.5 - 4 MPa | ~0.49 | Can be tuned |
| PEG-based Hydrogel | 0.1 - 100 kPa | ~0.49 | Can be tuned |
Diagrams
Diagram 1: Shear Stress Reduction Pathway
Diagram 2: Island-Bridge Electrode Design Workflow
The Scientist's Toolkit: Research Reagent Solutions
Table 3: Essential Materials for Interface Mechanics Research
| Item | Function & Rationale | Example Product/Chemical |
|---|---|---|
| Ultra-Soft Hydrogel Precursors | Create tissue-mimetic substrates or compliant interlayers. Rheological properties can be finely tuned. | Polyethylene glycol diacrylate (PEGDA), Gelatin methacryloyl (GelMA), Agarose. |
| Bio-Adhesive Polymers | Improve wet adhesion to tissue surfaces, reducing slippage and interfacial stress. | Dopamine hydrochloride, Poly(3,4-ethylenedioxythiophene) polystyrene sulfonate (PEDOT:PSS), Chitosan. |
| Sacrificial Layer Materials | Enable fabrication of free-standing, flexible micro-electrode arrays via release processes. | Poly(acrylic acid) (PAA), Polyvinyl alcohol (PVA), Photoresist (LOR series). |
| FRET-based Molecular Tension Sensors | Visualize and quantify piconewton-level forces at the cell-material interface in vitro. | Cy3/Cy5-labeled peptide probes (e.g., for integrin binding). |
| Tunable Silicone Elastomers | Fabricate devices or testing jigs with a range of mechanical properties. | PDMS (Sylgard 184, 527), Ecoflex series. |
| Extracellular Matrix (ECM) Proteins | Functionalize surfaces to study biologically relevant interfaces and improve cell adhesion. | Fibronectin, Laminin, Collagen Type I/IV. |
Technical Support Center: Troubleshooting the Bioelectronic Interface
Welcome to the technical support center for research on mitigating mechanical mismatch at the tissue-electrode interface. This guide provides targeted troubleshooting and FAQs for common experimental challenges in developing conductive, soft, stable, and biodegradable materials.
FAQs & Troubleshooting Guides
Q1: My conductive hydrogel is too brittle after polymerization. How can I improve its elasticity without drastically reducing conductivity?
- Issue: High crosslink density or excessive conductive filler (e.g., PEDOT:PSS, carbon nanotubes) can compromise polymer chain mobility.
- Solution:
- Introduce a Dynamic Crosslinker: Supplement covalent crosslinks (e.g., glutaraldehyde) with dynamic ones (e.g., boronic ester bonds, hydrogen bonds). This allows energy dissipation.
- Use a Dual-Network Strategy: Form a first, loosely crosslinked, neutral polymer network (e.g., PAAm), then infiltrate with a second conductive polymer network.
- Optimize Filler Aspect Ratio: Switch from spherical conductive particles (high percolation threshold) to high-aspect-ratio nanowires (lower threshold for conductivity, less impact on mechanics).
- Protocol - Dynamic Crosslinking Test: Prepare your hydrogel precursor with a 3:1 molar ratio of covalent to dynamic crosslinker. Polymerize. Perform cyclic compression testing (0-20% strain, 100 cycles) and measure impedance before and after. Elastic recovery >85% and impedance change <15% indicate a good trade-off.
Q2: The electrochemical impedance of my soft electrode degrades rapidly (within days) under physiological conditions.
- Issue: Swelling, hydrolytic degradation of the polymer matrix, or leaching of conductive components.
- Solution:
- Control Swelling Ratio: Increase hydrophobic monomer content (e.g., methyl methacrylate) or use a crosslinker with higher functionality. Target a swelling ratio <1.5 in PBS.
- Apply a Biostable Barrier: Apply an ultra-thin, hydrolytically stable coating (e.g., parylene-C, <1 µm) via chemical vapor deposition. Ensure coating is conformal to avoid cracking.
- Use Degradation-Inert Fillers: Employ conductive materials with inherent stability, like gold nanowires or platinum nanoparticles, instead of degradable metallic fillers (Mg, Zn).
- Protocol - Accelerated Aging Test: Immerse electrode in PBS at 40°C (accelerates hydrolysis). Measure impedance at 1 kHz daily. Use the time for a 50% impedance increase (T50) as a stability metric. Compare T50 for coated vs. uncoated samples.
Q3: My biodegradable conductive composite loses mechanical integrity long before electrical function. How can I synchronize these rates?
- Issue: The degradation kinetics of the polymer matrix and the conductive filler are mismatched.
- Solution:
- Engineer the Filler: For metallic fillers (e.g., Mg, Fe), control degradation rate via alloying or nano-encapsulation in a slower-degrading polymer shell.
- Layer-by-Layer Design: Fabricate a multi-layer construct where the outer layer degrades first, providing initial mechanical support, while an inner conductive core degrades last.
- Crosslink Density Gradient: Create a material with a gradient in crosslink density, so degradation and mechanical loss proceed in a controlled, spatial manner.
- Protocol - Synchronization Assessment:
- Step 1: Perform in vitro degradation in PBS (pH 7.4, 37°C).
- Step 2: At weekly intervals, measure mass loss (gravimetric), Young's modulus (via nanoindentation), and sheet resistance (4-point probe).
- Step 3: Plot normalized values (% of initial) vs. time. The goal is overlapping curves for mass, modulus, and conductivity inverse.
Q4: Cell adhesion on my soft, conductive substrate is poor compared to my standard tissue culture plastic.
- Issue: The surface may be too hydrophobic, or the high conductivity/softness might affect protein adsorption.
- Solution:
- Surface Functionalization: Treat with oxygen plasma for 30-60 seconds, then immediately incubate with an RGD (Arg-Gly-Asp) peptide solution (0.1 mg/mL in PBS) for 2 hours.
- Incorporate Bioactive Moieties: Co-polymerize with monomers containing carboxylate or amine groups (e.g., acrylic acid) to which extracellular matrix proteins (e.g., laminin) can be covalently coupled.
- Verify Surface Charge: Use a Kelvin Probe Force Microscope to ensure surface potential is conducive to protein adsorption.
Table 1: Trade-offs in Conductive Hydrogel Formulations
| Material System | Conductivity (S/cm) | Young's Modulus (kPa) | Degradation Time (weeks) | Key Trade-off Observed |
|---|---|---|---|---|
| PEDOT:PSS / PVA | ~10 | 500-1000 | >52 (Stable) | High conductivity but high modulus, non-degradable |
| PPy / GelMA | ~0.1 | 10-50 | 2-4 | Good softness & biodegradability, low conductivity |
| PANI / Chitosan | ~0.01 | 100-200 | 4-8 | Moderate trade-off on all fronts |
| Au Nanowire / PLGA | ~100 | 1000-5000 | 8-12 | Excellent conductivity, very stiff, slow degradation |
| Mg Particle / PCL | ~1 | 50-150 | 6-10 | Degrades completely, conductivity is transient |
Table 2: Performance Stability Metrics in Simulated Body Fluid
| Electrode Coating | Initial Impedance @1kHz (kΩ) | Impedance after 30 days (kΩ) | % Change | Notes |
|---|---|---|---|---|
| Uncoated PEDOT Hydrogel | 2.5 | 15.8 | +532% | Severe swelling & cracking |
| Parylene-C Coated (500 nm) | 3.1 | 4.7 | +52% | Minor delamination at edges |
| SiO2 Nano-layer (50 nm) | 2.8 | 3.5 | +25% | Best stability, requires adhesion layer |
| PLA Electrospun Mesh | 5.0 | 22.5 | +350% | Degradation causes failure |
Experimental Protocols
Protocol 1: Fabrication of a Dual-Network Conductive Hydrogel
- Objective: Create a hydrogel that balances conductivity (σ > 0.1 S/cm) and softness (E < 50 kPa).
- Materials: See "Scientist's Toolkit" below.
- Method:
- First Network: Dissolve 10% w/v AAm and 0.05% w/v MBAA in DI water. Add 0.1% w/v APS and 0.05% v/v TEMED to initiate free-radical polymerization. Cast and let set for 1 hr at RT.
- Equilibration: Immerse the formed PAAm gel in a solution containing 3% w/v PEDOT:PSS and 0.5% v/v GOPS (crosslinker for PEDOT) for 48 hours.
- Second Network: Remove the swollen gel and heat at 70°C for 2 hours to crosslink the PEDOT:PSS phase, forming the interpenetrating conductive network.
- Characterization: Perform rheology (oscillatory strain sweep) for modulus and 4-point probe measurement for conductivity.
Protocol 2: In Vitro Biodegradation & Function Tracking
- Objective: Monitor mechanical, electrical, and mass loss profiles concurrently.
- Method:
- Prepare standardized samples (e.g., 10mm diameter x 1mm thick discs).
- Immerse in 5 mL of PBS (pH 7.4) with 10 U/mL of enzyme (e.g., esterase for polyesters) at 37°C under gentle agitation.
- At predetermined time points (e.g., days 1, 3, 7, 14, 28): a. Remove sample, blot dry, record mass (M_t). b. Perform electrochemical impedance spectroscopy (EIS) from 1 Hz to 100 kHz. c. Perform uniaxial tensile/compressive test to failure.
- Calculate normalized values: Mt/M0, Et/E0, and (1/Rt)/(1/R0).
Visualizations
Diagram 1: Tissue-Electrode Interface Optimization Workflow
Diagram 2: Key Properties Interdependence at the Interface
The Scientist's Toolkit: Research Reagent Solutions
| Item | Function & Rationale |
|---|---|
| PEDOT:PSS (PH1000) | Industry-standard conductive polymer dispersion. Provides high conductivity but is mechanically brittle and non-degradable. Often requires secondary doping (e.g., with DMSO) or crosslinking. |
| Gelatin Methacryloyl (GelMA) | Photocrosslinkable, biodegradable hydrogel derived from ECM. Provides cell-adhesive motifs and tunable mechanical properties. Low inherent conductivity. |
| Polycaprolactone (PCL) | Biodegradable polyester with a slow degradation rate (~2 years). Used as a matrix for long-term implants or to modulate degradation kinetics in composites. |
| Gold Nanowires (AuNWs) | High-aspect-ratio conductive filler. Achieves conductivity percolation at low loading, minimizing impact on matrix mechanics. Biostable but not biodegradable. |
| (3-Glycidyloxypropyl)trimethoxysilane (GOPS) | A common crosslinker for PEDOT:PSS, improving its stability in aqueous environments and adhesion to substrates. Critical for preventing wash-out. |
| Lipase or Esterase Enzymes | Used in in vitro degradation studies to accelerate and simulate the hydrolytic breakdown of polyester-based materials (e.g., PLGA, PCL) in a controlled manner. |
| RGD Peptide (GRGDS) | Cell-adhesive ligand. Conjugated to material surfaces to enhance integrin-mediated cell attachment and spreading, overcoming bio-inertness of some synthetic polymers. |
| Parylene-C | A vapor-deposited, biostable, conformal polymer coating. Used as an ultra-thin barrier to prevent water ingress and ionic leakage, enhancing device stability. |
Computational Modeling (Finite Element Analysis) for Predictive Interface Design
Troubleshooting Guides & FAQs
Q1: My FEA model of a neural electrode shows unrealistic stress concentrations (>500 MPa) at the electrode shank, even under minimal displacement. What could be wrong? A: This typically indicates an issue with material property definition or contact modeling. Ensure that:
- The Young's modulus for neural tissue is defined in the correct range (1-10 kPa for soft tissue, not GPa).
- A proper, bonded contact is defined at the tissue-electrode interface if modeling an implanted state. Unconstrained nodes can lead to singularities.
- The mesh is sufficiently refined at the interface but uses a gradual transition to avoid sharp element distortions.
Q2: How do I accurately model the viscoelastic and time-dependent relaxation of brain tissue in a static FEA simulation? A: For long-term mismatch studies, a static approximation is insufficient. You must:
- Use a Viscoelastic material model (e.g., Prony series) in your FEA software. Obtain parameters (G∞, Gᵢ, τᵢ) from stress-relaxation test literature.
- Run a Time-domain analysis over hours/days. A simplified protocol: Apply displacement boundary condition simulating implantation over 60 seconds, then hold displacement constant and solve for stress decay over 10,000 seconds.
- Key Parameters Table:
| Parameter | Typical Value (Brain Tissue) | FEA Model Input | Source |
|---|---|---|---|
| Instantaneous Shear Modulus (G₀) | 1.5 - 3 kPa | Prony series gᵢ | (Gefen et al., 2021) |
| Long-term Shear Modulus (G∞) | 0.3 - 0.7 kPa | Prony series g∞ | (Gefen et al., 2021) |
| Decay Constant (τ₁) | 100 - 500 s | Prony series τᵢ | (Budday et al., 2020) |
Q3: My model predicts minimal interface strain, but my in vivo experiments show significant glial scarring. What factors am I missing? A: The mechanical mismatch is likely only the initial trigger. Your model needs to incorporate the biological response cascade. Model the chronic phase by:
- Using your initial mechanical strain/stress output (e.g., strain energy density > 0.5 kPa) as a trigger zone.
- Coupling this to a reactive zone in a subsequent model where material properties are degraded (reduced modulus) or a softer encapsulating tissue layer (1-2 kPa, thicker over time) is added around the electrode. This simulates scar formation.
Q4: Which boundary conditions are most realistic for modeling a cortical surface electrode array? A: Avoid over-constraining the model. A recommended setup is:
- Fix the bottom surface of the brain tissue block in all degrees of freedom (this simulates connection to deeper structures).
- Apply a displacement/force on the electrode representing the pressure from a cranial window or dural sealant, typically 0.5-2 N distributed load.
- Leave the sides and top of the tissue block free to expand/contract, unless specifically modeling a tightly fitting craniotomy.
Q5: How can I validate my FEA model of interface stress? A: Direct in vivo validation is challenging. Use a tiered approach:
- Benchmark Validation: Replicate a classic contact mechanics problem (e.g., Hertzian contact) with your setup to verify solver and mesh accuracy.
- Ex Vivo Validation: Perform indentation tests on brain tissue phantoms with known mechanical properties using your electrode geometry. Use Digital Image Correlation (DIC) to capture surface strain fields and compare to model predictions.
- Indirect In Vivo Correlation: Correlate high-strain zones in your model with post-mortem histology sections from animal studies showing inflammation or cell death.
Experimental Protocols Cited
Protocol 1: Material Property Characterization for Viscoelastic Brain Tissue Modeling
Purpose: To obtain parameters for the Prony series viscoelastic model in FEA. Steps:
- Prepare cylindrical samples (e.g., 8mm diameter x 4mm height) from fresh porcine or rodent brain tissue (kept in artificial cerebrospinal fluid).
- Using a rheometer with parallel plate geometry, perform a stress-relaxation test.
- Apply a 5-10% compressive strain instantaneously (<0.1s) and hold for 1800s while recording the decaying shear stress.
- Fit the resulting stress-time data to a Prony series model (σ(t) = γ₀ * [G∞ + Σ Gᵢ exp(-t/τᵢ)]) using nonlinear regression software to extract G∞, Gᵢ, and τᵢ.
Protocol 2: Ex Vivo Model Validation Using Digital Image Correlation (DIC)
Purpose: To validate FEA-predicted strain fields at the electrode-tissue interface. Steps:
- Create a transparent brain tissue phantom with a matched viscoelastic modulus (~3 kPa) and speckle pattern on one surface.
- Mount the phantom and a microelectrode array on a micro-positioning stage under a stereo DIC camera system.
- Program the stage to implant the electrode at 1 µm/s to a depth of 1.5mm.
- The DIC system captures images at 10 fps. Software calculates full-field 3D displacement and strain maps.
- Replicate the exact geometry, material properties, and boundary conditions in your FEA model.
- Quantitatively compare the strain fields (εxx, εyy, ε_vM) from DIC and FEA at the point of maximum insertion.
Diagrams
The Scientist's Toolkit: Research Reagent & Material Solutions
| Item | Function in Interface Research | Example/Details |
|---|---|---|
| Silicone Elastomers (PDMS) | Tissue Mimicking Phantom: Used to create substrates or phantoms with tunable Young's modulus (1-3000 kPa) for ex vivo FEA validation experiments. | Sylgard 527, Sylgard 184 (Dow). Mix ratios control stiffness. |
| Fibrin/Hyaluronic Acid Hydrogels | Biomimetic Tissue Model: Provides a soft (0.1-5 kPa), bioactive 3D matrix for cell-embedded testing of electrode interfaces, modeling the brain extracellular matrix. | Fibrinogen from bovine plasma; HyStem-HP kits. |
| Conductive Polymer Coatings | Interface Modifier: Coated on electrodes to lower impedance and improve charge transfer. Their mechanical properties (softer than metals) can be modeled in FEA. | PEDOT:PSS, PEDOT:CNT composites. |
| Fluorescent Microspheres | DIC Validation Markers: Mixed into tissue phantoms to create the speckle pattern necessary for Digital Image Correlation strain mapping. | Polyethylene microspheres, 50-100 µm diameter. |
| Prony Series Parameters (Software) | Viscoelastic Modeling Input: Essential numerical coefficients for accurately simulating time-dependent tissue relaxation in FEA solvers. | Obtained from curve-fitting software (e.g., MATLAB fit) to rheology data. |
| Multi-Electrode Arrays (MEAs) | Experimental Validation Substrate: The physical device being modeled. In vitro MEAs allow parallel electrical testing of interface designs predicted by FEA. | Commercial (Multi Channel Systems) or custom-fabricated arrays. |
Benchmarking Success: Validating and Comparing Interface Strategies
Technical Support & Troubleshooting Center
FAQ 1: My IHC staining intensity (signal) is fading over multiple imaging sessions, degrading my SNR. What could be the cause and how do I fix it?
- Answer: Photobleaching of fluorophores or chromogen fading is a common culprit, especially in longitudinal studies relevant to tissue-electrode interface research where the same sample may be imaged repeatedly. To mitigate this:
- Use Antifade Mounting Media: For fluorescence IHC, switch to commercial antifade mounting media (e.g., containing p-phenylenediamine or Mowiol).
- Limit Light Exposure: Minimize sample exposure to light during preparation and use dimmest possible light during initial focusing. Use automated microscope stage positioning to image specific fields only once.
- Store Samples in Darkness: Keep stained slides at 4°C in complete darkness between imaging sessions.
- Consider More Stable Chromogens: For chromogenic IHC (DAB), consider using a stabilizing enhancement solution to prevent fading.
FAQ 2: My background (noise) is inconsistently high across tissue sections, especially near the edges of implanted electrode tracts. How can I standardize this?
- Answer: Inconsistent background often stems from non-specific antibody binding or uneven tissue processing. This is critical in mechanical mismatch studies where tissue damage/repair zones create variability.
- Optimize Blocking: Ensure thorough blocking with serum from the same species as the secondary antibody, or use commercial protein block solutions. For challenging tissues, extend blocking time or try casein-based blocks.
- Optimize Antibody Titration: Re-titrate your primary and secondary antibodies on positive control tissue to find the highest dilution that gives a strong specific signal with minimal background.
- Uniform Washing: Implement stringent and consistent washing steps (e.g., 3 x 5 min in PBS-Tween) with agitation. Use a slide holder that ensures even fluid flow over the tissue.
- Control for Edge Effects: When analyzing near electrode tracts, define a standardized "region of interest" distance from the edge and apply the same background subtraction algorithm uniformly.
FAQ 3: How do I calculate SNR specifically for my IHC images, and what tools can I use?
- Answer: SNR quantifies the specificity of your stain. A basic calculation is: SNR = (Mean Signal Intensity of Target Region - Mean Background Intensity) / Standard Deviation of Background Intensity.
- Procedure:
- Using image analysis software (e.g., ImageJ, QuPath), select a region positive for your stain (Signal Region).
- Select a region within the same tissue that lacks the target antigen (Background Region), avoiding artifacts, folds, or edge damage from implants.
- Measure the mean pixel intensity for both regions and the standard deviation for the background region.
- Apply the formula. Track this metric over time or across experimental groups.
- Tools: Most imaging software (e.g., ImageJ's "Measure" tool, QuPath's "Cell Detection" with intensity features) can automate these measurements across multiple images.
- Procedure:
FAQ 4: For validating neural interface biocompatibility, what are the best positive/negative controls for IHC to ensure SNR is meaningful?
- Answer: Robust controls are essential to attribute SNR changes to the biological response to the implant, not technique variance.
- Positive Control Tissue: A tissue known to express your target antigen (e.g., normal brain region for a neuronal marker).
- Negative Methodological Controls:
- Primary Antibody Omission: Replace primary antibody with buffer or isotype control. Any remaining signal is noise.
- Secondary Antibody Only: Apply only the secondary antibody. Controls for non-specific secondary binding.
- Biological Controls: Tissue from a sham-operated animal (surgery without implant) and an unimplanted, naive animal. This helps isolate the signal specific to the mechanical mismatch and foreign body response.
Troubleshooting Guide: Declining SNR in Longitudinal IHC Studies of Implant Sites
| Symptom | Possible Cause | Recommended Action |
|---|---|---|
| Signal decreases over repeated imaging. | Photobleaching of fluorophore. | Use antifade mountaint, reduce light exposure, store slides in dark. |
| General background increases over time. | Degradation of mounting media or tissue, leading to non-specific binding. | Re-mount slides with fresh media; ensure proper sealing of coverslips. |
| High, patchy background near implant site. | Residual blood, fibrin, or damaged tissue proteins causing non-specific binding. | Increase washing steps post-retrieval; use enzymatic antigen retrieval carefully. |
| Signal is lost upon re-staining. | Antigen degradation or epitope masking over storage time. | Store unstained sections at -80°C; optimize antigen retrieval for archived tissue. |
| Inconsistent SNR between slides. | Variations in antibody incubation time, temperature, or washing. | Implement a standardized protocol with precise timers and calibrated equipment. |
Key Experimental Protocols
Protocol 1: Quantitative IHC SNR Measurement for Tissue-Implant Interface
- Tissue Preparation: Perfuse-fix animals with implanted electrodes with 4% PFA. Extract brain, post-fix for 24h, cryoprotect in 30% sucrose.
- Sectioning: Cut coronal sections (30µm thickness) containing the electrode tract using a cryostat.
- Immunohistochemistry: Perform free-floating IHC. Block with 5% normal serum + 0.3% Triton X-100 for 2h. Incubate with primary antibody (e.g., anti-GFAP for astrocytes, anti-Iba1 for microglia) diluted in blocking solution for 48h at 4°C.
- Washing & Detection: Wash 6x over 3h. Incubate with HRP-conjugated secondary for 2h at RT. Develop with DAB chromogen for a strictly timed duration (e.g., 90 seconds) across all slides.
- Imaging: Capture brightfield images at 20x magnification using a microscope with a calibrated light source. Image the same 3-5 fields adjacent to the electrode tract at each time point (e.g., 1, 4, 12 weeks post-implant).
- SNR Analysis: In ImageJ, outline the glial scar (signal) and an adjacent, non-reactive parenchymal area (background). Apply the SNR formula. Record values for statistical comparison across time points and implant material groups.
Protocol 2: Validating Antibody Specificity for SNR Reliability
- Western Blot: Run a protein lysate from both naive and implant-interface tissue. The antibody should detect a single band at the expected molecular weight.
- Peptide Blocking: Pre-incubate the primary antibody with a 5-10 fold molar excess of the immunizing peptide for 1h at RT before applying to the tissue. The signal should be drastically reduced or eliminated compared to the non-blocked control.
- Genetic Controls: If available, use tissue from a knockout animal for the target protein. This is the gold standard control for antibody specificity.
Data Presentation
Table 1: Example SNR Data from a Simulated Study on Implant Material Biocompatibility Comparison of GFAP IHC Signal-to-Noise Ratio at the Tissue-Electrode Interface Over 12 Weeks. (Higher SNR indicates more specific detection of reactive astrocytes).
| Implant Material | Time Point (Weeks Post-Implant) | Mean Signal Intensity (Target) | Mean Background Intensity | SD of Background | Calculated SNR |
|---|---|---|---|---|---|
| Soft Hydrogel | 1 | 185.2 | 45.3 | 8.1 | 17.3 |
| 4 | 168.7 | 48.1 | 8.9 | 13.5 | |
| 12 | 155.5 | 46.9 | 7.8 | 13.9 | |
| Stiff Silicon | 1 | 192.5 | 44.8 | 8.5 | 17.4 |
| 4 | 210.3 | 47.2 | 9.2 | 17.7 | |
| 12 | 250.1 | 52.4 | 10.5 | 18.8 | |
| Sham Control | 1 | 102.1 | 42.5 | 7.2 | 8.3 |
| Naive Tissue | N/A | 98.8 | 41.9 | 6.9 | 8.2 |
The Scientist's Toolkit: Key Research Reagent Solutions
| Item | Function in IHC for Interface Research |
|---|---|
| Phosphate-Buffered Saline (PBS) with Tween-20 (PBS-T) | Standard washing buffer; Tween-20 (a detergent) reduces non-specific antibody binding, lowering background noise. |
| Normal Serum (e.g., Goat, Donkey) | Used for blocking; serum proteins occupy non-specific binding sites on tissue, crucial for high-SNR imaging of damaged implant sites. |
| Antigen Retrieval Buffers (Citrate, EDTA) | Unmasks epitopes hidden by formalin fixation, essential for consistent signal generation in archived interface samples. |
| Fluorophore/Antifade Mounting Media (e.g., ProLong Gold) | Preserves fluorescence signal and minimizes photobleaching, enabling reliable longitudinal SNR measurement. |
| Polymer-Based HRP Secondary Antibodies | Offer higher sensitivity and lower background compared to traditional secondaries, improving SNR for low-abundance targets. |
| DAB Chromogen Kit with Enhancer | Produces a stable, permanent brown precipitate. Timed development is critical for quantitative, comparable signal intensity. |
Visualizations
Workflow for IHC SNR Validation
SNR Components in IHC
Technical Support Center
Troubleshooting Guides & FAQs
Q1: During chronic implantation with our rigid silicon Utah array, we observe a progressive decline in single-unit yield over weeks. What are the likely causes and potential solutions?
A1: This is a classic sign of the foreign body response (FBR) exacerbated by mechanical mismatch. Rigid arrays (>1 GPa modulus) cause sustained micromotion damage against brain tissue (~1-10 kPa). This triggers chronic inflammation, glial scarring (astrogliosis), and neuronal displacement.
- Troubleshooting Steps:
- Histological Validation: Sacrifice subject and perform immunohistochemistry (IHC) for GFAP (astrocytes) and Iba1 (microglia) around the implant site. Compare with early time points.
- Mechanical Stabilization: Ensure the skull-anchored dental cement cap is secure and the connector is strain-relieved. Consider more advanced skull-fitting pedestals.
- Pharmacological Intervention (Experimental): Coating arrays with anti-inflammatory drugs (e.g., dexamethasone) or using systemic immunosuppressants per IACUC protocol can mitigate FBR short-term.
- Protocol Adjustment: Consider shortening the experimental timeline or moving to an ultra-flexible probe for chronic studies.
Q2: Our new Neuropixel 2.0 probes are buckling during insertion into the cortex, preventing us from reaching target depth. How can we successfully implant these ultra-flexible probes?
A2: Neuropixel probes, with their ultra-flexible shanks (<10 µm thick), require a rigid temporary support ("shuttle") for insertion. Buckling indicates an issue with the shuttle system or insertion technique.
- Troubleshooting Steps:
- Check Shuttle Alignment: Ensure the biodegradable polymer shuttle (e.g., polyethylene glycol, sugar) or reusable rigid inserter is perfectly aligned and bonded along the full length of the probe shank.
- Verify Insertion Speed: Use a calibrated microdrive. Insertion should be smooth and steady at an optimal speed (typically 100-500 µm/s). Too slow can cause buckling, too fast can cause tissue dimpling.
- Assess Dura Piercing: The dura is a significant barrier. Use a separate, rigid dura puncture tool first to create a clean opening, then insert the shuttle-assisted probe through the same opening.
- Shuttle Dissolution: If using a dissolving shuttle, verify the saline or CSF flow rate at the site is sufficient to dissolve it within the expected timeframe (e.g., 30-60 seconds).
Q3: We are getting excessive electrical noise on recordings from both array types. What is a systematic approach to diagnose the source?
A3:
- Step 1: Isolate the Source. Disconnect the headstage/amplifier from the animal. If noise persists, it's in the acquisition system or cabling. If it stops, the source is biological or at the implant interface.
- Step 2: Check Ground/Reference. A poor ground connection is the most common cause. Ensure the skull screw ground is securely connected to the system ground and has good conductive gel/paste contact with the skull. For Neuropixel, verify the internal reference is selected correctly in the software.
- Step 3: Inspect for Environmental Noise. Turn off nearby equipment (motors, lights, power supplies). Ensure the recording Faraday cage is properly grounded.
- Step 4: Probe-Specific Checks.
- Rigid Array: Check for cracked or delaminated insulation. Look for fluid in the connector. Impedance test all channels; a short or open circuit indicates damage.
- Neuropixel: Ensure the probe PCB is clean and dry. Check that the flex cable is not damaged and is firmly seated in the headstage.
Q4: How do we quantitatively compare the tissue response between the two implant types in our thesis research?
A4: A standardized histology and image analysis protocol is required.
- Protocol: Chronic Implant & Histology for Mechanical Mismatch Assessment
- Implantation: Implant devices (N>=5 per group) in age/strain-matched subjects using standard surgical protocols.
- Perfusion & Sectioning: At terminal time points (e.g., 1 day, 1 week, 4 weeks), transcardially perfuse with 4% PFA. Extract brain, section coronally (40 µm) through the implant tract using a cryostat or vibratome.
- Immunohistochemistry (IHC): Stain free-floating sections for:
- Neurons: NeuN (to quantify neuronal density/distance from tract).
- Astrocytes: GFAP (to assess astrogliosis extent and intensity).
- Microglia: Iba1 (to assess activation state, morphology).
- Imaging & Quantification: Use confocal microscopy. Quantify:
- Neuronal density in concentric bins (e.g., 0-50µm, 50-100µm, 100-200µm) from the tract edge.
- GFAP+ & Iba1+ area fraction within a 500µm radius.
- Thickness of the glial scar boundary.
Table 1: Material & Mechanical Properties Comparison
| Property | Rigid Silicon Microelectrode Array (e.g., Utah Array) | Ultra-Flexible Probe (e.g., Neuropixel 2.0) |
|---|---|---|
| Typical Material | Silicon, Borosilicate Glass | Polyimide, Parylene C, Thin-film Silicon |
| Young's Modulus | ~150-170 GPa (Silicon) | ~2-5 GPa (Polyimide), <1 GPa in composite |
| Bending Stiffness | Very High | Extremely Low (comparable to brain tissue) |
| Typical Thickness | 50-500 µm | 10-24 µm (shank) |
| Tissue Damage Potential | High (chronic micromotion) | Low (compliance reduces shear forces) |
| Primary Insertion Method | Direct, high-speed insertion | Dissolvable shuttle or rigid temporary carrier |
Table 2: Electrophysiological Performance Metrics (Typical Values)
| Metric | Rigid Silicon Array | Ultra-Flexible Neuropixel Probe |
|---|---|---|
| Channel Count | 64 - 256 | 384 - 960+ (Neuropixel 2.0: 384 active sites) |
| Single-Unit Yield (Day 1) | Moderate-High | Very High |
| Single-Unit Yield (Chronic, >4 wks) | Low-Moderate (steep decline) | High (stable for months) |
| Signal-to-Noise Ratio | High | High |
| Spatial Resolution | Lower (pitch ~400µm) | Very High (pitch ~20µm for dense sites) |
| Recording Depth | Fixed (cortical) | Adjustable (deep structures possible) |
Experimental Protocol Detail
Protocol: Simultaneous Electrophysiology & Local Field Potential (LFP) Recording for Interface Assessment
Objective: To record neural activity while monitoring the inflammatory state via LFP biomarkers (e.g., gamma power shifts) related to mechanical mismatch.
Materials: See "Scientist's Toolkit" below. Procedure:
- Anesthetize and prepare subject according to approved IACUC protocol.
- Perform craniotomy and dura removal at target coordinates.
- For Rigid Array: Mount in stereotaxic inserter and insert to cortical layer V at 1 mm/s.
- For Neuropixel: Load onto approved insertion rig with shuttle, align, and insert to target depth.
- Secure probe/array with dental cement, close surgical site.
- Connect to amplifier/headstage. In acquisition software (e.g., SpikeGLX, Open Ephys):
- Set appropriate reference (skull screw for array, internal for Neuropixel).
- Configure filters: High-pass at 300 Hz for spikes, band-pass 0.1-300 Hz for LFP.
- Record neural activity in vivo during baseline and controlled stimuli.
- Analysis: Offline spike sorting (Kilosort, MountainSort) to extract single-unit metrics (firing rate, waveform). Compute LFP power spectral density (PSD) and track gamma-band (30-80 Hz) power over time as a potential indicator of glial activation near the interface.
Visualization: Signaling Pathways & Workflows
Title: Foreign Body Response Pathway from Mechanical Mismatch
Title: Experimental Workflow for Comparative Interface Study
The Scientist's Toolkit: Key Research Reagent Solutions
| Item | Function/Benefit | Example/Notes |
|---|---|---|
| Parylene C Coating | Biostable, conformal insulation for flexible probes. Improves biocompatibility and electrical isolation. | Vapor deposition coating service required. Key for Neuropixel durability. |
| Dexamethasone-Eluting Coatings | Localized anti-inflammatory release to suppress acute FBR. Can extend functional recording period. | Often used on rigid arrays. Release kinetics are critical. |
| PEG-based Dissolvable Shuttles | Temporary rigid support for ultra-flexible probe insertion. Dissolves in situ with minimal residue. | Crucial for successful implantation of polymer probes. |
| IHC Antibodies: GFAP, Iba1, NeuN | Standard markers for quantifying glial scarring, microglial activation, and neuronal survival post-implant. | Use validated antibodies for your species (e.g., Rat, Mouse). |
| Conductive Adhesive/Gel (e.g., Carbon Paste) | Ensures stable electrical connection for skull screw grounds and array connectors. Reduces noise. | Must be non-toxic and stable long-term. |
| Rigid Silicon Insertion Shuttles | Reusable, fine tungsten or steel rods used to insert polymer probes. Alternative to dissolving shuttles. | Requires precise handling and cleaning. |
| Advanced Neural Data Acq. Software (SpikeGLX) | Acquires high-channel-count data from modern probes like Neuropixel. Synchronizes with stimulus. | Open-source, supports multi-platform recording. |
| Offline Spike Sorter (Kilosort) | Algorithms to extract single-unit activity from dense, high-channel recordings. Essential for yield analysis. | Kilosort 2.5/3.0 standard for Neuropixel data. |
Technical Support Center: Troubleshooting & FAQs
FAQ 1: How do I mitigate persistent gliosis and signal degradation around my Utah Array over time? Answer: Chronic gliosis is a primary failure mode. Implement a prophylactic protocol of dexamethasone-eluting silicone parylene-C coatings. A recommended experimental protocol is: (1) Prepare a 1 mg/mL dexamethasone solution in dimethyl sulfoxide (DMSO). (2) Apply via pulsed spray coating onto the array shank, followed by a 5 µm parylene-C gas-phase deposition. (3) Sterilize using low-temperature hydrogen peroxide plasma (not autoclave). This protocol has shown a 40% reduction in glial fibrillary acidic protein (GFAP) marker density at 12 weeks post-implantation in murine models compared to uncoated controls.
FAQ 2: What are the recommended steps for troubleshooting intermittent channel failure on a NeuroPort system during acute recordings? Answer: Intermittency often stems from mechanical disruption at the cable-headstage junction or fluid ingress. Follow this isolation protocol:
- Isolate the Fault: Use the NeuroPort "Impedance Check" utility. Note any channels with impedance > 2 MΩ at 1 kHz (open circuit) or < 50 kΩ (short).
- Inspect Physically: Under a microscope, examine the patient cable connector for bent pins or saline residue. Clean with isopropyl alcohol and compressed air if contaminated.
- Test Headstage Swap: Replace the headstage with a known-good unit. If the fault moves, the headstage is faulty.
- Bypass the Cable: If available, connect the array directly to the headstage using a sterile adapter. If signal returns, the patient cable is compromised.
- Check Ground/Reference: Ensure the animal/system reference (skull screw, pedestal) has a secure, low-impedance connection. A floating reference causes widespread noise.
FAQ 3: My Stentrode exhibits lower-than-expected single-unit yield. What optimization strategies are valid? Answer: Stentrode yield is highly dependent on stent apposition against the vessel wall. Optimization is pre-implantation:
- Pre-op Imaging: Use high-resolution cerebral angiography to measure the target vessel diameter. Select a stent diameter with a 1:1.1 stent-to-vessel ratio to ensure secure apposition without over-dilation.
- Post-op Confirmation: Confirm deployment with flat-panel CT. Incomplete apposition >0.5 mm significantly reduces viable electrode contacts.
- Signal Processing: Apply a spatial filter (e.g., Common Average Reference) to mitigate ECG and movement artifacts. Use a high-pass filter > 300 Hz to isolate putative single-unit activity from local field potentials.
FAQ 4: How can I quantify the mechanical mismatch at the implant-tissue interface for these devices? Answer: A standard protocol involves concurrent in vivo imaging and micromechanical modeling:
- Two-Photon Microscopy: In a transgenic Thy1-GFP-M mouse model, image the peri-implant region at 0, 2, 4, and 8 weeks post-insertion (for Utah/NeuroPort) or deployment (Stentrode).
- Strain Calculation: Use Digital Image Correlation (DIC) software on sequential images to compute displacement vectors of neural structures relative to the implant.
- Finite Element Modeling (FEM): Build a model in COMSOL Multiphysics using the device's known Young's Modulus (see table below) and brain tissue properties (modeled as a viscoelastic material). Input displacement data to calculate shear strain.
- Correlate with Histology: Post-perfusion, stain for neuronal nuclei (NeuN) and GFAP. Correlate regions of high calculated strain (>15%) with neuronal loss and glial scarring.
Table 1: Key Mechanical & Performance Properties
| Interface | Young's Modulus | Typical Implantation Depth | Typical Single-Unit Yield (Week 12) | Chronic Recording Duration (Typical) |
|---|---|---|---|---|
| Utah Array | ~100-150 GPa (Silicon) | 1.0-1.5 mm (cortex) | 40-60% of channels | 6 months - 5+ years |
| NeuroPort | ~100-150 GPa (Silicon) | 1.0-2.0 mm (cortex) | 50-70% of channels | 1-3 years (acute use common) |
| Stentrode | ~1-3 GPa (Nitinol) | Endovascular (motor cortex) | 5-20 active units per session | 12+ months (ongoing trials) |
Table 2: Common Failure Modes & Mitigations
| Failure Mode | Utah Array | NeuroPort | Stentrode | Primary Mitigation Strategy |
|---|---|---|---|---|
| Gliosis/Fibrosis | High | High | Low-Medium | Drug-eluting coatings, softer materials |
| Material Degradation | Low (Si) | Low (Si) | Medium (Electrode dissolution) | Iridium oxide coatings, impedance monitoring |
| Mechanical Drift | High | High | Very Low | Skull-anchored pedestals, dermal locks |
| Vascular Occlusion | N/A | N/A | Medium | Antiplatelet therapy, precision sizing |
Experimental Protocols
Protocol 1: In Vivo Electrode-Tissue Strain Mapping Objective: Quantify micromotion-induced strain. Materials: Utah Array, two-photon microscope, transgenic mouse, stereotaxic frame. Steps:
- Implant array using standard surgical protocol.
- At time zero, acquire a high-resolution z-stack image stack of the implant region.
- Apply a controlled, 100 µm lateral displacement to the array using a micromanipulator.
- Acquire a second image stack.
- Use DIC software (e.g., Ncorr) to calculate the full-field strain tensor between pre- and post-displacement images.
- Correlate strain hotspots with immunohistochemical markers from perfused tissue.
Protocol 2: Chronic Impedance and Signal Tracking for Failure Prediction Objective: Proactively identify failing interfaces. Materials: NeuroPort system, non-human primate model, daily recording sessions. Steps:
- Record daily electrode impedance at 1 kHz for all channels.
- Compute daily signal-to-noise ratio (SNR) and number of detectable single units per channel.
- Plot trends over time. A concurrent rise in impedance (>30% baseline) and drop in SNR (>6 dB) indicates impending channel failure due to encapsulation.
- Validate with scheduled perfusions and histology at pre-defined time points.
Diagrams
Title: Tissue Response Cascade to Mechanical Mismatch
Title: Stentrode Deployment & Signal Processing Workflow
The Scientist's Toolkit: Key Research Reagent Solutions
Table 3: Essential Materials for Interface Evaluation Studies
| Item | Function | Example Product/Catalog # |
|---|---|---|
| Dexamethasone | Anti-inflammatory for gliosis mitigation. Used in eluting coatings. | Sigma-Aldrich, D4902 |
| Iridium Oxide Sputter Target | Creates low-impedance, high-charge-capacity electrode coatings. | Kurt J. Lesker, 99.9% purity |
| Parylene-C Dimer | Provides conformal, biocompatible insulation for electrodes. | Specialty Coating Systems, Parylene C |
| Anti-GFAP Primary Antibody | Immunohistochemical marker for reactive astrocytes (gliosis). | Abcam, ab7260 |
| Anti-NeuN Primary Antibody | Immunohistochemical marker for neuronal nuclei (neuronal health). | MilliporeSigma, MAB377 |
| FluoroMyelin Red Stain | Labels myelin for assessing tissue damage/deformation. | Invitrogen, F34652 |
| Artificial Cerebrospinal Fluid (aCSF) | Ionic medium for in vitro electrochemical testing of interfaces. | Tocris Bioscience, 3525 |
| Matrigel Matrix | Simulates soft brain tissue for in vitro mechanical mismatch models. | Corning, 356237 |
Troubleshooting Guides & FAQs
Q1: After 4-6 weeks of implantation, our chronic neural recording electrodes show a significant decline in signal-to-noise ratio (SNR) and single-unit yield. What are the primary causes and potential solutions?
A: This is characteristic of the foreign body response (FBR). The primary cause is the encapsulation of the electrode by a dense glial scar (astrogliosis) and microglia, increasing impedance and physical distance from neurons. Mechanical mismatch-induced micromotion exacerbates this.
- Solution A (Material): Consider switching to or coating with softer conductive polymers (e.g., PEDOT:PSS) or low-modulus composites to better match brain tissue.
- Solution B (Pharmacological): Local, sustained delivery of anti-inflammatory agents (e.g., dexamethasone) from a coating or reservoir can transiently suppress FBR.
- Solution C (Design): Use smaller, more flexible electrode shanks (e.g., polymer-based ultrafine arrays) to reduce strain on tissue.
Q2: We observe fibrosis and thickening of the capsule around subcutaneously implanted biosensors (e.g., glucose sensors) after 2-3 months, leading to signal drift. How can this be mitigated?
A: Fibrous encapsulation is driven by the body's attempt to isolate the foreign object. The key is to minimize the initial inflammatory trigger.
- Solution A (Surface): Use biocompatible, bio-inert coatings like zwitterionic hydrogels or chemically modified surfaces (e.g., with phosphorylcholine) that resist protein fouling.
- Solution B (Architecture): Implement a porous or membrane architecture around the sensor that promotes vascularization near the sensing surface, improving analyte transport.
Q3: Our implanted piezoelectric devices for energy harvesting show reduced voltage output over 8 weeks, suspected due to biofouling on the active surface. How do we maintain performance?
A: Biofouling creates a dampening layer, reducing mechanical coupling and efficiency.
- Solution A (Encapsulation): Employ a thin, flexible, and hermetic biocompatible barrier (e.g., parylene C, silicon nitride) that transmits the relevant mechanical strain while isolating the active material.
- Solution B (Active Cleaning): For certain applications, integrate a low-energy surface activation mechanism (e.g., periodic mild heating) to deter protein adhesion.
Q4: How do we reliably track and quantify the tissue response and device performance longitudinally in the same animal?
A: This requires a multimodal longitudinal assessment protocol.
- Method: Correlate frequent (in vivo) functional readouts (e.g., electrochemical impedance spectroscopy, neural signal quality) with periodic, terminal (ex vivo) histological analyses (immunostaining for neurons, astrocytes, microglia, collagen) at predetermined time points (e.g., 2, 4, 8, 12 weeks) across cohorts.
Key Experimental Protocol: Longitudinal Assessment of Implanted Electrodes
Objective: To quantitatively evaluate the chronic performance and tissue integration of a neural electrode array over a 12-week period.
Materials: Polyimide-based µECoG array, stereotaxic frame, surgical tools, wireless impedance telemeter, perfusion setup, histology reagents (4% PFA, cryostat, antibodies: GFAP, Iba1, NeuN, Collagen IV).
Procedure:
- Implantation: Aseptically implant the electrode array into the target region (e.g., rat motor cortex) under anesthesia.
- Baseline Measurement (Week 0): Record electrochemical impedance spectrum (1 Hz-1 MHz) and neural recording baseline (SNR, unit count) post-recovery.
- Weekly In Vivo Monitoring: At weekly intervals, measure impedance at 1 kHz and record spontaneous neural activity under light anesthesia.
- Cohort Termination & Histology: At pre-defined endpoints (Weeks 2, 4, 8, 12), transcardially perfuse the animal. Extract, section, and stain the brain for histological markers.
- Analysis: Correlate impedance trends with histomorphometric analysis (glial scar thickness, neuronal density within 150 µm of interface).
Data Presentation
Table 1: Longitudinal Performance Metrics of Implanted Neural Electrodes
| Time Point (Weeks) | Avg. 1 kHz Impedance (kΩ, ±SD) | Single-Unit Yield (±SD) | Mean SNR (dB, ±SD) | Histological Glial Scar Thickness (µm, ±SD) |
|---|---|---|---|---|
| 0 (Baseline) | 125 ± 15 | 12.5 ± 2.1 | 18.5 ± 1.8 | N/A |
| 2 | 450 ± 85 | 8.2 ± 1.8 | 15.2 ± 2.1 | 45.2 ± 10.5 |
| 4 | 680 ± 120 | 4.5 ± 1.5 | 12.1 ± 1.9 | 82.7 ± 15.3 |
| 8 | 950 ± 210 | 2.1 ± 1.2 | 9.8 ± 2.5 | 110.5 ± 20.1 |
| 12 | 1150 ± 300 | 0.5 ± 0.7 | 6.5 ± 3.0 | 135.8 ± 25.4 |
Table 2: Impact of Soft Coating on Chronic Impedance
| Coating Type | Modulus (MPa) | Impedance at 12 Weeks (kΩ, ±SD) | Unit Yield at 12 Weeks (±SD) |
|---|---|---|---|
| Uncoated (Silicon) | ~150,000 | 1150 ± 300 | 0.5 ± 0.7 |
| Parylene C | ~3,000 | 820 ± 180 | 1.2 ± 0.9 |
| PEDOT:PSS Hydrogel | ~1 - 10 | 350 ± 75 | 5.8 ± 1.8 |
| Silk Fibroin | ~5 - 10 | 420 ± 90 | 4.5 ± 1.6 |
Visualizations
Title: Foreign Body Response Cascade & Intervention Points
Title: Longitudinal Implant Evaluation Protocol
The Scientist's Toolkit: Research Reagent Solutions
| Item | Function/Application |
|---|---|
| PEDOT:PSS Conductive Polymer | A soft, biocompatible coating for electrodes that lowers impedance, improves charge injection, and reduces mechanical mismatch. |
| Dexamethasone-Eluting Coatings | Provides localized, sustained release of an anti-inflammatory corticosteroid to suppress the initial foreign body response. |
| Zwitterionic Hydrogel (e.g., PMPC) | Creates a super-hydrophilic, bio-inert surface layer that highly resists protein adsorption and cell adhesion, reducing fouling. |
| Silk Fibroin | A biocompatible, tunable-strength protein substrate for creating flexible, conformable electronics that integrate with tissue. |
| Parylene C Conformal Coating | A USP Class VI biocompatible polymer used for thin, flexible, and uniform hermetic encapsulation of devices. |
| Anti-GFAP & Anti-Iba1 Antibodies | Key immunohistochemistry reagents for labeling reactive astrocytes and activated microglia, respectively, to quantify glial scarring. |
| Electrochemical Impedance Spectrometer | Instrument for non-destructive, in vivo tracking of the electrode-tissue interface health and stability over time. |
| Flexible Polyimide/SU-8 Substrates | Polymer materials used as the structural backbone for ultrafine, low-modulus electrode arrays that minimize tissue strain. |
The Role of Accelerated Aging Tests and ISO Standard Compliance
Troubleshooting Guides & FAQs
Q1: During an accelerated aging test of our novel hydrogel-coated electrode, we observed unexpected delamination after only 500 hours at 60°C, far below the target 1000 hours. What could be the cause?
A: This premature failure often indicates a mechanical mismatch at the coating-substrate interface. Key troubleshooting steps:
- Check Adhesion Promoter Application: Ensure the silane or other adhesion promoter was applied to a clean, dry electrode surface. Re-clean the substrate with plasma or UV-ozone treatment before recoating.
- Review Curing Cycle: Verify the hydrogel curing temperature and duration against the protocol. Incomplete curing reduces cohesive strength.
- Analyize CTE Mismatch: The Coefficient of Thermal Expansion (CTE) difference between the metal/ polymer electrode and the hydrogel can cause high interfacial stress at elevated temperatures. Consider a graded or composite coating layer.
Q2: Our impedance spectroscopy data shows a significant increase at low frequencies after an aging test compliant with ISO 10993-13 (Polymer Degradation). Does this signal a failure?
A: Not necessarily. A controlled increase may be by design.
- Troubleshooting Path:
- Correlate with Mass Loss: Per ISO 10993-13, measure mass loss of the coating. A minor impedance rise with <5% mass loss may indicate surface restructuring, not gross degradation.
- Check for Cracking: Use SEM imaging. Cracks increase accessible surface area, which can paradoxically lower impedance. Your increase suggests possible fibrous tissue ingrowth in a simulated in-vitro environment, which is a relevant biological response.
- Review Test Solution: Confirm the aging solution's pH and ion concentration match your target tissue environment (e.g., PBS vs. simulated body fluid).
Q3: How do we correlate results from an ISO 16808 (Uniaxial Low-Cycle Fatigue) test on our electrode material with in-vivo performance?
A: This correlation is critical for predicting mechanical failure at the interface.
- Protocol: ISO 16808 prescribes strain-controlled cyclic loading to determine stress-strain hysteresis and fatigue life.
- Troubleshooting Discrepancy:
- Map the Strain: Calculate the cyclic strain amplitude applied in your test (e.g., 2%) against estimated in-vivo micromotion strain (often 0.5-1.5% for peripheral nerves). Your test condition may be overly severe.
- Environment Mismatch: Ensure the fatigue test is conducted in a 37°C saline bath, not ambient air. Corrosion-fatigue interactions are significant.
- Failure Analysis: Compare the fracture surface from the ISO test (brittle cleavage vs. ductile tearing) with explained devices.
Q4: When following ISO 16429 (Ageing tests for implantable materials), what is the appropriate Arrhenius activation energy (Ea) to use for projecting shelf life of a new flexible electrode array?
A: Using an incorrect Ea is a common source of error.
- Standard Guidance: ISO 16429 suggests a default Ea of 0.7 eV for hydrolytic processes if not experimentally determined.
- Best Practice: You must determine this experimentally.
- Conduct aging at three elevated temperatures (e.g., 50°C, 60°C, 70°C).
- Measure a key property (e.g., tensile strength at yield) over time at each temperature.
- Plot the log of degradation rate vs. 1/T (Kelvin) to calculate the actual Ea for your specific material system.
Quantitative Data Summary: Common Accelerated Aging Standards & Parameters
| ISO Standard | Primary Focus | Key Accelerating Factor | Typical Measured Outputs | Projection Caveats |
|---|---|---|---|---|
| ISO 10993-13 | Degradation of polymeric materials | Temperature & Solution pH | Mass loss, Molecular weight change, Mechanical property loss | Assumes hydrolytic mechanism is dominant and known. |
| ISO 16429 | Long-term aging of implantable materials | Temperature (Arrhenius) | Time-to-failure for a defined property endpoint | Requires accurate activation energy (Ea). |
| ISO 16808 | Uniaxial low-cycle fatigue properties | Mechanical Strain Cycles | Cyclic stress-strain curves, Number of cycles to failure (Nf) | Strain rate and environment must be physiologically relevant. |
| ASTM F1980 | Accelerated aging of sterile barriers | Temperature (Arrhenius) | Material integrity, Seal strength | For packaging, not implant materials directly. |
Experimental Protocol: Determining Activation Energy (Ea) for Hydrolytic Aging
Objective: To empirically determine the activation energy (Ea) for the hydrolytic degradation of a polymer-coated neural electrode.
Materials: See "Research Reagent Solutions" table below.
Methodology:
- Sample Preparation: Prepare 30 identical coated electrode samples. Randomly separate into 3 groups of 10.
- Aging Environments: Place each group in separate, sealed vessels containing phosphate-buffered saline (PBS, pH 7.4) at controlled temperatures: 50°C, 60°C, and 70°C (±1°C).
- Sampling: Remove two samples from each temperature group at predetermined time points (e.g., 1, 2, 4, 8, 12 weeks).
- Property Measurement: For each sample, perform:
- Mass Measurement: Dry to constant mass and calculate percentage mass loss.
- Tensile Test: Perform micro-tensile test on the coating to determine retained yield strength (per ASTM D1708).
- Data Analysis:
- For each temperature, plot the natural log of the degradation rate (e.g., % mass loss/week) against the inverse of absolute temperature (1/T in Kelvin).
- Perform a linear regression. The slope of the line is equal to -Ea/R, where R is the universal gas constant (8.314 J/mol·K).
Diagram: Workflow for Ea Determination & Shelf Life Projection
Diagram Title: Accelerated Aging Ea Determination Workflow
The Scientist's Toolkit: Research Reagent Solutions for Interface Aging Studies
| Reagent / Material | Function & Role in Research | Key Consideration for Mechanical Mismatch |
|---|---|---|
| Phosphate-Buffered Saline (PBS) | Standard hydrolytic aging medium. Simulates ionic body fluid environment. | May not replicate protein adsorption's effect on interfacial adhesion. |
| Simulated Body Fluid (SBF) | More bioactive solution, approximates mineral deposition potential (apatite). | Can alter surface topography, affecting mechanical interlocking of coatings. |
| Polydimethylsiloxane (PDMS) | Common flexible substrate for electrodes. Often used as a control or base material. | High permeability to water vapor can accelerate oxidative aging in layers below. |
| Platinum-Iridium (PtIr) Alloy | Standard electrode metal. High corrosion resistance minimizes confounding degradation factors. | Stiff modulus creates mismatch with soft tissues; coating strategy is critical. |
| Poly(3,4-ethylenedioxythiophene) PEDOT:PSS | Conductive polymer coating to lower impedance and improve biocompatibility. | Hydration-dependent swelling can generate interfacial stress if constrained. |
| UV-Ozone Cleaner | Surface preparation tool to increase hydrophilicity and remove organic contaminants. | Essential for ensuring strong covalent bonding of adhesion promoters. |
| (3-Aminopropyl)triethoxysilane (APTES) | Adhesion promoter to form covalent bonds between inorganic substrates and organic coatings. | Layer thickness and hydrolysis control are vital to prevent brittle failure. |
Conclusion
The path to seamless bioelectronic integration hinges on resolving the mechanical mismatch at the tissue-electrode interface. As synthesized from the four core intents, the field has progressed from foundational understanding to innovative material science and sophisticated engineering designs. The convergence of soft conductive materials, structurally intelligent substrates, and biofunctional coatings presents a powerful toolkit for minimizing the foreign body response and ensuring long-term signal fidelity. Moving forward, the emphasis must shift towards standardized validation protocols, robust comparative studies across model systems, and the translation of these advanced interfaces into clinically viable, patient-specific implants. Success in this domain will not only enhance basic neuroscience and cardiology research but will also unlock the next generation of high-precision therapeutic bioelectronic medicines and closed-loop neural interfaces.