Beyond Conductivity: How Bone and Soft Tissue Resistivity Directly Impact Neural Electrode Function and Longevity
This article provides a comprehensive analysis for researchers and biomedical engineers on the critical, yet often underexplored, influence of local tissue resistivity on electrode performance.
Beyond Conductivity: How Bone and Soft Tissue Resistivity Directly Impact Neural Electrode Function and Longevity
Abstract
This article provides a comprehensive analysis for researchers and biomedical engineers on the critical, yet often underexplored, influence of local tissue resistivity on electrode performance. Moving beyond basic conductivity concepts, we explore the fundamental biophysical principles distinguishing bone from soft tissue resistivity (Intent 1). We detail methodological approaches for in vitro and in silico modeling of heterogeneous tissue environments, and their application in designing targeted electrodes for neuromodulation and neural recording (Intent 2). Practical troubleshooting strategies for mitigating the effects of variable tissue interfaces, such as encapsulation and surgical placement, are discussed to optimize signal fidelity and stimulation efficiency (Intent 3). Finally, we validate these concepts through comparative analysis of clinical and preclinical data, evaluating different electrode technologies and materials in osseous versus soft tissue beds (Intent 4).
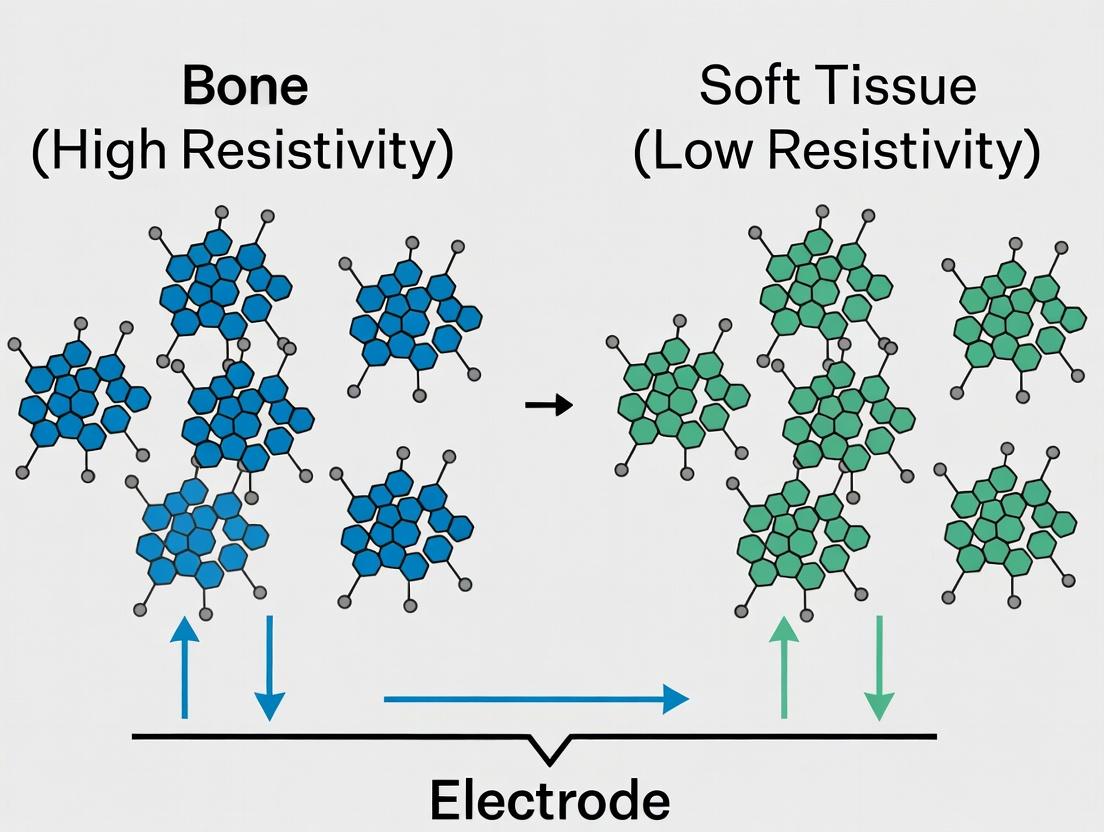
The Biophysical Divide: Understanding the Fundamental Resistivity of Bone vs. Soft Tissue at the Electrode Interface
Technical Support Center
Troubleshooting Guides & FAQs
Q1: My bioimpedance spectroscopy (BIS) measurements on a bone sample show unexpectedly high and variable resistance. What could be the cause? A1: This is a common issue when measuring anisotropic tissues like bone. Primary causes include:
- Poor Electrode-Tissue Contact: Bone surfaces are often irregular and non-conductive periosteum may remain. Ensure electrodes are firmly placed on a clean, flat surface, possibly using conductive gel or a custom electrode holder.
- Current Pathway Inhomogeneity: The measured path includes both cortical bone (high resistivity) and marrow (low resistivity). Use a four-electrode (tetrapolar) setup to minimize contact impedance and define a more specific measurement volume.
- Frequency Selection Error: Low-frequency currents (<10 kHz) cannot penetrate the extracellular matrix of dry cortical bone effectively. Verify your spectrometer covers a suitable range (e.g., 1 kHz to 1 MHz) to characterize different dispersion regions.
- Protocol: For reproducible bone measurements, prepare a uniform sample (e.g., a machined cube of cortical bone). Use Ag/AgCl pellet electrodes with conductive paste in a tetrapolar configuration. Immerse in physiological saline to prevent drying. Sweep frequencies from 100 Hz to 1 MHz and plot the impedance locus (Cole-Cole plot).
Q2: When comparing soft tissue and bone in the same setup, the phase angle data for soft tissue is noisy at high frequencies (>100 kHz). How can I fix this? A2: Noise at high frequencies often stems from stray capacitance and instrument limitations.
- Cable and Electrode Capacitance: Use short, shielded coaxial cables and ensure they are not moving during measurement. Consider using driven-shield cables.
- Calibration: Perform an open/short/load calibration with calibration standards that closely match your expected impedance range. Always calibrate with the exact cables and electrode holders you will use.
- Electrode Polarization: Even with Ag/AgCl electrodes, polarization impedance can distort high-frequency measurements. Confirm your electrode's effective working frequency range. The tetrapolar method inherently reduces this effect.
Q3: How do I experimentally isolate the contribution of soft tissue resistivity from bone resistivity in a layered tissue model (e.g., muscle over bone)? A3: This requires a controlled experimental design.
- Protocol: Use phantom materials with known properties.
- Create a two-layer phantom: a bottom layer of material mimicking bone resistivity (e.g., agarose with low saline content, resistivity ~500 Ω·m) and a top layer mimicking muscle (e.g., agarose with higher saline, resistivity ~1-2 Ω·m).
- Use a surface electrode array in a tetrapolar configuration.
- Measure impedance spectra first on the muscle mimic alone.
- Measure on the layered phantom.
- Use a computational model (e.g., Finite Element Method) to fit the layered measurement, iterating the bone layer's resistivity as a parameter until the model matches the measured data. This inversely estimates the bone layer's impact.
Table 1: Typical Resistivity (ρ) and Conductivity (σ) Ranges for Biological Tissues at 10 kHz
| Tissue Type | Resistivity Range (Ω·m) | Conductivity Range (S/m) | Key Notes |
|---|---|---|---|
| Cortical Bone | 150 - 500 | 0.002 - 0.0067 | Highly anisotropic; dry, compact bone is a poor conductor. |
| Cancellous Bone | 70 - 150 | 0.0067 - 0.014 | Higher water and blood content lowers resistivity. |
| Skeletal Muscle (Transverse) | 2.0 - 4.0 | 0.25 - 0.50 | Highly anisotropic; longitudinal resistivity is much lower. |
| Skeletal Muscle (Longitudinal) | 0.5 - 1.5 | 0.67 - 2.0 | Direction relative to fiber orientation is critical. |
| Adipose Tissue | 20 - 40 | 0.025 - 0.05 | High lipid content results in higher resistivity. |
| Blood | 1.5 - 1.7 | 0.59 - 0.67 | Highly conductive due to ionic content. |
| Saline (0.9%) | ~0.7 | ~1.4 | Common reference and phantom material. |
Table 2: Impact of Measurement Variables on Bioimpedance Data
| Variable | Effect on Measured Resistivity | Mitigation Strategy |
|---|---|---|
| Frequency | Decreases with increasing frequency (dispersion) due to cellular membrane polarization. | Always report measurement frequency. Use spectroscopy to characterize β-dispersion. |
| Temperature | Resistivity decreases ~2% per °C increase (ion mobility). | Maintain constant temperature (e.g., 37°C water bath). |
| Electrode Placement | Minor changes can drastically alter measured path in anisotropic tissues. | Use standardized anatomical landmarks and electrode spacings. |
| Tissue Hydration | Dehydration increases resistivity significantly. | Measure ex vivo samples immersed in physiological solution. |
Experimental Protocols
Protocol 1: Characterizing Tissue-Specific Resistivity Ex Vivo Objective: To determine the resistivity (ρ) of homogeneous samples of bone and soft muscle tissue. Materials: See "The Scientist's Toolkit" below. Method:
- Prepare uniform tissue samples (e.g., 10mm cube) using a precision saw. Keep hydrated in physiological saline.
- Set up a four-electrode cell with known geometry (e.g., two outer current-injecting and two inner voltage-sensing electrodes). Precisely measure the distance between voltage electrodes (L) and cross-sectional area (A) of the sample.
- Place the sample in the cell, ensuring full contact with electrodes.
- Connect the cell to a Bioimpedance Analyzer (e.g., Keysight E4990A). Calibrate.
- Apply a constant current (I) at a specific frequency (e.g., 50 kHz) that penetrates cell membranes.
- Measure the resulting voltage (V) between the inner electrodes.
- Calculate impedance Z = V/I. Calculate resistivity: ρ = Z * (A / L).
- Repeat across a frequency spectrum (1 kHz - 1 MHz) to generate a dispersion profile.
Protocol 2: Assessing Electrode Function on Different Tissue Substrates Objective: To quantify the electrode-tissue interface impedance (Z_interface) for a given electrode on bone vs. muscle surfaces. Materials: Ag/AgCl needle or surface electrodes, BIS device, tissue samples. Method:
- Configure the BIS device for two-electrode measurement (this measures total impedance, dominated by interface impedance at high frequencies).
- Place two identical electrodes on the surface of a hydrated muscle sample with a fixed gap (e.g., 5mm).
- Measure impedance magnitude and phase from 100 Hz to 1 MHz. This is Ztotalmuscle ≈ Zinterfacemuscle.
- Repeat Step 2&3 on a clean, flattened cortical bone surface.
- Plot the impedance magnitude vs. frequency for both tissues on a log-log scale. The difference, particularly at lower frequencies, highlights the impact of substrate resistivity/conductivity on the current injection profile and thus the measured interface impedance.
Diagrams
Experimental Workflow for Tissue Resistivity Comparison
Key Factors Affecting Bioimpedance Measurement
The Scientist's Toolkit: Key Research Reagent Solutions
| Item | Function in Bioimpedance Research |
|---|---|
| Ag/AgCl Electrode (Pellet or Needle) | Reversible electrode providing stable, low-polarization impedance interface with tissue, crucial for accurate potential sensing and current injection. |
| Electrolytic Gel (Phosphate Buffer/Saline based) | Ensures ionic conductivity and reduces contact impedance between electrode and dry or irregular tissue surfaces (e.g., bone). |
| Agarose/Saline Phantoms | Tissue-mimicking materials with tunable resistivity (by varying NaCl concentration) for controlled validation of measurement systems and electrode performance. |
| Bioimpedance Analyzer/Spectrometer | Device that applies an AC current over a range of frequencies and measures the resultant impedance magnitude and phase angle (e.g., Keysight E4990A, ImpediMed SFB7). |
| Tetrapolar Electrode Cell | Custom or commercial cell with four electrodes; separates current injection from voltage measurement to eliminate the error from contact impedance. |
| Physiological Saline (0.9% NaCl) | Standard solution for hydrating ex vivo tissue samples to maintain physiological ion concentrations and prevent desiccation during experiments. |
| Finite Element Method (FEM) Software (e.g., COMSOL) | Allows modeling of complex current pathways in heterogeneous tissues (bone+soft tissue) to interpret measured data and deconvolve individual tissue contributions. |
This technical support center is framed within a thesis investigating the impact of bone versus soft tissue electrical resistivity on electrode function in biomedical research, such as neuromodulation, bioimpedance spectroscopy, and electrophysiological recording. Accurate resistivity values are critical for modeling current pathways, predicting stimulation thresholds, and interpreting impedance data.
FAQ & Troubleshooting
Q1: My finite element model (FEM) of deep brain stimulation shows unexpected current shunting. Could incorrect tissue resistivity values be the cause? A: Yes. Inaccurate resistivity (ρ) values, particularly for tissues surrounding your target, drastically alter modeled current spread. Cortical bone (very high ρ) can block current, while cerebrospinal fluid (very low ρ, ~0.65 Ω·m) can shunt it. Verify you are using appropriate, frequency-specific values from recent literature (see tables below) for all tissues in your model geometry.
Q2: When measuring bioimpedance in vivo, my readings for the same anatomical location show high variability. How can I improve consistency? A: Variability often stems from uncontrolled experimental parameters.
- Electrode Contact: Ensure consistent electrode-skin/tissue contact pressure and interface impedance.
- Hydration State: Tissue resistivity is highly sensitive to water and electrolyte content. Control for subject hydration and measure at a consistent time of day.
- Temperature: Resistivity decreases with increasing temperature. Maintain a stable experimental temperature.
- Frequency: Always report the measurement frequency (see Table 2). Use the same frequency for comparative studies.
Q3: Why are the resistivity values for bone in different papers orders of magnitude apart? A: Bone resistivity is exceptionally variable due to:
- Bone Type: Cortical vs. cancellous bone have intrinsic differences (see Table 1).
- Mineralization & Porosity: Highly mineralized, dense cortical bone has higher resistivity.
- Measurement Direction: Cortical bone is anisotropic; resistivity is higher across the osteon direction than along it.
- Hydration: Ex vivo measurements on dried bone yield vastly higher values than in vivo. Always note the measurement context.
Q4: How does tissue heterogeneity affect my electrode's performance in stimulation experiments? A: Tissue layers create a complex resistive network. A high-resistivity layer (e.g., skull) can cause a larger voltage drop, requiring higher stimulation amplitudes to reach target neural tissue. Conversely, a low-resistivity layer (e.g., fat) may distort the current field. Use layered tissue models in your experimental planning.
Quantitative Data Tables
Table 1: Typical Electrical Resistivity of Biological Tissues at ~10-100 Hz (Low Frequency)
| Tissue Type | Typical Resistivity Range (Ω·m) | Key Notes |
|---|---|---|
| Cortical Bone | 100 - 1,000 | Highly anisotropic. Sensitive to density, hydration. Major current barrier. |
| Cancellous (Trabecular) Bone | 50 - 200 | Lower than cortical due to marrow content. More isotropic. |
| Skeletal Muscle | 1.5 - 3.5 | Highly anisotropic (lower along fibers). |
| Fat (Adipose Tissue) | 20 - 50 | Higher resistivity due to low water/ion content. |
| Brain (Grey Matter) | 2.5 - 4.0 | Relatively isotropic. |
| Brain (White Matter) | 4.0 - 8.0 | Anisotropic (lower along axonal tracts). |
| Blood | 1.2 - 1.7 | Low resistivity, highly conductive. |
| Skin (Dry) | 10,000 - 100,000+ | Highly variable, primary barrier for surface electrodes. |
| Skin (Wet) | 200 - 500 | Hydration drastically reduces resistivity. |
Table 2: Frequency Dependence of Tissue Resistivity (Dispersive Behavior)
| Tissue Type | Resistivity Trend with Increasing Frequency | Example Change (Approx.) |
|---|---|---|
| All Tissues | Generally decreases (β-dispersion) | Due to cell membrane capacitive bypass. |
| Muscle | Strong decrease (anisotropy reduces) | ρ may drop by ~50% from 10 Hz to 100 kHz. |
| Bone | Moderate decrease | Less dispersive than soft tissues. |
| Fat | Less decrease | Less cellular structure, lower dispersion. |
Experimental Protocols
Protocol 1: Four-Electrode (4-Point) Method forEx VivoTissue Resistivity Measurement
Purpose: To measure bulk resistivity of excised tissue samples while eliminating electrode polarization impedance. Materials: See "The Scientist's Toolkit" below. Procedure:
- Sample Preparation: Prepare a uniform, geometrically regular tissue sample (e.g., a cube or cylinder). Maintain hydration with physiological saline during preparation.
- Setup: Place sample in a non-conductive holder. Position four identical, parallel electrodes in line on the sample surface. The outer two are current (I) injection electrodes. The inner two are voltage (V) sensing electrodes.
- Measurement: Using a precision current source and voltmeter (or an impedance analyzer), inject a small, known sinusoidal current (I) at the desired frequency between the outer electrodes.
- Recording: Measure the resulting voltage drop (V) between the inner electrodes. Ensure no current flows in the voltage measurement circuit (high-impedance voltmeter).
- Calculation: Calculate resistivity: ρ = (V / I) * (A / L), where A is the cross-sectional area of the sample perpendicular to current flow, and L is the distance between the inner voltage electrodes.
- Control: Measure across multiple frequencies (e.g., 10 Hz - 100 kHz) and sample orientations (for anisotropic tissues).
Protocol 2: In Vivo Bioimpedance Spectroscopy (BIS) for Tissue Characterization
Purpose: To non-invasively assess tissue composition or monitor changes via multi-frequency impedance. Materials: Bioimpedance spectrometer, surface electrodes, conductive gel. Procedure:
- Electrode Placement: Apply electrodes to the skin over the region of interest (e.g., limb, torso) in a tetrapolar configuration.
- Baseline Measurement: On a healthy subject/animal, perform a frequency sweep (e.g., 1 kHz - 1 MHz) to establish a baseline impedance spectrum (|Z| and phase angle).
- Model Fitting: Fit the collected BIS data to an equivalent circuit model (e.g., Cole-Cole model) using dedicated software. This model extracts parameters like extracellular (Re) and intracellular (Ri) resistance.
- Interpretation: Relate Re and Ri to tissue properties. For example, an increase in Re may indicate dehydration or fibrosis; a change in Ri may reflect cell integrity changes.
- Validation: Correlate BIS findings with gold-standard imaging (e.g., CT for bone density, MRI for soft tissue) or direct measurement when possible.
Visualization: Experimental & Conceptual Workflows
Diagram: Four-Electrode Resistivity Measurement Setup
Diagram: Thesis Context: Impact of Tissue Resistivity on Electrode Function
The Scientist's Toolkit: Key Research Reagent Solutions
| Item | Function in Resistivity/Electrode Research |
|---|---|
| Four-Electrode Cell & Probe | Enables accurate bulk resistivity measurement by separating current injection and voltage sensing, nullifying contact impedance errors. |
| Bioimpedance Spectrometer | Device that measures impedance magnitude and phase across a frequency spectrum, crucial for characterizing tissue dispersion. |
| Physiological Saline (0.9% NaCl) | Standard solution for maintaining tissue hydration ex vivo and providing conductive interface for electrodes. |
| Agarose or Saline Phantoms | Tissue-mimicking materials with known, tunable resistivity for calibrating measurement systems and validating FEM models. |
| Finite Element Modeling (FEM) Software (e.g., COMSOL, ANSYS) | Platforms for simulating electric fields and current density in complex, heterogeneous tissue geometries. |
| Microelectrode Arrays (MEAs) | Used for high-resolution stimulation and recording to validate predictions of current spread in neural tissues. |
| Cole-Cole Model Fitting Software | Specialized tools to extract intracellular/extracellular resistances and membrane capacitance from bioimpedance spectroscopy data. |
| Standard Reference Resistors & Phantoms | Calibration tools to ensure accuracy and traceability of all impedance measurement equipment. |
The Cellular and Extracellular Matrix Basis of Tissue-Specific Electrical Properties
Technical Support Center
Troubleshooting Guide & FAQs
Q1: Our in vivo impedance measurements in bone show unexpectedly high and variable resistivity compared to published soft tissue values. What are the primary factors we should investigate? A: High bone resistivity is primarily due to its low cellularity and dense, mineralized ECM. Investigate:
- Mineralization Density: Use micro-CT to quantify bone volume fraction (BV/TV) at the measurement site. Higher mineralization directly increases resistivity.
- Electrode Placement: Ensure the electrode is in direct contact with the bone surface and not separated by a periosteal or soft tissue layer. Use surgical-grade, non-conductive adhesive to isolate the site.
- Hydration State: Ex vivo measurements are highly sensitive to dehydration. Perform measurements in physiological saline (0.9% NaCl) or Ringers solution immediately after extraction.
- Frequency: Bone's resistivity is highly frequency-dependent. Use a standardized frequency (e.g., 1 kHz) for comparison with literature values.
Q2: When modeling electric field spread for a cortical bone implant, what are the key ECM parameters I need, and how do I obtain them? A: For accurate finite element modeling (FEM), you need the anisotropic conductivity tensor. Key parameters and methods:
- Primary Parameter: Longitudinal vs. transverse resistivity. Bone conducts better along osteonal channels.
- Measurement Protocol:
- Excise a cuboidal sample of cortical bone with known orientation (e.g., along the long bone axis).
- Use a four-point probe impedance spectrometer.
- Measure impedance in both longitudinal and transverse orientations across a frequency range (1 Hz - 1 MHz).
- Calculate resistivity (ρ) from the measured resistance (R), cross-sectional area (A), and probe spacing (L): ρ = R * (A/L).
Q3: Our cell culture experiments (osteoblasts vs. fibroblasts) show different membrane capacitance readings. Could this be an artifact of the substrate? A: Yes. The substrate's dielectric properties significantly influence local field measurements.
- Troubleshooting Steps:
- Standardize Substrate: Use culture surfaces with known, consistent electrical properties (e.g., glass coverslips coated with a uniform, thin layer of Type I collagen).
- Control Confluency: Measure at defined confluency (e.g., 70%). Variations in cell-cell and cell-ECM contact area alter measured capacitance.
- Confirm Sealing: For patch-clamp, ensure a high-resistance seal (>1 GΩ). Poor seals in osteoblasts, which can produce more ECM, are a common issue. Include enzymatic (collagenase, 100 µg/mL, 5 min) or chelating (EDTA, 0.5 mM) steps in your trypsinization protocol to improve seal formation.
Q4: How do I accurately simulate the electrical environment of bone marrow (a composite tissue) for my electrode testing? A: Bone marrow is a heterogeneous mix of hematopoietic cells, adipocytes, and a vascular/neural network in a soft collagenous matrix.
- Recommended Protocol:
- Create a Physiomimetic Construct: Use a 3D collagen I hydrogel (2-3 mg/mL) seeded with relevant cell types (e.g., mesenchymal stem cells differentiated towards adipocytes).
- Incorporate a Mineralized Component: Introduce nano-hydroxyapatite particles (50-100 nm, 20% w/w) suspended in the gel to mimic trabecular bone spicules.
- Characterize Impedance: Use an impedance analyzer with a two-plate electrode configuration to measure the bulk resistivity of the construct at 37°C.
- Validation: Compare the measured resistivity range (typically 150-400 Ω·cm) to published in vivo values.
Table 1: Typical Resistivity (Ω·cm) of Biological Tissues at 1 kHz
| Tissue Type | Typical Resistivity Range (Ω·cm) | Key Determinant |
|---|---|---|
| Cortical Bone | 10,000 - 180,000 | Hydroxyapatite content, osteon orientation |
| Cancellous Bone | 200 - 800 | Marrow fat/water content, porosity |
| Bone Marrow (Red) | 150 - 400 | Cellularity, vascular volume |
| Skeletal Muscle (Transverse) | 300 - 700 | Myofibril density, interstitial fluid |
| Skeletal Muscle (Longitudinal) | 50 - 150 | Muscle fiber alignment |
| Dense Fibrous Tissue | 600 - 1200 | Collagen fiber density and alignment |
| Blood | 150 - 180 | Hematocrit, plasma ion concentration |
Table 2: Key Cellular Electrical Properties
| Cell Type | Resting Membrane Potential (mV) | Specific Membrane Capacitance (µF/cm²) | Primary Ion Channels/Transporters |
|---|---|---|---|
| Osteoblast | -20 to -40 | ~0.8 - 1.2 | Voltage-Gated Ca2+ Channels, Connexin 43 Hemichannels |
| Fibroblast | -30 to -60 | ~1.0 - 1.5 | Stretch-Activated Channels, K+ Channels |
| Neuron (Soma) | -60 to -70 | ~1.0 | Voltage-Gated Na+/K+ Channels |
| Cardiomyocyte | -80 to -90 | ~1.0 - 1.5 | Voltage-Gated Na+/K+/Ca2+ Channels |
Experimental Protocols
Protocol 1: Four-Point Probe Measurement of Bone Anisotropy Objective: To measure the directional resistivity of cortical bone. Materials: Precision bone saw, four-point probe station, impedance analyzer (e.g., Keysight E4990A), physiological saline, incubator (37°C). Procedure:
- From a fresh bovine or murine femur, cut two rectangular prisms (10mm x 3mm x 3mm): one aligned longitudinally (L), one transversely (T).
- Immerse samples in 37°C saline for 1 hour to equilibrate.
- Place the sample on the probe stage. Align the four equidistant, colinear probes along the long axis of the prism.
- Apply a constant current (I) between the outer probes (e.g., 100 µA at 1 kHz).
- Measure the voltage (V) between the two inner probes.
- Calculate resistivity: ρ = (V/I) * (Cross-Sectional Area / Probe Spacing).
- Repeat for the transverse sample, placing probes perpendicular to the osteon direction.
- Plot ρL vs. ρT to determine anisotropy ratio.
Protocol 2: Impedance Spectroscopy of 3D Tissue Constructs Objective: To characterize the frequency-dependent impedance of engineered soft tissue and bone-like constructs. Materials: 3D construct in transwell, two-plate gold electrode setup, impedance spectroscope (e.g., BioLogic SP-300), PBS. Procedure:
- Place the construct between two parallel gold plate electrodes in a custom chamber filled with PBS.
- Apply a sinusoidal AC voltage (10 mV amplitude) sweeping from 1 Hz to 1 MHz.
- Measure the real (Z') and imaginary (Z'') components of impedance.
- Fit the resulting Nyquist plot to an equivalent circuit model (e.g., a modified Randles circuit with a constant phase element for roughness).
- Extract the extracellular matrix resistance (Recm) and cell membrane capacitance (Cm) from the model fit.
Visualizations
Diagram Title: Workflow for Measuring Tissue Electrical Properties
Diagram Title: Electric Field Spread in Different Tissue Types
The Scientist's Toolkit: Research Reagent Solutions
Table 3: Essential Materials for Tissue Electrophysiology Research
| Item | Function / Application | Example Product / Specification |
|---|---|---|
| Four-Point Probe System | Measures bulk resistivity of materials (like bone) without contact resistance error. | Signatone S-302-4 with 1.0mm spacing, or custom micromanipulator setup. |
| Impedance / Network Analyzer | Performs electrochemical impedance spectroscopy (EIS) across a wide frequency range. | Keysight E4990A (20 Hz - 120 MHz), BioLogic SP-300. |
| Micro-CT Scanner | Quantifies bone mineral density, porosity, and 3D structure for correlating with resistivity. | Scanco Medical µCT 50, Bruker SkyScan 1272. |
| Patch-Clamp Amplifier | Measures single-cell or monolayer membrane potential, capacitance, and ion currents. | Molecular Devices Axopatch 200B, HEKA EPC 10. |
| Type I Collagen, High Purity | Standardized substrate for 2D cell studies or hydrogel for 3D tissue constructs. | Corning Rat Tail Collagen I, 3-5 mg/mL, in 0.02N acetic acid. |
| Nano-Hydroxyapatite (nHA) | Mimics the mineral phase of bone in composite constructs for realistic modeling. | Sigma-Aldrich, <200 nm particle size, synthetic. |
| Physiological Saline / aCSF | Maintains tissue hydration and ionic homeostasis during ex vivo measurements. | 0.9% NaCl, or Artificial Cerebrospinal Fluid (aCSF) for neural tissues. |
| Conductive Cell Culture Media | For real-time, non-invasive impedance monitoring of cell layers (e.g., ECIS). | Media with low serum and supplemented with 5-10 mM HEPES. |
| Dielectric Spectroscopy Software | Models complex impedance data and fits to equivalent circuits. | BioLogic EC-Lab, ZView (Scribner Associates). |
| Flexible, Biocompatible Electrodes | For in vivo or in situ measurements on soft, moving tissues. | Polyimide-based µECoG arrays, PEDOT:PSS-coated electrodes. |
Framing Context: This support center is part of a thesis investigating the impact of bone versus soft tissue electrical resistivity on the function and signal fidelity of electrodes used in biomedical sensing and stimulation.
Frequently Asked Questions (FAQs) & Troubleshooting
Category 1: Sample Preparation & Measurement
Q1: Our bioimpedance spectroscopy (BIS) measurements on ex vivo bone samples show high variability. What are the key preparation factors? A: Variability often stems from improper hydration control and temperature. Bone is a composite material, and its resistivity is highly sensitive to water content and ionic concentration.
- Protocol: Standardize sample preparation using phosphate-buffered saline (PBS) immersion at 4°C for 24 hours to achieve equilibrium hydration. Conduct all measurements in a temperature-controlled bath at 37±0.5°C using a calibrated thermocouple.
- Troubleshooting: If variability persists, check for microfractures (via micro-CT) and ensure all marrow is removed via pressurized saline flush. Surface-electrode contact must be uniform; use conductive gel and a constant pressure fixture.
Q2: How do we reliably differentiate the resistivity contribution of soft tissue hydration from that of bone mineral density (BMD) in a layered in vivo model? A: This requires a multi-modal calibration approach. BMD and hydration are correlated but independently alter current pathways.
- Protocol:
- Establish a baseline BMD via peripheral quantitative computed tomography (pQCT) or DXA scan.
- Perform multi-frequency BIS (e.g., 1 kHz to 1 MHz) at the same site.
- Use a Cole-Cole model to extract extracellular (Re) and intracellular (Ri) resistance. Re is primarily influenced by hydration.
- Correlate Re with hydration markers (e.g., serum osmolality, tissue wet/dry weight from biopsy if feasible) and correlate low-frequency impedance magnitude with BMD.
- Troubleshooting: If correlations are weak, ensure the BIS current path is aligned with the BMD measurement volume. Use finite element modeling (FEM) to simulate the layered structure and refine your interpretation model.
Q3: Our electrode-skin impedance is unstable over time, confounding deep tissue measurements. What is the primary cause? A: This is typically due to dynamic changes in soft tissue hydration under the electrode. Electrolyte diffusion, sweat, and skin occlusion alter local ionic conductivity.
- Protocol: Implement a pre-conditioning and monitoring step.
- Apply electrodes using a standardized hydrogel of known viscosity and ion concentration.
- Allow a 10-minute stabilization period before baseline measurement.
- Use a three-electrode (working, reference, counter) potentiostatic setup to monitor interface impedance at a high frequency (e.g., 10 kHz) throughout the experiment, logging it as a confounding variable.
- Troubleshooting: For long-term measurements, use hydrogel formulations with moisture-locking polymers (e.g., polyvinylpyrrolidone). If drift continues, consider using dry electrode arrays with built-in hydrogel-free, capacitive coupling, though signal-to-noise ratio may be lower.
Category 2: Data Interpretation & Modeling
Q4: How do we quantitatively model the combined effect of BMD and hydration on local resistivity for our FEM? A: You need to incorporate empirical relationships as material properties in your FEM software (e.g., COMSOL, ANSYS).
Table 1: Empirical Relationships for Tissue Resistivity (ρ)
| Tissue / Factor | Quantitative Relationship | Key Parameters & Notes |
|---|---|---|
| Cortical Bone | ρ ≈ k1 * BMD-1.2 + k2 * (H2O%)-1 | k1, k2: sample-specific constants. BMD in g/cm³. Strong anisotropic property: resistivity along length ~150-300 Ω·m, across length ~300-500 Ω·m. |
| Soft Tissue (Muscle) | ρ ≈ ρ0 * (1 - αΔT) * (H2O% / H2O%0)-β | ρ0: baseline resistivity (~1.5-3.5 Ω·m). α: temp coeff (~0.02/°C). β: hydration exponent (~1.5). Highly anisotropic: transverse ρ ~2-5x longitudinal ρ. |
| Hydration (General) | ρextracellular ∝ 1 / [Na+] | [Na+] is the dominant extracellular ion. Measured via BIS-derived Re. |
Q5: When validating our model with electrode performance data, what are the key output metrics to compare? A: Focus on metrics that directly impact electrode function:
- Signal-to-Noise Ratio (SNR): Degrades as overall impedance increases.
- Current Density Distribution: How much current shunts through low-resistivity soft tissue vs. penetrating bone?
- Voltage Drop Across Layers: Critical for stimulation electrodes to ensure sufficient voltage reaches target depth.
- Protocol: Run your FEM simulation with your derived ρ values. Export the 3D current density matrix and calculate the percentage of current within your target tissue layer. Compare simulated voltage at a deep point to your in vitro or in vivo measurements.
The Scientist's Toolkit: Key Research Reagent Solutions
Table 2: Essential Materials for Resistivity Experiments
| Item Name | Function / Application | Example & Notes |
|---|---|---|
| Multi-Frequency Bioimpedance Analyzer | Measures complex impedance (magnitude & phase) across a spectrum to differentiate tissue compartments. | Examples: ImpediMed SFB7, Solartron 1260. Key: Ensure current injection complies with IEC 60601 safety limits. |
| Standardized Hydration Buffer | Maintains consistent ionic content and osmolarity in ex vivo samples. | Dulbecco's PBS (1X), pH 7.4. Add protease inhibitors for long-term tissue maintenance. |
| Conductive Hydrogel for Electrodes | Provides stable, low-impedance interface between electrode and tissue. | Sigma Gel ECG/EEG conductive gel. For long-term use, seek gels with high viscosity and humectants (e.g., glycerin). |
| Calibration Phantoms | Validate BIS system and FEM models with known resistivity. | Homogeneous Saline Phantoms (0.9% NaCl, ρ≈0.70 Ω·m). Layered Agarose-NaCl Gels with different salt concentrations to mimic bone/soft tissue layers. |
| Finite Element Modeling Software | Models complex current pathways in heterogeneous, anisotropic tissues. | COMSOL Multiphysics with AC/DC Module. ANSYS. Essential for translating localized measurements to predictions of in vivo electrode performance. |
Experimental Workflow & Conceptual Diagrams
Title: Research Workflow: From Tissue Properties to Electrode Model
Title: How BMD & Hydration Dynamically Alter Electrode Function
Technical Support & Troubleshooting Center
Frequently Asked Questions (FAQs)
Q1: During Electrochemical Impedance Spectroscopy (EIS) measurements in bone tissue, we observe a depressed semicircle in the Nyquist plot instead of a perfect one. Is this an instrument error or an expected phenomenon?
A1: This is an expected phenomenon, not an error. The depressed semicircle indicates a Constant Phase Element (CPE) behavior, which is common in heterogeneous, porous, or rough interfaces like bone. The CPE impedance is given by ( Z_{CPE} = 1 / [Q(j\omega)^n] ), where ( Q ) is the CPE constant, ( j ) is the imaginary unit, ( ω ) is angular frequency, and ( n ) is the CPE exponent (0 ≤ n ≤ 1). In bone (high resistivity, complex microstructure), ( n ) often deviates significantly from 1 (an ideal capacitor). Compare this to soft tissue measurements where ( n ) is typically closer to 1.
Q2: Our equivalent circuit model fits poorly for electrodes implanted in bony sites compared to soft tissue controls. Which circuit elements should we prioritize modifying?
A2: For bony sites (high resistivity, capacitive effects), prioritize these elements:
- Replace the ideal capacitor with a CPE. This accounts for surface heterogeneity and current distribution non-uniformity.
- Incorporate a Warburg element (open or finite-length) in series with the charge transfer resistance. This models diffusion impedance, which can be significant in the low-frequency range in poorly conductive media like bone.
- Re-evaluate the solution resistance (Rs). Bone has significantly higher resistivity than soft tissue, so Rs will be larger.
Q3: How do we experimentally distinguish between the effects of tissue resistivity and genuine charge transfer kinetics at the electrode surface?
A3: Use a combination protocol:
- Perform EIS in a standard electrolyte (e.g., PBS) with known resistivity before and after tissue exposure. This establishes a baseline for electrode surface properties.
- Perform EIS in situ (in bone vs. soft tissue). The difference in the high-frequency real-axis intercept in the Nyquist plot directly gives the additional tissue resistance (( R{tissue} = \rho{tissue} \cdot (d/A) ), where ( \rho ) is resistivity, d is spacing, A is area).
- Compare circuit parameters (especially charge transfer resistance ( R{ct} ) and CPE parameters) from the in-vitro (step 1) and in-situ (step 2) fits. Changes in ( R{ct} ) and CPE-( Q ) indicate surface fouling or kinetic changes beyond simple bulk resistivity.
Troubleshooting Guides
Issue: Unstable Open Circuit Potential (OCP) in Bone Preparations
- Symptoms: Drifting OCP (> 10 mV/min) after implantation in bone.
- Potential Causes & Solutions:
- Poor Mechanical Stability: Bone is rigid. Micro-motions can disrupt the interface. Solution: Use dental cement or biocompatible screws for secure electrode fixation.
- Local pH Changes: Bone remodeling causes ionic flux. Solution: Use a Ag/AgCl reference electrode with a sufficiently large, stable junction.
- Low Ionic Strength: Bone marrow cavity may have lower conductivity. Solution: Rinse with saline to establish a standard initial condition and report this in methods.
Issue: Inconsistent EIS Data at Low Frequencies (< 1 Hz)
- Symptoms: Poor reproducibility in the low-frequency tail, crucial for identifying Warburg diffusion.
- Checklist:
- Equilibration Time: Allow the electrode-tissue system to stabilize for at least 15-30 minutes post-implantation before measuring.
- DC Bias: Ensure the applied AC potential amplitude (typically 10 mV) is small enough not to perturb the system, but large enough for a good signal-to-noise ratio. Verify the DC bias is set correctly, usually at the OCP.
- Averaging & Integration: Increase the number of averaging cycles per frequency point for low frequencies.
Experimental Data & Protocols
Data synthesized from recent literature on bone vs. soft tissue electrophysiology.
| Parameter | Typical Range (Soft Tissue) | Typical Range (Cortical Bone) | Impact on Circuit Model | Notes |
|---|---|---|---|---|
| Resistivity (ρ) | 1 - 5 Ω·m | 100 - 300 Ω·m | Directly increases series resistance (R_s). | Primary source of signal attenuation in bone. |
| CPE Exponent (n) | 0.85 - 0.95 | 0.65 - 0.80 | Lower n indicates more non-ideal capacitance, depresses semicircle. | Reflects surface roughness and current dispersion in porous bone. |
| Double Layer Capacitance (Q_dl) | 10 - 100 µF·s^(n-1) | 1 - 20 µF·s^(n-1) | Lower effective capacitance in bone. | Often modeled as CPE. Calculated from Q and n. |
| Charge Transfer Resistance (R_ct) | 1 - 50 kΩ | 50 - 500 kΩ | Significantly higher in bone, slowing kinetics. | Can be conflated with diffusion effects; use low-freq EIS to deconvolve. |
| Warburg Coefficient (σ) | Low to Moderate | High | Indicates significant diffusion limitation. | Use finite-length Warburg if bone layer thickness is known. |
Detailed Protocol: Comparative EIS in Bone vs. Soft Tissue
Objective: To isolate the contribution of bulk tissue resistivity to the overall impedance of an implanted electrode.
Materials: See "The Scientist's Toolkit" below.
Procedure:
- Calibration in Phantom: Characterize the 2-electrode system in standard saline (0.9% NaCl, ρ ≈ 0.7 Ω·m) and a resistive phantom gel (ρ ≈ 200 Ω·m) using EIS (e.g., 100 kHz to 0.1 Hz). This calibrates the system's response to known resistivity changes.
- In Vivo Preparation: Anesthetize and prepare the animal model. Surgically expose the target bone site (e.g., femur) and a control soft tissue site (e.g., subcutaneous muscle).
- Baseline Measurement: Insert identical working electrodes into each site. Place a common reference/auxiliary electrode in distant soft tissue. Measure and record OCP until stable (±2 mV over 2 min).
- EIS Measurement: Perform EIS at OCP with a 10 mV RMS sinusoidal perturbation. Log the frequency response for both sites.
- Data Analysis: a. Extract the high-frequency intercept with the real axis as ( R{total} ). b. Using the known electrode geometry and the calibrated phantom data, estimate the component of ( R{total} ) attributable to bulk tissue resistance ( R{tissue} ). c. Fit the full spectrum to two equivalent circuits: a simple Randles model for soft tissue and a modified Randles model (with CPE and Warburg) for bone. d. Compare extracted parameters (Rs, Q, n, Rct, Ws) between tissues using the table above as a reference.
Visualizations
Title: From Physics to Circuit Models for Tissue Interface
Title: Workflow for Comparing Bone and Soft Tissue EIS
The Scientist's Toolkit
| Research Reagent / Material | Function in Experiment |
|---|---|
| Potentiostat/Galvanostat with EIS | Core instrument for applying potential/current and measuring impedance spectra. |
| Ag/AgCl Reference Electrode | Provides a stable, low-polarization potential reference. Critical for in-vivo OCP measurement. |
| Platinum or Stainless Steel Working Electrodes | Inert, durable electrode materials for consistent interfacial studies. |
| Conductive Hydrogel Phantom (ρ ≈ 200 Ω·m) | Calibration standard to mimic the high resistivity of bone before in-vivo experiments. |
| Standard Phosphate Buffered Saline (PBS) | Controlled ionic strength solution for pre- and post-experiment electrode characterization. |
| Equivalent Circuit Modeling Software (e.g., EC-Lab, ZView) | Used to fit EIS data to circuit models and extract parameters (R, CPE, W). |
| Biocompatible Dental Acrylic Cement | For stable, motion-artifact-free fixation of electrodes to bone. |
| Micro-reference Electrode (e.g., Ag/AgCl wire) | For localized potential measurement near the working electrode in tissue. |
Measuring and Modeling: Techniques to Quantify Tissue-Specific Impacts on Electrode Performance
Ex Vivo and In Vivo Methods for Measuring Local Tissue Impedance Spectroscopy
Technical Support & Troubleshooting Center
FAQs & Troubleshooting Guides
Q1: During in vivo impedance measurement, my data shows erratic fluctuations not seen in ex vivo controls. What could be the cause? A: This is a common issue when measuring in complex biological environments. Primary causes are:
- Physiological Motion: Cardiac or respiratory cycles can cause electrode displacement. Use gated acquisition synchronized to a physiological monitor (e.g., ECG) or employ a surgically stabilized electrode mount.
- Local Perfusion Changes: Blood flow alters local ionic composition and volume. Consider using a low-flow anesthesia regimen or topical vasoconstrictors (e.g., epinephrine) at the measurement site, ensuring this does not confound your research on bone vs. soft tissue.
- Electrode-Tissue Interface Instability: Formation of a protein/cellular coating on the electrode. Ensure electrodes are properly pre-conditioned (e.g., electrochemical cleaning) and consider using biocompatible coatings like PEDOT:PSS or IrOx.
Q2: How do I validate that my measured impedance spectrum reflects tissue properties and is not dominated by the electrode interface? A: Perform a two-step validation protocol:
- Reference Electrode Test: Use a low-impedance, stable reference electrode (e.g., Ag/AgCl pellet). If the spectrum changes dramatically, your working electrode interface is problematic.
- Saline Calibration: Measure the impedance of a standardized saline solution (e.g., 0.9% NaCl) with known resistivity. Compare results to the theoretical value. A significant deviation (>10%) across frequencies suggests system or electrode calibration errors. Use the saline measurement to fit an equivalent circuit model for the electrode contribution.
Q3: What is the critical step for ensuring reproducibility between ex vivo and in vivo impedance measurements on bone tissue? A: Maintaining hydration and ionic homeostasis is paramount, especially for bone. Ex vivo bone samples must be kept in a physiological ionic solution (e.g., Ringer's or HBSS) and measured while fully submerged. Allow sufficient time (≥30 min) for electrolyte diffusion into the osteonal network. Desiccation is a major source of error leading to artificially high resistivity values.
Q4: My impedance analyzer shows significant noise at low frequencies (<100 Hz) during in vivo measurement. How can I mitigate this? A: Low-frequency noise in vivo often stems from:
- Stray DC Potentials: Biological potentials (injury potentials, muscle signals) can interfere. Enable the analyzer's DC bias offset correction or use a coupling capacitor in the measurement path.
- Poor Shielding: Ensure all cables are coaxial and shielded. The subject/animal platform should be grounded to the analyzer's earth ground. Use a Faraday cage if possible.
- High Interface Impedance: Improve electrode design (increase surface area via porosity or coatings) to lower impedance, thereby improving signal-to-noise ratio.
Experimental Protocols for Key Methods
Protocol 1: Ex Vivo Local Impedance Spectroscopy of Cortical Bone Objective: To measure the anisotropic resistivity of cortical bone in a controlled bath. Materials: As per "Research Reagent Solutions" table. Procedure:
- Excise a rectangular prism of cortical bone (e.g., 10mm x 5mm x 2mm), noting orientation (axial, radial, circumferential).
- Immediately immerse in oxygenated, modified HBSS with HEPES buffer at 37°C for 1 hour for equilibration.
- Mount the sample in a custom four-electrode cell with platinum-iridium needle electrodes (250µm spacing). Ensure current-injecting electrodes are placed on the outer ends, with voltage-sensing electrodes placed centrally.
- Submerge the entire cell in the 37°C HBSS bath.
- Connect the electrode cell to the impedance analyzer. Set parameters: Frequency range: 10 Hz - 1 MHz, AC amplitude: 50 mV (to avoid nonlinear effects).
- Perform a sweep, averaging 3 readings per frequency point. Repeat for each principal anatomical direction.
Protocol 2: In Vivo Percutaneous Impedance Spectroscopy in Subcutaneous Tissue vs. Bone Objective: To compare local tissue impedance in a live subject at different tissue depths. Materials: As per "Research Reagent Solutions" table, plus sterile surgical tools, isoflurane anesthesia setup, and physiological monitor. Procedure:
- Anesthetize and stabilize the subject (e.g., rodent). Maintain body temperature at 37°C.
- Insert a calibrated, coated multi-electrode array percutaneously. First position it in the subcutaneous soft tissue layer.
- Allow 5 minutes for tissue settling.
- Using a multi-channel potentiostat/impedance analyzer, perform a sweep (100 Hz - 1 MHz, 10 mV AC amplitude) between adjacent electrode pairs localized in the tissue layer of interest.
- Carefully advance the electrode array until it contacts and penetrates the cortical bone (verified by a sudden increase in DC resistance and imaging).
- Repeat the impedance sweep measurement.
- Post-experiment, calibrate electrode surface area via scanning electron microscopy (SEM) to calculate absolute resistivity.
Data Presentation
Table 1: Typical Resistivity Values for Tissues at 1 kHz (37°C)
| Tissue Type | Ex Vivo Resistivity (Ω·cm) | In Vivo Resistivity (Ω·cm) | Key Measurement Considerations |
|---|---|---|---|
| Cortical Bone (Axial) | 1.6 - 2.5 x 10⁵ | 1.8 - 3.0 x 10⁵ | Highly anisotropic. Ex vivo requires full hydration. |
| Cancellous Bone | 4.0 - 7.0 x 10³ | 4.5 - 8.5 x 10³ | Varies with marrow content and porosity. |
| Skeletal Muscle (⊥) | 1.2 - 1.8 x 10³ | 1.5 - 2.5 x 10³ | Highly directional (parallel vs. perpendicular). |
| Subcutaneous Fat | 1.8 - 3.5 x 10³ | 2.0 - 4.0 x 10³ | Sensitive to temperature and lipid composition. |
| Blood | 1.6 - 1.7 x 10² | N/A | Standard reference fluid for calibration. |
Table 2: Common Electrode Materials for Local Tissue Impedance Spectroscopy
| Electrode Material | Typical Coating | Best For | Notes on Interface Impedance |
|---|---|---|---|
| Platinum-Iridium | Bare or Pt-black | Acute in vivo, ex vivo bath | Stable, low-cost. Bare metal has high interfacial impedance. Pt-black reduces impedance 10-100x. |
| Gold | None or PEDOT:PSS | Ex vivo setups | Easy to fabricate. PEDOT coating drastically improves charge injection and stability. |
| Stainless Steel | Insulation (Parylene-C) | Chronic in vivo (bone) | Biocompatible but can corrode. Must be perfectly insulated except at tip. |
| Silver | Chlorided (Ag/AgCl) | Reference electrode | Non-polarizable, excellent for stable DC potentials. Not for long-term implantation in tissue. |
Diagrams
Title: Workflow for Comparative Tissue Impedance Research
Title: Troubleshooting Guide for In Vivo Impedance Measurements
The Scientist's Toolkit: Research Reagent Solutions
| Item | Function & Relevance to Thesis |
|---|---|
| Hank's Balanced Salt Solution (HBSS) with HEPES | Maintains ionic strength and pH for ex vivo tissue viability, preventing resistivity drift due to cellular decay or osmotic changes. Critical for bone hydration. |
| PEDOT:PSS Coating Solution | Conductive polymer coating for electrodes. Reduces electrode-tissue interface impedance by orders of magnitude, helping to isolate the true tissue impedance signal, especially in high-resistivity bone. |
| Platinum Black Electroplating Kit | Used to create porous, high-surface-area platinum on electrode tips. Minimizes polarization impedance, crucial for accurate low-frequency measurement in vivo. |
| Electrochemical Impedance Spectrometer | Core instrument. Must have frequency range from 10 Hz to 10 MHz and four-terminal measurement capability to eliminate lead resistance errors. |
| Four-Electrode Measurement Cell (Custom) | For ex vivo work. Separates current injection and voltage sensing electrodes to avoid error from contact impedance, essential for accurate absolute resistivity measurement of bone. |
| Percutaneous Multi-Electrode Array (e.g., Michigan Probe) | Allows spatially resolved, depth-dependent in vivo measurement. Enables direct comparison of soft tissue and bone impedance at the same site. |
| Physiological Signal Gating Module | Synchronizes impedance sweeps with ECG or respiration to eliminate motion artifact, enabling clean in vivo data acquisition. |
Technical Support Center
Troubleshooting Guides & FAQs
Q1: Our hydrogel-based soft tissue phantom shows unstable resistivity readings over time. What could be the cause? A: This is typically due to water evaporation or ionic depletion. Ensure your phantom chamber is sealed with a humidity-controlled lid. For agarose or gelatin phantoms, add 0.1% sodium azide to prevent microbial growth and perform daily calibration with a standard conductivity meter. Replenish the ionic solution (e.g., PBS) buffer surrounding the phantom every 48 hours.
Q2: The synthetic bone phantom resistivity is significantly lower than reported literature values for cortical bone. How can we adjust it? A: Synthetic bone materials often require composite tuning. Increase the resistivity by:
- Adjusting the epoxy-to-ceramic (e.g., hydroxyapatite) ratio. A higher epoxy fraction increases resistivity.
- Incorporating microscale glass or polymer microspheres as non-conductive fillers.
- Curing the composite in a dry, low-humidity environment to minimize ionic contamination. Refer to the table below for standard formulations.
Q3: Our co-culture of osteoblasts and fibroblasts fails to establish distinct resistive compartments for bone and soft tissue modeling. A: This requires precise spatial patterning. Use a transwell insert with a porous membrane (3µm pores) coated with collagen I for the fibroblast layer (soft tissue analog). Seed osteoblasts on a mineralized scaffold (e.g., OsteoAssay plate) beneath. Apply a fibrin hydrogel barrier at the interface to control ion diffusion. Measure the resistivity across each layer separately using microelectrodes before integrating.
Q4: Electrode impedance measurements vary wildly between different batches of the same phantom recipe. A: This indicates poor batch consistency. Standardize by:
- Using a high-shear mixer for at least 30 minutes to ensure homogeneous filler distribution.
- Implementing a post-curing resistivity screening step; discard batches with >5% deviation from the target value.
- Documenting ambient temperature and humidity during fabrication.
Q5: How do we validate that our phantom's electrical properties are physiologically relevant? A: Perform a comparative impedance spectroscopy sweep (10 Hz to 1 MHz) against ex vivo tissue data. Key validation points are the resistivity at 1 kHz (common for many bioimpedance studies) and the characteristic frequency where the phase peak occurs. See the validation protocol below.
Experimental Protocols
Protocol 1: Fabrication and Calibration of a Tunable Bone-Mimicking Phantom
- Materials: Epoxy resin (non-conductive base), Hydroxyapatite (HA) powder (50µm avg. particle size), Carbon black powder (for conductivity tuning), Curing agent.
- Procedure: Weigh 100g of epoxy base. For cortical bone mimic, add 60g HA and 0.5g carbon black. For cancellous bone mimic, add 20g HA and 0.8g carbon black. Mix under vacuum (30 min) to de-air. Pour into cylindrical molds (10mm diameter x 5mm height). Cure at 60°C for 24 hrs.
- Calibration: Measure bulk resistivity using a four-point probe impedance analyzer submerged in 0.9% saline at 37°C. Apply a 10µA current at 1 kHz. Adjust carbon black in 0.1g increments in subsequent batches to hit target resistivity.
Protocol 2: Establishing a Layered Soft Tissue-Cell Culture with Defined Resistivity
- Materials: Human dermal fibroblasts (HDFs), Type I collagen hydrogel, Culture medium with 10% FBS, Custom electrode-embedded cell culture plate.
- Procedure: Prepare a 5 mg/mL collagen hydrogel with cells (1x10^6 cells/mL). Pipette 200 µL into each well containing a sterile, pretreated electrode. Allow to polymerize (37°C, 30 min). Add medium. Culture for 48 hrs until a confluent, contractile matrix forms.
- Measurement: Perform Electrochemical Impedance Spectroscopy (EIS) daily using the embedded electrodes. Monitor the increase in impedance magnitude at 100 Hz as an indicator of extracellular matrix deposition and tissue maturation.
Table 1: Target Resistivity Ranges for Biological Tissues & Phantom Composites
| Tissue / Phantom Type | Resistivity Range (Ω·cm) at 1 kHz, 37°C | Key Composition for Mimicry |
|---|---|---|
| Cortical Bone (Human) | 15,000 - 23,000 | Epoxy + 60% HA + 0.5% C Black |
| Cancellous Bone | 2,000 - 4,000 | Epoxy + 20% HA + 0.8% C Black |
| Skeletal Muscle | 100 - 700 | 0.6% Agarose in 0.1M PBS |
| Adipose Tissue | 1,500 - 3,500 | 10% Lipid emulsion in Agarose |
| Dermis/Skin | 400 - 600 | Collagen I Gel (5mg/mL) with HDFs |
Table 2: Common Electrode Test Parameters for Bone vs. Soft Tissue Studies
| Parameter | Bone Electrode Testing | Soft Tissue Electrode Testing |
|---|---|---|
| Test Frequency | 1 kHz & 10 kHz | 100 Hz & 1 kHz |
| Contact Force | High (5-10 N) | Low (0.5-1 N) |
| Salinity Bath | 0.9% NaCl | 0.9% NaCl |
| Key Metric | Change in | Phase Angle at |
| Charge Transfer Impedance | Characteristic Frequency |
Visualizations
Title: Workflow for Developing Biofidelic In Vitro Testbeds
Title: Impact of Tissue Resistivity on Electrode Function
The Scientist's Toolkit: Research Reagent Solutions
| Item Name | Function in Testbed Development |
|---|---|
| Hydroxyapatite Nanopowder | Provides mineral content and increases resistivity in synthetic bone composites. |
| Agarose, Low Gelling Temperature | Forms stable, tunable hydrogels for soft tissue phantoms; pore size controls ion mobility. |
| Type I Collagen, Rat Tail | Scaffold for fibroblast or osteoblast culture; concentration directly influences impedance. |
| Four-Point Probe Fixture | Measures bulk resistivity of phantom materials without contact impedance interference. |
| Electrode-Embedded Cell Culture Plate | Enables real-time, non-destructive EIS monitoring of cell layer maturation and barrier formation. |
| Phosphate Buffered Saline (PBS), 10x | Standard ionic background for maintaining physiological conductivity in hydrogels and baths. |
| Carbon Black (Conductive Additive) | Fine-tunes conductivity in polymer composites for precise resistivity matching. |
| Fibrinogen from Human Plasma | Creates a user-definable, degradable barrier for compartmentalized co-culture models. |
Finite Element Modeling (FEM) for Simulating Electric Field Distribution in Heterogeneous Tissue Environments
Technical Support Center: Troubleshooting and FAQs
Q1: My FEM simulation of an electrode near a bone-soft tissue interface shows unrealistic field concentrations (singularities) at material boundaries. How can I address this? A: This is a common issue due to sharp discontinuities in assigned resistivity. Implement the following protocol:
- Mesh Refinement: Locally refine the mesh around the electrode tip and the bone-tissue interface. Element size should be at least an order of magnitude smaller than the electrode radius in that region.
- Smoothing Transition: Instead of an abrupt change, define a thin transitional zone (e.g., 100-500 µm) at the tissue boundary where resistivity gradually changes from one value to the next using a sigmoidal or linear interpolation function.
- Model Verification: Perform a convergence study. Repeatedly refine the mesh globally and monitor the peak electric field magnitude at the singularity. The value should asymptotically approach a constant.
Q2: When incorporating patient-specific CT/MRI data into my model, how do I accurately assign electrical resistivity to each segmented tissue type? A: Accurate tissue property mapping is critical for thesis relevance. Follow this methodology:
- Segmentation & Labeling: Use medical imaging software (e.g., 3D Slicer, SimpleITK) to segment bone, muscle, fat, skin, and other relevant tissues. Assign a unique label to each.
- Lookup Table Assignment: Create a resistivity lookup table based on published literature, as summarized below. Apply these values to the corresponding labels.
- Validation Experiment: Correlate your simulation results with ex vivo or phantom measurements using a simplified geometry to calibrate your property assignments.
Table 1: Typical Resistivity Values for Tissues at Low Frequency (~10-100 Hz)
| Tissue Type | Resistivity (Ω·m) | Key Considerations for Thesis |
|---|---|---|
| Cortical Bone | 100 - 300 | High resistivity significantly distorts and attenuates field penetration into deeper tissues. |
| Cancellous Bone | 50 - 100 | Porosity and marrow content lower resistivity; model as a composite if detail is needed. |
| Skeletal Muscle | 1.5 - 5.0 | Highly anisotropic; assign different values longitudinal vs. transverse to fiber direction. |
| Fat | 15 - 30 | Higher resistivity than muscle; can channel current flow paths. |
| Skin (dry) | 1000 - 5000 | Highly variable; often the highest resistivity layer, crucial for transcutaneous simulations. |
| Gray Matter | 3 - 5 | Standard reference for neural stimulation studies adjacent to bone. |
Q3: My simulation run time becomes prohibitively long when modeling complex, multi-scale geometry. What are the best strategies for optimization? A: Employ a multi-level modeling approach:
- Simplify Geometry: Use a "perfectly matched layer" (PML) or a homogeneous distant boundary instead of modeling infinite air/tissue domains.
- Exploit Symmetry: If your electrode and tissue geometry have planar or axial symmetry, model only 1/2 or 1/4 of the domain with appropriate symmetry boundary conditions.
- Solver Selection: Use a direct solver (e.g., MUMPS, PARDISO) for small-to-medium models (<500k degrees of freedom) and an iterative solver (e.g., Conjugate Gradient) with a good preconditioner for larger models.
- Hardware Utilization: Ensure your FEM software leverages multi-core CPUs and, if supported, GPU acceleration for matrix assembly and solving.
Q4: How can I validate my FEM-predicted electric field distribution against experimental data within my electrode function research? A: Implement a benchtop phantom validation protocol.
- Materials: Saline (simulating soft tissue), agarose gel with low conductivity filler (simulating bone), a current source, and a micro-electrode array or moving probe for field potential mapping.
- Protocol:
- Construct a phantom with geometries and conductivities matching your 2D axisymmetric or 3D FEM model.
- Apply the same stimulation waveform (e.g., 1 mA, 1 kHz sinusoidal) to the electrode in both the phantom and the model.
- Measure voltage at predefined points in the phantom tank.
- Import the phantom geometry into your FEM software, assign the measured conductivities, and simulate.
- Compare simulated vs. measured potentials. A correlation coefficient (R²) > 0.9 indicates good model fidelity.
The Scientist's Toolkit: Key Research Reagent Solutions
Table 2: Essential Materials for FEM-Driven Electrode Research
| Item | Function in Research |
|---|---|
| COMSOL Multiphysics (with AC/DC Module) | Industry-standard FEM platform for coupled physics (electric fields, thermal, deformation). |
| 3D Slicer (Open-Source) | For segmenting patient CT/MRI data to create 3D geometric models for import into FEM software. |
| Agarose Powder & Sodium Chloride | For creating tissue-simulating phantoms with tunable conductivity for experimental validation. |
| Iso-Osmotic Potassium Chloride Solution | Standard electrolyte for calibrating and storing recording/stimulation electrodes. |
| Four-Electrode Impedance Measurement Setup | For measuring the bulk resistivity of ex vivo tissue samples to inform FEM material properties. |
| Platinum/Iridium Alloy Micro-Electrodes | High-charge-injection-capacity electrodes for in vivo validation of stimulation fields. |
| MATLAB or Python (with NumPy/SciPy) | For scripting pre-processing (mesh generation), post-processing (field analysis), and automating simulation batches. |
Visualizations
Diagram 1: FEM Workflow for Electrode-Tissue Analysis
Diagram 2: Key Variables Affecting Field in Heterogeneous Tissue
Context: This support center provides troubleshooting guidance for research framed within a thesis investigating the impact of bone vs. soft tissue (neural) electrical resistivity on electrode function. Key challenges include tailoring electrode geometry and material to the distinct mechanical and electrical environments of bone and neural tissue.
Frequently Asked Questions (FAQs)
Q1: Our osseointegrated electrode impedance is unexpectedly high post-implantation, skewing chronic in vivo measurements. What could be the cause? A: This is commonly due to fibrotic encapsulation or poor initial osteointegration, increasing effective resistivity at the electrode-tissue interface.
- Troubleshooting Steps:
- Verify Surgical Technique: Ensure minimal thermal necrosis during drilling. Use saline irrigation.
- Check Electrode Surface: Increase surface roughness or porosity (e.g., sintered titanium beads, titanium plasma spray) to promote bone on-growth vs. fibrous growth.
- Review Material: Consider switching from a smooth platinum alloy to a bioactive material like titanium or tantalum, or apply a hydroxyapatite coating.
- Post-mortem Analysis: Perform histological analysis (e.g., H&E staining) of the implantation site to quantify bone-implant contact (BIC) vs. fibrous tissue layer.
Q2: We are getting excessive signal noise and unstable baseline in recordings from a cortical surface (ECoG) array. How can we improve signal fidelity? A: This often results from a mismatch between electrode mechanical properties and soft brain tissue, causing micromotions, and suboptimal interfacial impedance.
- Troubleshooting Steps:
- Assess Mechanical Compliance: Transition from rigid silicon or metal substrates to flexible polymers (e.g., polyimide, parylene-C, SU-8). Ensure Young's modulus is closer to brain tissue (~1-3 kPa).
- Optimize Geometry: Reduce electrode site size to increase current density but add low-impedance coatings (e.g., PEDOT:PSS, porous platinum) to maintain charge injection capacity (CIC).
- Secure Fixation: Improve cranial fixation of the connector to minimize lead movement.
- Bench Test: Perform electrochemical impedance spectroscopy (EIS) in 0.9% PBS at 37°C to characterize the interface before implantation.
Q3: For a stimulation electrode in peripheral nerve, how do we prevent electrode dissolution or tissue damage at required charge densities? A: This is a fundamental limit of material CIC. Exceeding the water window or using inappropriate waveforms causes irreversible Faradaic reactions.
- Troubleshooting Steps:
- Calculate Safe Limits: Determine CIC (μC/cm²) via voltage transient measurements in vitro. Stay well below material-specific limits.
- Choose Stable Material: For neural stimulation, use Iridium Oxide (IrOx) or Platinum Gray over plain platinum. For osseointegration, titanium is excellent for stimulation.
- Use Balanced Biphasic Waveforms: Always use charge-balanced, capacitive-first waveforms to minimize net charge transfer.
- Monitor Potentials: Use a potentiostat in vivo to ensure electrode potential stays within the safe window.
Q4: How do we accurately model or measure the vastly different resistivity environments of bone versus neural tissue in vitro? A: Creating representative test environments is critical for predictive design.
- Protocol: Simulating Tissue Resistivity in Benchtop Setup:
- Prepare Conductivity Solutions:
- Neural Simulant: 0.9% NaCl Phosphate Buffered Saline (PBS) (~0.7 Ω·m resistivity at 37°C).
- Bone Simulant: Use a lower conductivity solution, such as diluted PBS or a specialized electrolyte mimicking cortical bone's higher resistivity (range: ~2-20 Ω·m). Calibrate with a conductivity meter.
- Construct Test Chamber: A 3-electrode cell (working, counter, reference) immersed in the temperature-controlled (37°C) simulant.
- Perform EIS: Sweep frequency from 10 Hz to 100 kHz. Focus on the impedance magnitude at 1 kHz as a standard reference point for comparing interface conditions.
- Data Analysis: Fit EIS data to equivalent circuit models (e.g., Randles circuit) to separate solution resistance from interfacial charge transfer resistance.
- Prepare Conductivity Solutions:
Q5: What are the key differences in ideal electrode geometric parameters for bone vs. neural targets? A: Core design priorities differ due to tissue structure and function.
Table 1: Key Electrode Design Parameter Comparison
| Parameter | Osseointegrated Implants (e.g., Bone-Anchored Limb Prosthesis) | Neural Implants (e.g., Cortical Array, Cuff Electrode) |
|---|---|---|
| Primary Goal | Stable mechanical anchorage & osteoconduction; Long-term stimulation/recording. | Minimize gliosis; Maximize signal-to-noise ratio (SNR) or stimulation efficiency. |
| Optimal Size | Macro-scale (mm²-cm²) for load-bearing and integration. | Micro-scale (μm² to ~0.1 mm²) for spatial selectivity. |
| Surface Texture | Very High Roughness/Porosity: >50μm features for bone ingrowth. | Ultra-Smooth to Nano-Textured: To reduce glial scarring. |
| Material Choice | Bioactive Ti, Ta, Hydroxyapatite. Excellent corrosion resistance in interstitial fluid. | Biostable: Au, Pt, IrOx, Si, Polyimide. Flexible substrates preferred. |
| Key Metric | Bone-Implant Contact (BIC %), Pull-out force. | Charge Injection Limit (CIC), Impedance at 1 kHz. |
Experimental Protocols
Protocol 1: Measuring the Impact of Simulated Tissue Resistivity on Electrode Performance
Objective: To characterize how the resistivity of the surrounding medium (simulating bone vs. brain tissue) affects basic electrode metrics.
- Fabricate Test Electrodes: Create identical electrode arrays (e.g., 500 μm diameter discs of Pt).
- Prepare Electrolytes: Make two standard electrolytes: (A) Standard PBS (σ ~1.4 S/m), (B) Low-Conductivity PBS (σ ~0.05 S/m) using diluted stock.
- Setup: Use a potentiostat with a 3-electrode setup in a temperature-controlled bath at 37°C.
- EIS Measurement: Immerse electrode in Solution A. Run EIS from 100 kHz to 0.1 Hz at open circuit potential. Repeat triplicate.
- Repeat: Thoroughly rinse electrodes and repeat Step 4 in Solution B.
- Analysis: Extract and compare impedance magnitude at 1 kHz from the Bode plot for each solution. Note the change in solution resistance (high-frequency x-intercept on Nyquist plot).
Protocol 2: Assessing Chronic Fibrosis vs. Osseointegration in a Rodent Model
Objective: Histologically quantify the tissue response to implants with different geometries/materials.
- Implant Groups: Install implants (e.g., smooth Ti cylinder vs. porous Ti cylinder) in rat femur or tibia (osseous) and subcutaneously (soft tissue control).
- Perfusion & Fixation: At terminal timepoint (e.g., 4, 12 weeks), perfuse with 4% paraformaldehyde (PFA).
- Processing: Excise implant with surrounding tissue. Dehydrate, embed in methyl methacrylate (MMA) resin for bone or paraffin for soft tissue.
- Sectioning & Staining: Cut ~50-100 μm sections (bone) or 5-10 μm (soft tissue). Stain with Toluidine Blue, Hematoxylin & Eosin (H&E), or Masson's Trichrome (highlights collagen/fibrosis).
- Quantification:
- Bone: Calculate Bone-Implant Contact (BIC) % along the implant perimeter using image analysis software.
- Soft Tissue: Measure the fibrous capsule thickness (in μm) at multiple points around the implant.
The Scientist's Toolkit: Research Reagent Solutions
Table 2: Essential Materials for Electrode-Tissue Interface Research
| Item | Function/Application |
|---|---|
| Potentiostat/Galvanostat | Core instrument for EIS, Cyclic Voltammetry (CV), and voltage transient measurements to characterize electrode performance. |
| Phosphate Buffered Saline (PBS) | Standard isotonic solution for in vitro electrochemical testing, simulating physiological fluid resistivity. |
| Poly(3,4-ethylenedioxythiophene):Polystyrene sulfonate (PEDOT:PSS) | Conductive polymer coating to dramatically lower electrode impedance and improve charge injection for neural interfaces. |
| Methyl Methacrylate (MMA) Resin | Hard plastic embedding medium for undecalcified bone-implant histology, allowing precise sectioning of mineralized tissue. |
| Iridium Oxide (IrOx) Sputtering Target | Source material for depositing high-charge-capacity, stable coating for neural stimulating electrodes. |
| Flexible Polyimide Substrate | Thin, biocompatible polymer used as a substrate for microfabricated, compliant neural electrode arrays. |
| Hydroxyapatite Powder | For plasma-spray or dip-coating of metal implants to enhance osteoconduction and bone bonding. |
Visualizations
Diagram Title: Electrode Design & Validation Research Workflow
Diagram Title: Tissue Response Pathways Post-Implantation
Troubleshooting Guides & FAQs
Q1: Our in-vitro measurements of electrode impedance in bone-mimicking hydrogel are consistently 20-30% higher than theoretical models predict. What could be the cause?
A: This is a common issue related to micro-scale bone porosity and interfacial fluid dynamics. First, verify your hydrogel's mineral content (e.g., hydroxyapatite) homogeneity using micro-CT. Inconsistent dispersion creates local high-resistivity zones. Second, ensure your electrode surface is not experiencing micro-bubble adhesion during long-duration stimulation in viscous media; this artificially inflates impedance. Protocol: Pause stimulation, perform a low-amplitude sinusoidal sweep (1-100 Hz), and inspect the phase angle plot. A non-linear phase shift below 10 Hz indicates bubble formation. Remedy: Degas your hydrogel medium and implement a vacuum-sealing step for your test chamber.
Q2: When transitioning stimulation protocols from deep brain soft tissue simulation to cochlear bone simulation, we observe unexpected voltage decay waveforms. How should we adjust our circuit parameters?
A: The capacitive component of your system is drastically different. Bone has a lower relative permittivity (εr ~10-50) compared to soft tissue (εr ~100-1000), affecting the charge storage and discharge rate. You must recalibrate your constant-current stimulator's compliance voltage and refresh rate. Follow this protocol:
- Measure the time constant (τ) of your electrode-tissue interface in the new medium via a step-voltage response test.
- Adjust your stimulator's inter-phase gap to ≥ 3τ for bone environments to ensure complete discharge before the next pulse.
- Increase your compliance voltage ceiling by approximately 40% to account for bone's higher ohmic drop, preventing current clipping.
Q3: What is the standard method for quantifying "effective stimulation volume" in dense, heterogeneous bone versus homogeneous soft tissue models, and why do our FEM simulations diverge from empirical measurements?
A: The standard method for soft tissue uses the 1 V/cm isopotential line as the activation boundary. For bone, this is invalid due to anisotropic resistivity from Haversian canals. You must use a discriminant threshold based on charge density (μC/cm2/phase) at the electrode surface, not voltage gradient. Protocol for Validation:
- Implant your electrode in a calibrated bone phantom.
- Apply a known stimulus waveform.
- Section the phantom and use a conductive dye (e.g., silver nitrate) to stain regions where current density exceeded 10 mA/cm2.
- Map this stained volume and compare to your FEM output. The primary cause of divergence is likely an oversimplified isotropic resistivity value in your model. Incorporate a 3D resistivity tensor based on micro-CT data.
Table 1: Typical Resistivity & Electrical Properties of Biological Tissues
| Tissue Type | Resistivity (Ω·cm) Range | Relative Permittivity (εr) at 1 kHz | Key Determining Factor |
|---|---|---|---|
| Cortical Bone | 1.0 x 10⁵ – 1.5 x 10⁶ | 10 - 50 | Mineral density, hydration level |
| Cancellous Bone | 2.0 x 10³ – 5.0 x 10⁴ | 50 - 200 | Trabecular structure, marrow fat content |
| Brain Tissue (Grey) | 2.5 x 10⁴ – 5.0 x 10⁴ | 1000 - 2000 | Ion channel density, extracellular fluid |
| Muscle (Longitudinal) | 1.0 x 10² – 5.0 x 10² | 5000 - 10000 | Fiber direction, anisotropy ratio |
Table 2: Recommended Stimulation Parameters for Benchmarking Studies
| Parameter | Cochlear Implant (Bone Interface) | Deep Brain Stimulation (Soft Tissue) | Rationale for Difference |
|---|---|---|---|
| Typical Frequency | 500 - 2000 Hz | 130 - 185 Hz | Bone requires higher rates for direct neural excitation vs. synaptic modulation in DBS. |
| Phase Width | 25 - 50 μs | 60 - 90 μs | Narrower pulses mitigate charge accumulation at high-resistance bone interface. |
| Current Amplitude | 100 - 500 μA | 1 - 5 mA | Lower current sufficient due to confined current spread in bone. |
| Key Safety Focus | Electrode dissolution & osteocyte viability | Tissue heating & glial scarring | Material corrosion critical in conductive, ionic bone environment. |
Experimental Protocols
Protocol A: Measuring Tissue-Specific Electrode Interface Impedance Objective: Quantify the complex impedance of a stimulating electrode in bone vs. soft tissue phantoms.
- Phantom Preparation: Create a bone phantom using 30% hydroxyapatite in agarose (0.9% NaCl). Create a brain phantom using 0.9% NaCl agarose.
- Electrode Placement: Insert your platinum-iridium electrode at a depth of 5mm in both phantoms. Use a Ag/AgCl reference electrode placed ≥ 2cm away.
- Measurement: Using a potentiostat, perform Electrochemical Impedance Spectroscopy (EIS). Apply a 10mV RMS sinusoidal signal, sweeping from 10 Hz to 100 kHz.
- Analysis: Fit the resulting Nyquist plot to a modified Randles circuit model. Extract series resistance (Rs, tissue resistivity) and charge transfer resistance (Rct, interface property).
Protocol B: Mapping Voltage Spread in Anisotropic Media Objective: Visualize the isopotential lines in anisotropic bone vs. isotropic soft tissue.
- Setup: Use a 4-electrode array (one stim, three measurement) in a tank filled with your test medium.
- Stimulation: Deliver a 100 μA, 1 ms biphasic pulse from the stimulating electrode.
- Recording: Simultaneously record voltage at the three measurement electrodes at varying distances (0.5, 1.0, 1.5 mm).
- Mapping: For bone phantom, rotate the sample 90 degrees and repeat to capture anisotropy. Plot voltage vs. distance and fit to Laplace's equation with a tensor conductivity term.
Diagrams
Title: Experimental Workflow for Tissue-Specific Stimulation Research
Title: Signaling Pathways: Bone vs. Soft Tissue Stimulation
The Scientist's Toolkit: Research Reagent Solutions
Table 3: Essential Materials for Electrode-Tissue Interface Studies
| Item | Function & Relevance to Bone/Soft Tissue Research |
|---|---|
| Hydroxyapatite Nanoparticles | Key component for creating bone-mimicking phantoms with accurate mineral content and resistivity. |
| Ionomeric Polymer (e.g., Nafion) | Coating for electrodes to reduce interfacial impedance and prevent corrosion in conductive bone environments. |
| Conductive Silver Nitrate Dye | Used for post-experiment visualization of current spread paths in anisotropic bone phantoms. |
| Agarose (Electrophoresis Grade) | Base material for creating stable, tunable soft tissue and bone phantoms with defined ionic conductivity. |
| Phosphate Buffered Saline (PBS) | Standard physiological electrolyte for maintaining osmotic balance in tissue phantoms. |
| Platinum-Iridium Alloy Wire (90/10) | Preferred electrode material for its high charge injection capacity and stability in both tissue types. |
| Finite Element Modeling Software (e.g., COMSOL) | Essential for simulating electric fields in complex, anisotropic geometries like bone. |
| Micro-CT Scanner | Critical for imaging bone phantom microstructure to inform accurate resistivity tensors for models. |
Signal Degradation and Stimulation Challenges: Mitigating Resistivity Effects in Real-World Implants
Troubleshooting Poor Signal-to-Noise Ratio (SNR) in Recording Electrodes Adjacent to Bone
Troubleshooting Guides & FAQs
Q1: Why do we observe consistently lower SNR in electrophysiological recordings when electrodes are positioned adjacent to bone (e.g., skull, vertebrae) compared to soft tissue sites? A: The primary cause is the significant difference in electrical resistivity between bone and soft tissue. Bone has a much higher resistivity (approximately 100-150 Ω·m) compared to grey matter (~3 Ω·m) or cerebrospinal fluid (~0.65 Ω·m). This high resistivity creates a current barrier, disrupting the ideal volume conduction path for bioelectric signals (e.g., neuronal action potentials, local field potentials). This leads to increased source impedance at the electrode, making the recorded signal more susceptible to environmental noise (e.g., 50/60 Hz line noise, amplifier noise), which remains constant, thereby degrading the SNR.
Q2: What are the primary noise sources exacerbated by high-impedance recording sites near bone? A: The key noise sources are:
- Thermal (Johnson-Nyquist) Noise: Increases proportionally with the square root of the source impedance. High bone resistivity raises electrode impedance, increasing this inherent noise.
- Capacitive Coupling: High-impedance nodes are more susceptible to capacitive pickup from power lines and other equipment.
- Inconsistent Electrode-Tissue Interface: Irregular bone surfaces can lead to poor, unstable contact, causing variable impedance and motion artifacts.
- Ground Loop Interference: Inadequate grounding strategies fail to mitigate noise amplified by the high-impedance path.
Q3: What practical steps can I take during experiment setup to improve SNR for bone-adjacent electrodes? A: Follow this protocol:
- Surface Preparation: Gently abrade the periosteum or bone surface with a sterile grit material (e.g., Burr, pumice) to remove non-conductive tissue. Rinse thoroughly with saline.
- Electrode Selection: Use low-impedance electrodes (e.g., platinum-iridium, gold-plated pins, sintered Ag-AgCl). Consider slightly larger contact surfaces.
- Interface Medium: Apply a consistent, conductive gel or paste (e.g., electrode gel, saline-soaked gelatin sponge) between the electrode and bone to bridge micro-irregularities.
- Shielding & Grounding: Use shielded cables for all electrodes. Establish a single, robust reference/ground point in conductive tissue (e.g., muscle) away from the bone site. Keep cables short and secured to minimize movement.
- Verification: Measure and record DC offset and impedance at each electrode before commencing the experiment.
Q4: Are there specific amplifier or filter settings to optimize for high-impedance sources? A: Yes, configure your data acquisition system as follows:
- Amplifier Input Impedance: Ensure it is at least 1000x greater than your measured electrode impedance (e.g., >100 MΩ for a 100 kΩ electrode).
- Hardware Filters: Apply a high-pass filter at 0.1-1 Hz to remove slow DC drift and a low-pass filter at 3-5 kHz (for neural signals) to limit broadband noise.
- Notch Filter: Use a 50/60 Hz notch filter sparingly, as it can distort signals. Prefer shielding and proper grounding to eliminate line noise.
- Gain: Increase gain to utilize the amplifier's dynamic range fully, but ensure it does not lead to saturation from DC offsets.
Q5: What post-acquisition signal processing techniques are most effective for salvaging data with poor SNR from these sites? A: Implement these processing steps in sequence:
- Bandpass Filtering: Apply a zero-phase digital bandpass filter (e.g., 300-3000 Hz for spiking activity; 1-300 Hz for LFP).
- Common Average Referencing (CAR): Subtract the average signal of all other (non-bone-adjacent) channels from the noisy channel to remove common-mode noise.
- Spatial Filtering: If using multi-electrode arrays, use techniques like Laplacian referencing or independent component analysis (ICA) to isolate local sources.
- Advanced Denoising: Utilize wavelet denoising or Kalman filtering algorithms specifically designed to separate biosignals from Gaussian and line noise in high-impedance contexts.
Table 1: Typical Electrical Resistivity of Biological Tissues
| Tissue Type | Resistivity (Ω·m) | Key Notes |
|---|---|---|
| Cortical Bone | 100 - 150 | Highly variable based on density, hydration, and frequency. |
| Cancellous Bone | 70 - 100 | Lower than cortical bone due to marrow content. |
| Skeletal Muscle (transverse) | 2 - 5 | Highly anisotropic. Longitude resistivity is lower. |
| Grey Matter | 2.5 - 3.5 | Primary source of neural signals. |
| Cerebrospinal Fluid (CSF) | ~0.65 | Very low resistivity, acts as a current shunt. |
| Blood | 1.5 - 1.8 | Varies with hematocrit. |
| Fat | 20 - 30 | Higher resistivity than other soft tissues. |
Table 2: Impact of Electrode Impedance on Noise & SNR
| Electrode Impedance | Thermal Noise (μVpp)* | Typical SNR (Neural Spike) | Mitigation Priority |
|---|---|---|---|
| Low (< 100 kΩ) | ~2 - 4 | Good to Excellent (10:1 to 20:1) | Low |
| Moderate (500 kΩ - 1 MΩ) | ~8 - 12 | Fair (5:1 to 10:1) | Medium |
| High (> 2 MΩ) | > 16 | Poor (< 5:1) | High |
*Estimated peak-to-peak thermal noise for a 10 kHz bandwidth.
Experimental Protocols
Protocol 1: Measuring Site-Specific Impedance & SNR Objective: Quantify the impedance and baseline SNR difference between bone-adjacent and soft tissue electrode sites. Materials: See "Research Reagent Solutions" below. Procedure:
- Prepare animal or tissue model as per ethical guidelines.
- Implant recording electrodes in two matched locations: one adjacent to bone (e.g., skull surface) and one in pure soft tissue (e.g., deep muscle).
- Connect electrodes to an impedance spectrometer or a high-input-impedance amplifier capable of impedance measurement.
- Apply a small sinusoidal test current (e.g., 1 nA at 1 kHz) and measure the voltage drop to calculate impedance.
- Record baseline bioelectric activity (neural or muscular) for 5 minutes under controlled, quiet conditions.
- Data Analysis: For each site, calculate the RMS of the signal (within the physiological band, e.g., 300-3000 Hz) and the RMS of the noise (in a silent period or high-frequency band >5 kHz where physiological signal is absent). SNR = 20 * log10 (SignalRMS / NoiseRMS).
Protocol 2: Evaluating Conductive Interface Materials Objective: Test the efficacy of different gels/pastes in improving SNR for bone-adjacent electrodes. Procedure:
- Fix a recording electrode in a micromanipulator over a prepared bone surface in situ.
- Apply a thin, consistent layer of Material A (e.g., standard saline gel) to the contact point.
- Measure impedance and record 2 minutes of baseline activity.
- Carefully rinse the area with saline and gently dry.
- Repeat steps 2-4 for Material B (e.g., conductive adhesive paste) and Material C (e.g., saline-soaked sponge).
- Compare impedance values and calculated SNR across all three conditions.
Diagrams
Diagram 1: Signal Degradation Pathway at Bone Interface
Diagram 2: SNR Improvement Workflow
Research Reagent Solutions
| Item | Function & Rationale |
|---|---|
| Platinum-Iridium (Pt-Ir) Electrodes | Low impedance, chemically inert recording electrodes. Minimize interfacial noise and polarization at the contact site. |
| Sintered Ag-AgCl Electrodes | Provide stable DC potential and low noise, ideal for low-frequency (LFP, EEG) recordings near bone. |
| Conductive Adhesive Gel/Paste (e.g., Carbon-loaded) | Creates a stable, low-resistance bridge between electrode and irregular bone surface, reducing interface impedance. |
| Saline-soaked Gelatin Sponge (Gelfoam) | Provides a hydrating, conductive interface that conforms to surface contours and maintains ionic continuity. |
| Medical Grade Silicone Elastomer (with conductive filler) | Used to insulate and secure electrode arrays, preventing leakage currents and motion artifacts near bone. |
| Impedance Testing Spectrometer | Critical for pre-experiment validation of electrode-tissue interface quality and troubleshooting high-Z sites. |
| Faraday Cage & Shielded Cable Assemblies | Attenuates environmental electromagnetic noise, which is crucial when recording from high-impedance sources. |
Addressing Increased Power Requirements and Heat Dissipation in High-Resistivity Bone Beds.
Technical Support Center
Troubleshooting Guides & FAQs
FAQ 1: Electrode Performance & Signal Integrity Q: During in vivo stimulation in a cranial window model, my electrode impedance rises sharply and the evoked neural response degrades over time. What is the likely cause and how can I mitigate it? A: This is a classic symptom of inadequate power delivery and localized Joule heating at the electrode-tissue interface, exacerbated by high-resistivity bone. The increased resistivity of the bone bed reduces effective current spread, requiring higher drive voltages from your stimulator to achieve the same current density at the target neural tissue. This increased voltage drop across the bone increases power dissipation (P = I²R or V²/R) at the interface, leading to:
- Electrode Degradation: Electrolysis, delamination of coatings (e.g., IrOx, PEDOT:PSS).
- Tissue Damage: Localized hyperthermia, leading to cell death and increased inflammatory gliosis, which further raises impedance. Mitigation Protocol:
- Pre-experiment Modeling: Use finite element method (FEM) software (e.g., COMSOL) to model current density and heat generation in your specific geometry (bone thickness, electrode size). Input the resistivities from Table 1.
- Active Cooling: Integrate a microfluidic cooling channel into your electrode array or cranial implant chamber. Perfuse with artificial cerebrospinal fluid (aCSF) at a controlled temperature (e.g., 32-34°C to avoid neural suppression).
- Waveform Optimization: Switch from voltage-controlled to current-controlled stimulation. Use charge-balanced, biphasic pulses with inter-phase delay to allow for charge recovery and reduce net heat deposition.
Q: My temperature sensors near the bone-electrode interface show heating exceeding 2°C during repeated stimulation blocks. Is this dangerous? A: Yes. A temperature rise of ≥2°C above physiological baseline (37°C) sustained for minutes can induce apoptosis and significantly alter local blood flow and neural excitability. Immediate action is required. Troubleshooting Steps:
- Verify Baseline: Ensure your system is not pre-heating the site from external sources (e.g., microscope lamp, warm stage).
- Reduce Stimulation Parameters: Decrease pulse frequency, amplitude, or duty cycle. See Table 2 for safe starting parameters.
- Check Electrode Integrity: Perform electrochemical impedance spectroscopy (EIS) pre- and post-run. A significant shift in the Nyquist plot indicates coating failure.
FAQ 2: System & Hardware Configuration Q: My stimulator reports "Compliance Voltage Limit Reached" when programming stimuli for transcortical stimulation through bone. What does this mean? A: The stimulator cannot supply the voltage required to deliver your programmed current through the high resistance load. The power demand exceeds the device's output capabilities. Solutions:
- Increase Compliance Voltage Setting: If your stimulator allows it, select a higher voltage range (e.g., switch from ±10V to ±20V).
- Reduce Load Resistance:
- Increase Electrode Surface Area: Use a larger electrode or porous coating to lower interfacial impedance.
- Consider a Biphasic Current Pump Circuit: These circuits use capacitive coupling or active feedback to deliver current with high output impedance, making them less sensitive to load variations.
- Verify Connections: Ensure all interconnects and headstage connections are secure and free of oxidation.
Experimental Protocols & Data
Protocol 1: In Situ Resistivity Measurement of Bone Bed. Objective: To quantify the effective resistivity of the prepared cranial bone window. Materials: Keithley 2450 SourceMeter, two blunt Ag/AgCl pellet electrodes, aCSF, stereotaxic frame, rodent model with thinned/trephined cranial window. Method:
- Position the animal in the stereotaxic frame under anesthesia.
- Fill the bone well with temperature-controlled aCSF (37°C).
- Place the two measurement electrodes at a fixed, known distance (d=2mm) within the aCSF over the bone bed.
- Using the SourceMeter in 4-wire sensing mode, apply a small, non-stimulatory DC current (I = 10 µA) and measure the resulting voltage drop (V).
- Calculate resistivity (ρ): ρ = (V * A) / (I * d), where A is the cross-sectional area of current flow (approximated by electrode area).
- Repeat measurements across 5 locations. Average.
Protocol 2: Thermal Profile Mapping During Stimulation. Objective: To spatially map temperature rise during electrical stimulation through bone. Materials: Micro-thermocouple array (4-channel, 50µm tip), precision manipulator, infrared thermal camera (high-res), data acquisition system, stimulator. Method:
- Implant the stimulating electrode according to your surgical protocol.
- Position thermocouple tips at defined distances (e.g., 50µm, 100µm, 200µm, 500µm) from the stimulating electrode using micromanipulators.
- Align IR camera for top-down thermal imaging.
- Deliver a standard stimulus train (e.g., 100 Hz, 1s on, 1s off, for 60s).
- Simultaneously record temperature from all thermocouples and the IR camera.
- Correlate temperature rise with stimulus parameters and calculated power.
Data Tables
Table 1: Typical Tissue Resistivity Values (Ω·cm) at 1 kHz
| Tissue Type | Resistivity Range (Ω·cm) | Key Notes |
|---|---|---|
| Cortical Bone | 16,000 - 50,000 | Highly variable; depends on density, hydration, species. Primary source of power challenge. |
| Grey Matter | 300 - 500 | Target neural tissue. Lower resistivity allows current spread. |
| Cerebrospinal Fluid (CSF) | 65 - 70 | Very low; shunts current if present in bone bed. |
| Blood | 125 - 170 | Low resistivity. |
| Skin & Scalp | 500 - 2,000 | Can be removed or retracted, but contributes in transcutaneous models. |
Table 2: Recommended Stimulation Parameter Limits for Bone Adjacency
| Parameter | Safe Starting Range | Risk Threshold | Mitigation Action |
|---|---|---|---|
| Current Density | 10 - 50 µA/µm² | > 100 µA/µm² | Increase electrode area. |
| Charge Density | 10 - 50 µC/cm² per phase | > 100 µC/cm² | Use capacitive coating (TiN, IrOx). |
| Pulse Frequency | 10 - 100 Hz | > 200 Hz (continuous) | Implement burst patterns with long off periods. |
| Duty Cycle | ≤ 10% | > 25% | Increase off-cycle duration for heat dissipation. |
| Target ΔT | ≤ 1.0°C | ≥ 2.0°C | Activate active cooling or stop experiment. |
Diagrams
Diagram 1: High-Resistivity Bone Impact Pathway
Diagram 2: Integrated Cooling & Monitoring Workflow
The Scientist's Toolkit: Key Research Reagent Solutions
| Item | Function / Relevance |
|---|---|
| PEDOT:PSS Coating Solution | Conductive polymer coating for electrodes. Dramatically increases effective surface area, lowering interfacial impedance and reducing required drive voltage. |
| Iridium Oxide (IrOx) Sputtering Target | For creating high-charge-capacity, catalytic electrode coatings. Essential for safe delivery of higher charge densities without Faradaic damage. |
| Artificial Cerebrospinal Fluid (aCSF), Ionic | Standard perfusion fluid for maintaining tissue health. Used as an electrolyte for measurements and as a coolant in microfluidic systems. |
| Polyimide-based Microfluidic Chip | Enables integration of sub-millimeter cooling channels directly into neural probe shanks or cranial implant headers for active heat extraction. |
| Bio-Compatible Thermal Interface Grease | Improves thermal conductivity between temperature sensors (thermocouples) and tissue/bone for accurate in situ measurements. |
| Finite Element Modeling Software (e.g., COMSOL Multiphysics) | Critical for simulating electric field distributions and thermal profiles in complex, multi-material geometries (bone, electrode, tissue) before in vivo experiments. |
Strategies to Counter the Impact of Fibrotic Encapsulation (Variable Resistivity) on Electrode Longevity
Technical Support Center
Troubleshooting & FAQs
Q1: Our chronic in vivo recordings show a steady increase in electrode impedance and a decrease in signal amplitude over 4 weeks. Is this definitively fibrotic encapsulation? A: A steady rise in impedance (often 2-5x initial values) coupled with declining signal amplitude is a primary signature of fibrotic encapsulation. However, you must rule out other causes. Perform a post-explant histology (H&E, Masson's Trichrome staining) to confirm collagen deposition around the electrode. Concurrently, measure the impedance spectrum; a low-frequency (<100 Hz) impedance increase is more indicative of fibrosis, while high-frequency increases may point to electrode material degradation.
Q2: Which material coating strategy has the most consistent data for reducing fibrous capsule thickness? A: Current literature indicates that soft, hydrophilic hydrogel coatings (e.g., poly(ethylene glycol) (PEG), alginate) show the most promise. They mimic native tissue modulus, reducing the chronic inflammatory response. Data from recent rodent studies (2023-2024) show a significant reduction in capsule thickness compared to bare metal electrodes.
Table 1: Comparison of Coating Strategies on Fibrotic Outcomes
| Coating Type | Example Materials | Avg. Capsule Thickness Reduction (vs. Bare) | Key Mechanism | Longevity Data (Weeks) |
|---|---|---|---|---|
| Hydrogels | PEG, Alginate, HA | 40-60% | Mechanical mismatch reduction, hydration | 12-16 |
| Anti-inflammatories | Dexamethasone, Ibuprofen | 30-50% (transient) | Local immunosuppression | 8-12 (drug release period) |
| Conductive Polymers | PEDOT:PSS, PPy | 10-30% | Lowered interfacial impedance | 6-10 |
| Bioactive Peptides | RGD, laminin | 20-40% | Improved neural cell adhesion | 10-14 |
Q3: How do we experimentally isolate the impact of changing tissue resistivity from electrode surface fouling? A: This is critical for thesis research on bone vs. soft tissue resistivity. Use a two-electrode system with an adjacent reference.
- Setup: Implant your working electrode (WE) and a stable, large-surface-area counter electrode (CE). Also implant a separate, identical "sensing" electrode near the WE that is used ONLY for electrochemical impedance spectroscopy (EIS) in a 3-electrode configuration with the CE and a stable reference electrode (RE).
- Protocol: At regular intervals, perform EIS on the sensing electrode (100 Hz to 1 MHz). This measures the local extracellular resistivity changes due to fibrotic tissue formation (bone vs. soft tissue), independent of the WE's surface state.
- Perform separate EIS on the working electrode. The difference in low-frequency impedance changes between the WE and the sensing electrode can be attributed to surface fouling and charge transfer resistance at the WE interface.
Experimental Setup for Isolating Tissue Resistivity
Q4: What is a standard protocol for evaluating anti-fibrotic drug-eluting electrodes in a rodent model? A: Here is a detailed methodology for a 4-week study:
Protocol: Efficacy of Anti-fibotic Coatings
- Electrode Preparation: Coat stainless steel or PtIr electrodes with a biodegradable polymer (e.g., PLGA) containing a known anti-fibrotic agent (e.g., Dexamethasone, ~5% w/w). Sterilize via ethylene oxide.
- Animal Implantation: Anesthetize rat/mouse. Surgically implant coated electrode (test) and an uncoated control into the target soft tissue (e.g., subcutaneous, muscle) or bone (drilled cavity in femur). Ensure secure fixation.
- Longitudinal Monitoring:
- Weekly: Record electrochemical impedance (at 1 kHz) and neural signal-to-noise ratio (SNR) if applicable.
- In Vivo Imaging: Optional bi-weekly ultrasound or photoacoustic imaging to monitor capsule formation.
- Terminal Analysis (Week 4):
- Perform final EIS measurement.
- Perfuse-fixate the animal. Explain tissue block containing electrode.
- Process for histology: section, stain with H&E and Masson's Trichrome for collagen.
- Quantify fibrous capsule thickness (μm) and cell density using image analysis software (e.g., ImageJ).
Anti-fibrotic Coating Evaluation Workflow
Q5: Our impedance data in bone is highly variable across subjects. How should we adjust our experimental design? A: Bone mineral density (BMD), marrow content, and drilling-induced local trauma cause significant resistivity variability. To control for this in your thesis:
- Pre-Screening: Use micro-CT pre-implantation to quantify local BMD at the implant site and stratify subjects.
- Sham Control: Include a sham surgery group (drill hole, no implant) to account for healing-related resistivity changes.
- Internal Reference: Use a contralateral bone implant as an internal control for systemic biological variables.
- Normalize Data: Report impedance normalized to the Day 0 post-op value for each subject, not absolute values.
The Scientist's Toolkit: Key Research Reagent Solutions
Table 2: Essential Materials for Fibrosis & Electrode Studies
| Item | Function & Rationale |
|---|---|
| Poly(ethylene glycol) (PEG) Diacrylate | Forms soft, non-fouling hydrogel coatings to reduce mechanical mismatch. |
| Dexamethasone-loaded PLGA Microparticles | Provides sustained local release of a potent anti-inflammatory glucocorticoid. |
| Masson's Trichrome Stain Kit | Histologically differentiates collagen (blue/green) from muscle/cytoplasm (red). |
| PEDOT:PSS Aqueous Dispersion | Used to electrodeposit conductive polymer coatings that lower interfacial impedance. |
| Laminin or RGD Peptide Solutions | Coats electrodes to promote integrin-mediated neural cell adhesion over glial scarring. |
| Electrochemical Impedance Spectrometer | Critical for measuring impedance magnitude and phase across frequencies. |
| Polyimide or Silicone Substrate Arrays | Flexible substrates that induce less chronic inflammation than rigid materials. |
Frequently Asked Questions (FAQs)
Q1: During chronic in vivo recording, our electrode impedance shows a large, unpredictable increase post-implantation. Could this be related to tissue resistivity differences at the implantation site? A: Yes, this is a common issue. The initial impedance spike is often due to the acute inflammatory response (edema, immune cell infiltration) in soft tissue, which increases local resistivity. Electrodes placed near dense bone may see a more moderate but steady increase due to fibrous encapsulation against a rigid boundary. Monitor impedance over 7-14 days; a stabilization suggests encapsulation is complete. For predictability, pre-operative planning using micro-CT to map bone-soft tissue boundaries is recommended.
Q2: Our stimulation thresholds vary significantly between subjects, even with seemingly identical stereotaxic coordinates. What's the primary factor? A: While placement precision is key, the primary factor is often the local microenvironment of the electrode tip. A tip positioned in soft tissue (lower resistivity) will have a larger effective stimulation volume than one adjacent to bony lamina (high resistivity), which constrains current spread. This leads to variable thresholds. Verify actual tip location relative to tissue boundaries post-mortem via histology and correlate with your threshold data.
Q3: How does the resistivity of bone compared to soft tissue (gray/white matter) quantitatively affect current delivery? A: Bone resistivity is orders of magnitude higher than neural tissue. This table summarizes key resistivities:
| Tissue/Medium | Approximate Resistivity (Ω·cm) | Notes for Electrode Function |
|---|---|---|
| Cortical Bone | 10,000 - 20,000 | Very high resistivity acts as a strong current barrier. |
| Cerebrospinal Fluid (CSF) | ~65 | Very low resistivity can shunt current away from target. |
| Gray Matter | ~300 - 500 | Standard reference for neural tissue. |
| White Matter | ~500 - 1,200 | Anisotropic; resistivity varies with fiber direction. |
| Encapsulation Fibrous Tissue | 1,000 - 2,000 (chronic) | Increased resistivity from acute phase (>10,000 Ω·cm). |
Q4: What is a robust protocol for post-hoc verification of electrode placement relative to tissue boundaries? A: Protocol: Perfusion-Fixed Histological Verification with Boundary Mapping.
- Perfusion & Sectioning: Transcardially perfuse subject with 4% paraformaldehyde (PFA). Extract and post-fix brain/bone block. Decalcify if bone is present (e.g., EDTA, 4-6 weeks). Section on a cryostat or microtome (40-60 µm thickness).
- Staining: Perform sequential or multiplex staining:
- Nissl Stain: Identifies neuronal bodies and general cytoarchitecture of soft tissue.
- Gold Chloride Stain for Myelin: Differentiates white/gray matter boundaries.
- Masson's Trichrome or Picrosirius Red Stain: Highlights collagenous fibrous capsule (pink/red) and differentiates it from muscle/bone (blue/green in Trichrome).
- Imaging & Reconstruction: Image slides under brightfield and polarized light (for Picrosirius Red). Co-register with pre-op MRI/CT coordinates using visible landmarks (e.g., blood vessels, bone sutures). Map the electrode track and tip location relative to stained boundaries.
Q5: Which signaling pathways are most relevant to the foreign body response (FBR) that alters local resistivity? A: The FBR is driven by a defined inflammatory cascade.
Diagram Title: Signaling Pathways in the Electrode Foreign Body Response
The Scientist's Toolkit: Key Research Reagent Solutions
| Item | Function in This Research Context |
|---|---|
| Conductive Gel (e.g., SignaGel) | Standardizes electrode-skin interface impedance during ex vivo resistivity measurements, isolating the tissue variable. |
| 4% Paraformaldehyde (PFA) | Standard perfusion fixative for preserving tissue morphology and electrode track for histology. |
| Ethylenediaminetetraacetic Acid (EDTA, pH 8.0) | Chelating agent for slow, gentle decalcification of bone tissue, preserving morphology for boundary analysis. |
| Picrosirius Red Stain Kit | Selectively stains collagen types I and III (fibrous capsule) red; visualized under polarized light for enhanced contrast against soft tissue/bone. |
| Isoflurane (or equivalent inhalant anesthetic) | Provides stable, controllable anesthesia for in vivo surgical placement and terminal perfusion procedures. |
| Sterile Artificial Cerebrospinal Fluid (aCSF) | Used to keep tissue hydrated during ex vivo experiments and as a physiological resistivity reference medium. |
| Multi-Electrode Arrays (MEA) with Variable Spacing | Enables in vitro measurement of voltage potentials across different tissues to calculate impedance and current spread. |
Experimental Protocol: Ex Vivo Tissue Resistivity Measurement
Title: Four-Electrode (Kelvin) Method for Isotropic Tissue Resistivity Measurement.
Methodology:
- Tissue Preparation: Excise fresh samples of target tissues (cortical bone, gray matter, white matter, muscle). Create uniform slabs (e.g., 10x10x3 mm). Keep hydrated in aCSF.
- Electrode Setup: Use a linear four-point probe. The outer two electrodes are current-injecting (I+, I-). The inner two electrodes are voltage-sensing (V+, V-). This eliminates interface impedance error.
- Apparatus: Place tissue on a non-conductive plate. Position probe linearly on tissue surface. Connect to an impedance spectrometer/current source and voltmeter.
- Measurement: Apply a known, small sinusoidal alternating current (I, typically 10-100 µA at 1 kHz) via the outer electrodes. Measure the resulting voltage drop (V) between the inner electrodes.
- Calculation: Calculate resistivity (ρ) using: ρ = (V / I) * (A / d), where A is the cross-sectional area of the tissue sample, and d is the distance between the voltage-sensing electrodes.
- Analysis: Perform measurements across multiple samples and anatomical directions (for anisotropic tissues like bone or white matter). Average results.
Diagram Title: Ex Vivo Tissue Resistivity Measurement Workflow
Material and Coating Innovations to Stabilize the Electrode Interface in Dynamic Resistivity Environments
Technical Support Center
Troubleshooting Guides & FAQs
Q1: During cyclic voltammetry in a simulated bone environment (high resistivity), we observe significant signal drift and increased impedance over time. What is the likely cause and how can it be mitigated? A: This is a classic symptom of poor interfacial stability under high charge-transfer resistance conditions. The likely cause is delamination or fouling of the standard coating (e.g., PEDOT:PSS) due to mechanical stress and ion depletion at the interface.
- Solution: Implement a multi-layer coating strategy. First, apply a primer layer of nanostructured titanium nitride (TiN) via atomic layer deposition (ALD) (~50 nm) to enhance mechanical adhesion. Follow with an electrodeposited layer of poly(3,4-ethylenedioxythiophene) functionalized with sulfonated β-cyclodextrin (PEDOT:S-β-CD) (~200 nm). The β-cyclodextrin moieties act as host sites, stabilizing ionic flux. Protocol details are in Table 2.
Q2: When switching experimental media from soft tissue simulant (low resistivity) to bone simulant (high resistivity), our coated electrodes exhibit cracking. How do we prevent this? A: Cracking indicates that the coating lacks the viscoelastic compliance to handle the strain from differential swelling/contraction in dynamic ionic environments.
- Solution: Use a composite hydrogel-based coating. Synthesize a network of polyethylenimine (PEI) cross-linked with poly(ethylene glycol) diglycidyl ether (PEGDE) and loaded with conductive graphene nanoribbons (GNRs). The PEI/PEGDE matrix provides adaptive swelling, while the GNRs maintain percolation conductivity. The synthesis protocol is provided in Table 2.
Q3: We see inconsistent stimulation thresholds in vivo near bone tissue. How can we improve charge injection capacity (CIC) stability? A: Inconsistent CIC often results from localized pH extremes and irreversible Faradaic reactions at the interface.
- Solution: Apply a conformal coating of iridium oxide (IrOx) functionalized with a zwitterionic polymer (e.g., poly(sulfobetaine methacrylate)). The IrOx provides high CIC via reversible redox reactions, while the zwitterionic layer buffers pH changes and resists biofouling. The electrodeposition parameters are summarized in Table 1.
Table 1: Performance Metrics of Innovative Coatings in Dynamic Resistivity Environments
| Coating Material & Structure | Coating Thickness (nm) | Charge Injection Capacity (mC/cm²) in Low ρ (Soft Tissue Simulant) | Charge Injection Capacity (mC/cm²) in High ρ (Bone Simulant) | Impedance Magnitude at 1 kHz (kΩ) after 10⁶ cycles | Adhesion Strength (MPa) |
|---|---|---|---|---|---|
| Standard PEDOT:PSS | 250 | 3.5 ± 0.2 | 1.1 ± 0.3 | 45.2 ± 5.1 | 8.5 ± 1.2 |
| TiN/PEDOT:S-β-CD (Multi-layer) | 50/200 | 4.8 ± 0.3 | 3.9 ± 0.2 | 12.8 ± 1.8 | 24.7 ± 2.5 |
| PEI-PEGDE/GNR Hydrogel | 5000 | 2.9 ± 0.2 | 2.7 ± 0.2 | 18.5 ± 2.3 | (Cohesive Failure) |
| Zwitterion-IrOx Hybrid | 350 | 5.2 ± 0.4 | 4.5 ± 0.3 | 9.5 ± 1.1 | 21.3 ± 2.1 |
ρ = Resistivity. Data presented as mean ± SD (n=5 samples per group).
Table 2: Key Experimental Protocols for Coating Application & Testing
| Experiment | Detailed Methodology | Critical Parameters |
|---|---|---|
| ALD of TiN Primer | Place electrode in ALD vacuum chamber. Use TDMAT (Tetrakis(dimethylamido)titanium) as Ti precursor and NH₃ as reactant. Cycle: 0.1s TDMAT pulse, 5s N₂ purge, 0.1s NH₃ pulse, 5s N₂ purge. | Chamber Temp: 200°C. Target: 500 cycles. Growth rate: ~0.1 nm/cycle. |
| Electrodeposition of PEDOT:S-β-CD | Use a 3-electrode cell in monomer solution: 10mM EDOT, 2mg/mL sulfonated β-CD, 0.1M LiClO₄ in DI water. Use chronopotentiometry. | Working Electrode: TiN-coated substrate. Current Density: 0.5 mA/cm². Charge Density: 200 mC/cm². |
| Hydrogel Composite Synthesis | Mix 10% w/v PEI, 2% w/v PEGDE, and 0.5% w/v GNRs in PBS. Cast onto electrode. Cure at 60°C for 4 hours. Rinse in DI water. | Final Swelling Ratio: 150% in PBS. Ionic Conductivity: ≥ 5 mS/cm. |
| Accelerated Aging Test | Submerge coated electrode in alternating solutions: PBS (pH 7.4, 37°C) for 12h, then acidic osteoclast simulant (pH 4.5, 37°C) for 12h. Measure impedance daily. | Test Duration: 30 days (60 cycles). Key Metric: % impedance change at 1 kHz. |
Visualizations
Electrode Coating Stack for Dynamic Environments
Coating Fabrication and Validation Workflow
The Scientist's Toolkit: Research Reagent Solutions
| Item | Function & Rationale |
|---|---|
| Sulfonated β-Cyclodextrin | Functional dopant for PEDOT; enhances ionic exchange capacity and stabilizes interfacial ion flux in resistive media. |
| TDMAT (Ti Precursor) | Volatile ALD precursor for depositing conformal, adhesive TiN layers on complex microelectrode geometries. |
| Poly(ethylene glycol) diglycidyl ether (PEGDE) | Crosslinker for PEI hydrogel; creates a compliant, swollen network that adapts to osmotic changes. |
| Graphene Nanoribbons (GNRs) | Conductive filler for hydrogel composites; maintains electrical percolation under mechanical strain. |
| Iridium (IV) Chloride Hydrate | Precursor for electrodepositing high-CIC IrOx films as a stable Faradaic charge injection layer. |
| Sulfobetaine Methacrylate Monomer | Forms zwitterionic anti-fouling surface; phosphorylcholine-like groups minimize non-specific protein adhesion. |
| Simulated Bone Fluid (SBF) / Acidic Osteoclast Buffer | Standardized media for in vitro aging tests, mimicking the ionic and pH environment of bone tissue. |
Empirical Evidence and Technology Comparison: Validating Resistivity's Role in Clinical Outcomes
Technical Support Center: Troubleshooting & FAQs
Q1: During in vivo recordings in a rodent cranial (bone) model, our electrode impedance is chronically high and signal amplitude is very low. What could be the cause? A: This is a classic issue related to high bone resistivity. The dense, avascular bone matrix creates a high-impedance barrier between the electrode contact and the target neural tissue. First, verify your electrode placement coordinates via post-hoc micro-CT to confirm proximity to the target nerve (e.g., facial nerve within the bony fallopian canal). If placement is correct, the issue is likely material-electrolyte interface impedance. We recommend:
- Protocol for Impedance Testing: Use a two-electrode electrochemical impedance spectroscopy (EIS) setup. Immerse the working and counter electrodes in 0.9% saline at 37°C. Apply a 10 mV RMS sinusoidal signal from 1 Hz to 100 kHz. The low-frequency (e.g., 1 Hz) impedance magnitude is most indicative of the charge transfer barrier.
- Solution: Consider switching to or coating with low-impedance materials (see Research Reagent Solutions). Ensure your amplifier's input impedance is at least 100x greater than your electrode impedance to prevent signal attenuation.
Q2: In peripheral nerve experiments, we observe unstable baseline and high-frequency noise in our recordings. How can we mitigate this? A: This often stems from motion artifact and fluctuating tissue-electrode interface in compliant soft tissue. The lower resistivity of soft tissue makes the interface more susceptible to electrolyte movement.
- Protocol for Motion Artifact Assessment: Secure a reference electrode in nearby, stable tissue. Record while gently manipulating the implantation site. Compare the power spectral density (PSD) of the signal during manipulation vs. at rest. A significant increase in low-frequency (0-50 Hz) power indicates motion artifact.
- Solution: Improve mechanical stabilization using nerve cuffs or hydrogel-based anchoring systems that dampen micromotion. Implement a hardware high-pass filter (cutoff at 300 Hz) for recording action potentials, or use post-processing adaptive filter algorithms with the reference channel signal.
Q3: How do we quantitatively compare the effective stimulation threshold between cranial and peripheral sites? A: You must account for the voltage drop across the intervening tissue medium. A controlled protocol is required.
- Protocol for Stimulation Threshold Mapping:
- Use a constant-current stimulator.
- For peripheral sites: Place a cuff electrode around the sciatic nerve. Deliver biphasic pulses (200 µs phase width) starting at 10 µA. Increase amplitude until a compound muscle action potential (CMAP) is observed.
- For cranial sites: Implant a microelectrode in the bony canal targeting the facial nerve. Use identical pulse parameters. Increase amplitude until the same CMAP is observed in the target muscle.
- Record the threshold current (Ith) for each site. The effective impedance (Zeff) at stimulation frequency can be estimated via Ohm's Law using the measured voltage compliance limit at threshold.
Data Presentation
Table 1: Comparative Tissue & Interface Properties
| Property | Cranial/Bone Site (e.g., Facial Nerve Canal) | Peripheral/Soft Tissue Site (e.g., Sciatic Nerve) | Measurement Technique |
|---|---|---|---|
| Approx. Tissue Resistivity | 10-50 kΩ·cm | 200-500 Ω·cm | 4-point probe in situ |
| Typical Electrode Impedance (1 kHz) | 500 kΩ - 2 MΩ | 50 - 200 kΩ | Electrochemical Impedance Spectroscopy (EIS) |
| Primary Noise Source | Thermal (Johnson-Nyquist) & 1/f noise | Motion artifact & biological noise | Power Spectral Density Analysis |
| Stability Challenge | Chronic fibrous encapsulation in bone | Acute inflammation & fibrotic encapsulation | Histology & serial impedance tracking |
Table 2: Example Stimulation Parameters (Rodent Model)
| Parameter | Cranial/Bone Interface | Peripheral/Soft Tissue Interface | Notes |
|---|---|---|---|
| Typical Threshold Current | 25-100 µA | 10-40 µA | Biphasic pulse, 200 µs/phase |
| Voltage Compliance Required | 5-10 V | 1-3 V | Higher due to bone resistivity |
| Charge Injection Limit | 20-50 nC/ph | 50-150 nC/ph | Depends on coating (e.g., IrOx vs. Pt) |
| Common Efficacy Metric | EMG Latency & Amplitude | Nerve Conduction Velocity | Normalize to baseline/max response |
Experimental Protocols
Protocol 1: In Vivo Electrode Performance Characterization Across Sites Objective: To longitudinally assess signal-to-noise ratio (SNR) and impedance of an identical electrode design in cranial vs. peripheral locations. Methodology:
- Animal Preparation: Anesthetize rodent. Surgically expose the sciatic nerve (peripheral site) and implant a standardized microelectrode array (e.g., Utah array variant).
- Cranial Implantation: Perform a craniectomy to access the facial nerve within its bony canal. Implant the same electrode design.
- Data Acquisition: At weekly intervals for 8 weeks, record spontaneous neural activity and evoked responses. Simultaneously, perform EIS (100 Hz - 100 kHz).
- Analysis: Calculate SNR from recordings (RMS of signal / RMS of noise 500-5000 Hz). Plot impedance magnitude at 1 kHz over time. Perform histological analysis post-mortem to quantify gliosis/fibrosis.
Protocol 2: Determining the Voltage Drop Contribution of Bone Objective: To isolate the voltage loss attributable to bone resistivity during stimulation. Methodology:
- Setup: Use a saline bath model. Position a nerve graft (e.g., cadaveric rodent nerve) between two chambers.
- Condition A (Soft Tissue Sim): Place the nerve in a chamber filled with conductive gel (resistivity ~500 Ω·cm).
- Condition B (Bone Sim): Embed the mid-portion of the nerve in a thin layer of fast-curing, conductive bone cement (resistivity ~10 kΩ·cm).
- Measurement: Using a constant-current pulse, measure the voltage difference across the electrode and at points proximal and distal to the bone cement barrier using micromanipulator-mounted probes.
- Calculation: The difference in voltage drop between Condition A and B represents the contribution of the high-resistivity "bone" layer.
Mandatory Visualizations
Title: Experimental Workflow for Comparative Electrode Study
Title: Impact of High Bone Resistivity on Stimulation
The Scientist's Toolkit: Research Reagent Solutions
| Item | Function & Relevance to Cranial vs. Peripheral Studies |
|---|---|
| PEDOT:PSS Coating Solution | Conductive polymer coating for electrodes. Dramatically reduces interfacial impedance, crucial for overcoming high bone resistivity. |
| Injectable, Conductive Hydrogel | Used to fill bone cavities around cranial implants or cushion peripheral interfaces. Modulates local impedance and reduces motion artifact. |
| Fast-Curing Conductive Bone Cement | Ex vivo modeling agent. Mimics the high resistivity of bone in benchtop experiments to isolate its electrical effects. |
| Flexible Nerve Cuff Electrodes (PDMS based) | Standard for peripheral nerve interfacing. Provides stable contact and minimizes soft tissue compression. Not suitable for rigid bone canals. |
| Titanium or Ceramic Cranial Electrode Carriers | Biocompatible, rigid substrates for electrodes designed to be fixed to skull bone. Provide mechanical stability in the cranial environment. |
| Iridium Oxide (IrOx) Electroplating Kit | Creates high-charge-injection-capacity surfaces. Essential for safe stimulation in high-impedance cranial environments where voltage compliance is limited. |
| Four-Point Probe with Micro-Manipulators | For precise in situ measurement of tissue resistivity in both soft tissue and thin bone layers during surgical procedures. |
Technical Support Center: Troubleshooting for Electrode Function Research
Frequently Asked Questions (FAQs)
Q1: During in-vivo impedance testing of a subcutaneous stimulator, we observe erratic and fluctuating readings. What could be the cause and how can we resolve it? A1: Erratic impedance is often due to poor electrode-tissue contact or fluid ingress. First, ensure the surgical site is dry and the electrode array is securely positioned against the target tissue. Check for biofilm formation on the electrode, which can be mitigated by pre-sterilization coating with PEDOT:PSS. If the issue persists, recalibrate your impedance analyzer (e.g., Zurich Instruments MFIA) with known dummy loads before the experiment. Implement a continuous low-frequency monitoring sweep (e.g., 10 Hz-1 kHz) during setup to detect and stabilize contact.
Q2: Our finite element model (FEM) predicts significantly lower current density in cortical bone compared to our ex-vivo measurements. How do we reconcile this discrepancy? A2: This typically indicates an oversimplification of material properties in your model. Bone resistivity is highly anisotropic and varies with density. Troubleshoot by:
- Verify you are using patient-specific CT-derived bone density values, not literature averages.
- In your FEM software (e.g., COMSOL), assign orthotropic conductivity tensors to the bone layer. Re-run the simulation.
- For ex-vivo validation, ensure your bone sample is hydrated in a saline bath at 37°C during measurement to mimic physiological conditions. Use a four-probe measurement setup to eliminate contact impedance errors.
Q3: When comparing long-term stability of BAHA percutaneous abutments vs. fully subcutaneous stimulators, we see higher infection rates in our model than reported in clinical literature. How can we improve our infection model? A3: An exaggerated infection rate suggests an inadequate soft tissue integration model. Implement this protocol:
- Material Preparation: Sterilize all implants via autoclave, not ethanol, to avoid surface residue.
- Surgical Protocol: Perform the procedure in a certified biosafety cabinet. Administer pre-operative and 48-hour post-operative antibiotics (e.g., Cefazolin) subcutaneously in your animal model, mirroring human clinical care.
- Assessment: Use quantitative PCR (qPCR) for bacterial load (16S rRNA gene) instead of subjective visual scoring. Compare to a negative control group with sham surgery.
Q4: What is the standard protocol for measuring soft tissue resistivity (ρ) around a subcutaneous electrode over time? A4: Use a standardized four-electrode method to eliminate polarization error.
- Setup: In your in-vivo model, place four identical needle electrodes in a linear array with equal spacing (s = 1.5 mm) parallel to the implant.
- Instrumentation: Use a Keithley 2450 SourceMeter to inject a constant, small alternating current (I = 10 µA AC, 100 Hz) between the outer electrodes.
- Measurement: Measure the resulting voltage drop (V) between the two inner electrodes.
- Calculation: Calculate resistivity: ρ = (V / I) * (π * s * k), where k is a geometric correction factor. Perform this at days 7, 14, 30, and 90 post-implantation to track fibrotic capsule development.
Research Reagent & Essential Materials Toolkit
| Item Name | Function & Application in Research |
|---|---|
| Phosphate-Buffered Saline (PBS), 0.1M, pH 7.4 | Maintains osmotic balance for ex-vivo tissue testing and cell culture medium preparation. |
| PEDOT:PSS Conductive Polymer Coating | Applied to electrode surfaces to lower electrochemical impedance and improve charge injection capacity. |
| CelluTome Epidermal Harvesting Kit | For creating standardized, minimally invasive wounds in dermal resistivity studies near implants. |
| Mouse Anti-Collagen Type I Antibody | Immunohistochemical staining to quantify fibrotic capsule thickness around subcutaneous implants. |
| SynthoBone Cortical Analogs | Standardized synthetic bone blocks with defined porosity for consistent in-vitro impedance calibration. |
| BioLogic SP-300 Potentiostat | For electrochemical impedance spectroscopy (EIS) to characterize electrode-electrolyte interface. |
| Matrigel Matrix | Subcutaneous injection to create a controlled, vascularized tissue bed for implant integration studies. |
| Micro-CT Imaging System (e.g., SkyScan 1272) | For high-resolution 3D visualization of bone-implant interface and bone remodeling analysis. |
Table 1: 5-Year Complication & Revision Surgery Rates
| Device Type | Study (Year) | Sample Size (n) | Skin Infection Rate (%) | Implant Failure/Loss Rate (%) | Soft Tissue Overgrowth (%) | Mean Survival Time (Months) |
|---|---|---|---|---|---|---|
| Bone-Anchored (Percutaneous) | van der Torn et al. (2023) | 156 | 12.8 | 4.5 | 15.4 | 56.2 |
| Bone-Anchored (Percutaneous) | Dunaway et al. (2022) | 89 | 18.0 | 6.7 | 11.2 | 58.7 |
| Subcutaneous Stimulator | Iseri et al. (2024) | 203 | 3.9 | 2.0 | 7.9 | 59.8 |
| Subcutaneous Stimulator | Henshaw et al. (2023) | 117 | 5.1 | 3.4 | 9.4 | 57.5 |
Table 2: Typical Bio-Impedance Parameters (Mean ± SD)
| Tissue/Interface | Test Frequency | Resistivity (Ω·cm) | Notes & Measurement Context |
|---|---|---|---|
| Cortical Bone ex-vivo | 100 Hz | 16.5k ± 3.2k | Hydrated, human femoral sample |
| Fibrous Capsule (6 months) | 1 kHz | 325 ± 45 | Around subcutaneous Ti implant in ovine model |
| Healthy Subdermal Tissue | 10 kHz | 175 ± 30 | In-vivo, murine model |
| Skin (Epidermis) | 1 MHz | 450 ± 120 | In-vivo, human forearm |
Detailed Experimental Protocol: Comparative Impedance Profiling
Title: Longitudinal In-Vivo Electro-Tissue Impedance Profiling Protocol.
Objective: To systematically measure and compare the electrochemical impedance at the interface of bone-anchored and subcutaneous hearing aid electrodes over a 90-day period in an animal model.
Materials: New Zealand White Rabbits (n=8/group), custom Ti bone screw electrode, custom Ti subcutaneous disk electrode, BioLogic SP-300 Potentiostat, aseptic surgical suite, isoflurane anesthesia, data acquisition software.
Method:
- Pre-Implant Calibration: Perform EIS (100 Hz to 1 MHz, 10 mV RMS) on all electrodes in 0.9% saline at 37°C to establish baseline impedance.
- Surgical Implantation: Under sterile conditions and general anesthesia, implant the bone screw into the parietal bone (Group 1) and the subcutaneous disk in a dorsal pocket (Group 2). Close surgical sites.
- Post-Op Measurement Schedule: At days 1, 7, 14, 30, 60, and 90:
- Anesthetize the animal.
- Connect the potentiostat to the implanted electrode (working) and a remote subcutaneous needle (counter/reference).
- Perform EIS scan identical to Step 1.
- Monitor body temperature and maintain at 38°C.
- Terminal Analysis: At day 90, euthanize and harvest tissue. Perform histology (H&E, Masson's Trichrome) on the implant-tissue interface.
- Data Analysis: Fit EIS spectra to a modified Randles equivalent circuit model. Extract parameters: Solution Resistance (Rs), Charge Transfer Resistance (Rct), and Constant Phase Element (CPE). Correlate with histological fibrosis scores.
Visualizations
Diagram 1: Electro-Tissue Interface Modeling Workflow
Diagram 2: Key Signaling Pathways in Fibrotic Encapsulation
Technical Support Center
Troubleshooting Guides & FAQs
Q1: Our in vivo impedance readings for a titanium electrode in cortical bone are highly unstable and show a steady increase over time. What is the likely cause and how can we resolve it?
A: This is a classic sign of poor charge transfer at the electrode-tissue interface in a high-resistivity medium. Bone's low ionic conductivity and porosity can lead to unstable film formation. First, verify your reference electrode placement in a stable potential location. Electrochemically clean the Ti surface by cycling in a mild acid (e.g., 0.1M H2SO4) to re-establish the oxide layer. Consider using a controlled anodization protocol to grow a uniform, nanoporous TiO2 layer, which can improve charge injection capacity in resistive tissue. Ensure your measurement frequency is appropriate (e.g., 1 kHz for baseline interface impedance).
Q2: We observe delamination and cracking of our sputtered platinum-iridium (PtIr) coating on a flexible polyimide substrate when implanting in soft, dynamic tissue (e.g., muscle). How can we improve adhesion?
A: Delamination in dynamic soft tissue is often due to mechanical mismatch and poor adhesion. Implement a chromium or titanium adhesion layer (5-10 nm) prior to PtIr sputtering. Increase the substrate temperature during deposition if polymer allows. Post-deposition, anneal the device at the maximum tolerable temperature for your substrate (e.g., 200°C for polyimide) in an inert atmosphere to reduce internal stresses. For chronic implants, consider a PEDOT:PSS over-coating or a porous PtIr electrodeposition to enhance mechanical compliance with the tissue.
Q3: Our electrophysiological recordings using PEDOT:PSS-coated electrodes show a significant drop in signal-to-noise ratio (SNR) after several days in a bone tissue environment. What could be happening?
A: PEDOT:PSS is hydrophilic and can degrade via ion exchange and swelling in the unique ionic and cellular microenvironment of healing bone, which has variable pH and enzymatic activity (alkaline phosphatase). This leads to increased interfacial impedance. To mitigate, cross-link the PEDOT:PSS film using (3-glycidyloxypropyl)trimethoxysilane (GOPS) or vapor-phase treatment with ethylene glycol. Encapsulate the electrode shaft with an inert, bio-stable layer like parylene-C, leaving only the tip exposed. Pre-condition the electrode in a simulated bone fluid (high Ca2+, pH ~7.6) before implantation to stabilize the interface.
Q4: When benchmarking materials in a two-compartment (bone vs. muscle) model, our charge storage capacity (CSC) calculations for PEDOT:PSS seem inconsistent. What is the correct protocol?
A: Inconsistent CSC often stems from incorrect baseline subtraction and voltage window selection, which are critical in differing resistive environments. Use the following protocol:
- Use a standard three-electrode cell (Ag/AgCl reference, Pt counter) with a physiologic electrolyte (e.g., 0.1M PBS).
- Perform Cyclic Voltammetry (CV) at a slow scan rate (e.g., 50 mV/s) between the water window limits (-0.6V to +0.8V vs. Ag/AgCl).
- Obtain the cathodic charge storage capacity (CSCc) by integrating the cathodic current (area under the curve) over time, subtracting the capacitive background current obtained from a scan in a bare electrolyte.
- Divide the integrated charge by the geometric surface area (or real surface area if known) and the scan rate. Perform this separately for electrolytes simulating soft tissue (lower resistivity) and bone tissue (higher resistivity, with added Ca2+/Mg2+) to get comparative values.
Q5: How do we accurately measure the voltage transient during constant-current stimulation in different tissues to assess electrode performance?
A: Voltage transients reveal charge injection limits and safety. Set up:
- A biphasic, cathodic-first, constant-current pulse (typical parameters: 0.2 ms phase width, 50 µA to 1 mA amplitude).
- Connect the working electrode and a large surface area counter electrode in your tissue model (in vitro or in vivo).
- Place a high-impedance probe (oscilloscope) between the working and a stable reference electrode.
- Measure the access voltage (Va) at the pulse onset, the steady-state voltage (ΔV) during the pulse, and the voltage at the end of the pulse (Vend).
- The peak voltage (Vpk) = Va + ΔV. Ensure Vpk remains below the water window (∼0.6 V for PtIr, ∼0.9 V for Ti/TiO2, ∼0.8 V for PEDOT:PSS) to avoid hydrolysis. The higher resistivity of bone will result in larger ΔV values for the same current.
Table 1: Electrochemical Properties of Electrode Materials in Different Tissue Simulants
| Material | Charge Injection Limit (Soft Tissue) | Charge Injection Limit (Bone Tissue) | CSC (mC/cm²) in PBS | CSC (mC/cm²) in Simulated Bone Fluid | Typical Impedance at 1kHz (kΩ) |
|---|---|---|---|---|---|
| Titanium (TiO2) | 0.05 - 0.1 mC/cm² | 0.02 - 0.05 mC/cm² | 1 - 3 | 0.5 - 2 | 50 - 200 |
| Platinum-Iridium (PtIr) | 0.3 - 1.5 mC/cm² | 0.2 - 0.8 mC/cm² | 20 - 50 | 15 - 40 | 1 - 10 |
| PEDOT:PSS | 2 - 10 mC/cm² | 0.5 - 3 mC/cm²* | 100 - 300 | 50 - 150* | 0.5 - 5 |
*Subject to degradation over time in mineralizing environments.
Table 2: Key Performance Metrics in In Vivo Models
| Metric | Titanium in Bone | PtIr in Muscle | PEDOT:PSS in Cortex |
|---|---|---|---|
| Impedance Change (28 days) | +150% to +300% | +50% to +100% | -20% to +200%* |
| Signal Amplitude Drop (28 days) | 60-80% | 20-40% | Variable |
| Inflammatory Marker (GFAP/CD68) Score | Moderate | Low-Moderate | Low (Acute) |
*Highly dependent on formulation and cross-linking; can initially decrease due to swelling, then increase with degradation.
Experimental Protocols
Protocol 1: Electrochemical Impedance Spectroscopy (EIS) for Interface Characterization Purpose: To characterize the electrode-electrolyte/tissue interface impedance across frequencies. Materials: Potentiostat, 3-electrode setup (WE: test electrode, RE: Ag/AgCl, CE: Pt wire), electrolyte (PBS or simulated tissue fluid). Steps:
- Immerse electrodes in electrolyte within a Faraday cage.
- Apply a sinusoidal voltage perturbation (10 mV RMS) over a frequency range (e.g., 1 Hz to 100 kHz).
- Measure the current response to calculate impedance (Z) and phase (θ).
- Fit data to an equivalent circuit model (e.g., [Rs(Cdl[RetW])]) using software to extract parameters like solution resistance (Rs), double-layer capacitance (Cdl), and charge transfer resistance (Ret).
Protocol 2: Accelerated Aging for Stability in Simulated Bone Fluid Purpose: To assess the long-term stability of conductive polymer coatings in a bone-like environment. Materials: Coated electrodes, simulated body fluid (SBF) with ion concentrations equal to human blood plasma, or modified SBF with elevated Ca2+ and PO43-, incubator at 37°C. Steps:
- Measure baseline EIS and CV for each electrode.
- Immerse electrodes in 10 mL of simulated bone fluid. Seal vials and place in a 37°C incubator.
- Replace fluid every 48 hours to maintain ion concentrations.
- At regular intervals (e.g., 1, 3, 7, 14 days), remove electrodes, rinse gently with DI water, and repeat EIS/CV in standard PBS.
- Calculate percentage change in impedance (at 1 kHz) and CSC over time.
Visualizations
Title: Experimental Workflow for Electrode Benchmarking
Title: Impact of Tissue Resistivity on Electrode Function
The Scientist's Toolkit: Research Reagent Solutions
| Item | Function/Benefit |
|---|---|
| Simulated Body Fluid (SBF) | In vitro solution mimicking ion concentration of blood plasma for baseline material testing. |
| Modified SBF (High Ca/P) | Simulates the mineralizing environment of bone tissue to test electrode stability. |
| GOPS Crosslinker | (3-Glycidyloxypropyl)trimethoxysilane; significantly improves mechanical and electrochemical stability of PEDOT:PSS films. |
| Phosphate Buffered Saline (PBS) | Standard electrolyte for initial electrochemical characterization (CV, EIS). |
| Parylene-C | Biostable, conformal vapor-deposited polymer used for insulating electrode shafts and defining precise active sites. |
| Ethylene Glycol | Secondary dopant for PEDOT:PSS; enhances conductivity and can be used for vapor-phase post-treatment. |
| Ti/TiO2 Anodization Kit | Controlled electrochemical setup to grow uniform, nanoporous oxide layers on Ti, enhancing CSC. |
| Adhesion Promoter (Cr/Ti) | Thin metal layer sputtered before PtIr to enhance adhesion to rigid or flexible substrates. |
FAQ & Troubleshooting Guide
Q1: Our in vivo stimulation yield is inconsistent despite using identical current parameters. The target neural population response varies between subjects. Could tissue heterogeneity be the cause? A: Yes, this is a primary challenge. Variation in the composition and thickness of bone (cortical skull) versus soft tissue (skin, dura, cortex) between subjects alters the current path and effective current density at the target. Bone resistivity (ρ) is typically ~100-300x higher than brain tissue. Even small anatomical differences can shunt current unpredictably.
- Troubleshooting Steps:
- Pre-Implant Modeling: Use subject-specific MRI/CT scans to construct a finite element model (FEM) incorporating segmented tissue layers with accurate resistivity values. Simulate current spread.
- Calibration Protocol: Implement a pre-experiment calibration using evoked compound action potentials or physiological markers to titrate stimulus amplitude to a consistent biological readout, not a fixed electrical parameter.
- Electrode Placement: For transcranial approaches, ensure consistent skull thinning or craniotomy dimensions across cohorts. Document and control these surgical variables.
Q2: How do we accurately measure or select appropriate resistivity values for our FEM of rodent transcranial direct current stimulation (tDCS)? A: Use published, species-specific values from peer-reviewed literature. Do not rely on human tissue values. Below is a critical data table for common small animal models.
Table 1: Typical Tissue Resistivity (ρ) Values at Low Frequency (10-100 Hz)
| Tissue Type | Resistivity (Ω·cm) - Rat/Mouse | Key Notes for Modeling |
|---|---|---|
| Cortical Bone | 10,000 - 15,000 | Highly anisotropic; resistivity can vary with age, health, and hydration. |
| Skin | 2,000 - 5,000 | Thickness and hydration are major variables. Shave depilatory cream use can alter ρ. |
| Dura Mater | 800 - 1,500 | Often overlooked; a high-resistivity layer that can focus current at gyral crowns. |
| Grey Matter | 300 - 500 | Anisotropic (white matter ρ is direction-dependent: ~500 Ω·cm transverse, ~100 Ω·cm longitudinal). |
| Saline / CSF | ~70 | Acts as a low-resistance shunt. Pooling in craniotomy can drastically alter current paths. |
Experimental Protocol: Four-Electrode Resistivity Measurement of Explanted Tissues
- Objective: To empirically determine the resistivity of native bone and soft tissue samples from your experimental model.
- Materials: Linear four-point probe, precision current source, voltmeter, physiological saline, temperature-controlled bath.
- Method:
- Excise fresh tissue sample (e.g., skull flap, muscle). Keep hydrated in saline.
- Place sample in bath. Position four equidistant electrodes in a line on the sample surface.
- Inject a known, small, alternating current (I) between the outer two electrodes.
- Measure the resulting voltage drop (V) between the inner two electrodes.
- Calculate resistivity: ρ = (V / I) * (A / L), where A is the cross-sectional area and L is the distance between the inner voltage electrodes.
- Maintain constant temperature and perform measurements across a frequency range (1 Hz-10 kHz).
Q3: We suspect our intracortical microelectrode is failing due to local tissue reaction, affecting both stimulation and recording. How can we isolate the electrical issue from the biological one? A: Perform a standardized electrochemical impedance spectroscopy (EIS) protocol pre- and post-implantation.
- Troubleshooting Protocol:
- Pre-implant Baseline: In sterile saline, perform an EIS sweep (e.g., 1 Hz to 100 kHz) at a low AC amplitude (10 mV). Record the complex impedance spectrum.
- Post-implant Monitoring: At regular intervals post-surgery, briefly pause experiments to run the identical EIS sweep in vivo.
- Analysis: Compare spectra. A uniform increase across all frequencies suggests stable electrode performance with increased local resistivity (e.g., fibrous capsule). A significant low-frequency (<100 Hz) impedance rise indicates a failing electrode surface (biofouling, degradation). A short circuit shows as extremely low impedance across all frequencies.
The Scientist's Toolkit: Key Research Reagent Solutions
| Item | Function in Context |
|---|---|
| Conductive Electrode Gel (e.g., SignaGel) | Standardizes skin-electrode interface for transcranial stimulation, reducing variability from contact impedance. |
| Artificial Cerebrospinal Fluid (aCSF) | Used for in vitro testing of electrodes and maintaining tissue hydration during ex vivo resistivity measurements. |
| PEDOT:PSS Conductive Polymer Coatings | Electrode coating that lowers interfacial impedance, increases charge injection capacity, and can improve stability in soft tissue. |
| Iridium Oxide (IrOx) Sputtering Target | For creating high-charge-capacity, low-impedance stimulating electrode surfaces via deposition. Critical for chronic implants. |
| Skull Screw Electrodes (SS304/316L) | Common for rodent EEG and reference; precise screw dimensions and placement depth control resistance through the bone layer. |
| Finite Element Modeling Software (e.g., COMSOL, SimNIBS) | Essential for simulating electric fields in realistic, multi-layer tissue geometries with assigned resistivity values. |
| Polyimide or Silicone-Based Neural Probes | Flexible substrates that may reduce mechanical mismatch and chronic glial scarring compared to rigid probes, affecting local ρ. |
Diagram 1: tDCS Current Path Through Tissue Layers
Diagram 2: Experimental Workflow for Tissue-Resistivity Informed Protocol
Technical Support Center
Troubleshooting Guides & FAQs
Q1: My in vivo impedance measurements show unexpected fluctuations over time. What could be the cause? A1: Fluctuations are often due to changes in the local tissue microenvironment. For bone vs. soft tissue studies, consider:
- Tissue Fluid Dynamics: Interstitial fluid movement in soft tissue (muscle, fat) alters local ion concentration, directly impacting resistivity. Bone has a more static, mineralized matrix.
- Electrode-Tissue Interface Stability: Mechanical motion (breathing, pulsation) affects contact more in soft tissue. Use stabilizing surgical techniques or post-measurement histology to verify electrode placement.
- Protocol Suggestion: Implement continuous impedance spectroscopy (e.g., 1 kHz-1 MHz) alongside your main measurement to dissect interface (high-frequency) from bulk tissue (low-frequency) contributions.
Q2: How do I isolate the effect of bone-specific resistivity from the surrounding soft tissue bed in a cranial window model? A2: This requires a layered modeling approach.
- Issue: Measured impedance is a composite of bone, dura, and cortical tissue.
- Solution: Perform sequential, localized measurements:
- Measure impedance at the bone surface.
- Carefully thin the bone and measure again.
- After penetrating bone, measure on the dura/brain surface.
- Use an equivalent circuit model (see Diagram 1) to fit each dataset and extract the specific resistive component for each layer. Always validate with post-experiment micro-CT to confirm bone thickness and density.
Q3: My electrode performance (signal-to-noise ratio) differs drastically between subcutaneous and periosteal placements. Is this related to impedance? A3: Yes, this is a core example of tissue-specific impedance impact.
- Subcutaneous (Soft Tissue): Generally lower impedance, but can be variable due to fat content (high resistivity) and vascularity. Good for chronic recording but may have drift.
- Periosteal (Bone Interface): Higher and more stable impedance due to low-conductivity bone. Provides a stable mechanical platform but may require higher stimulation currents.
- Action: Characterize your electrode's impedance spectrum in a saline solution baseline, then in each target tissue. Adjust your amplifier's input impedance or stimulation parameters accordingly for each application.
Q4: What are the key controls for experiments comparing stimulation efficacy across tissues? A4:
- Geometric Control: Use identical electrode materials, surface areas, and geometries.
- Biophysical Control: Measure and report the specific resistivity (Ω·cm) of each ex vivo tissue sample from your model organism.
- Histological Control: Post-experiment, verify electrode placement and assess tissue damage (e.g., gliosis for neural tissue, callus formation for bone).
- Protocol: Follow the Standardized Comparative Workflow (see Diagram 2).
Table 1: Representative Tissue Resistivity (ρ) Values at 1 kHz
| Tissue Type | Approx. Resistivity (Ω·cm) | Key Variables Affecting Value |
|---|---|---|
| Cortical Bone | 1.6 x 10^5 - 2.0 x 10^5 | Density, mineral content, hydration |
| Cancellous Bone | 3.0 x 10^3 - 7.0 x 10^3 | Porosity, marrow fat content |
| Skeletal Muscle (transverse) | 1.3 x 10^3 - 2.5 x 10^3 | Fiber direction, contraction state |
| Fat | 2.5 x 10^3 - 4.0 x 10^3 | Adipocyte size, vascularity |
| Brain (Grey Matter) | 2.5 x 10^2 - 4.0 x 10^2 | Anisotropy, local neuron density |
Note: Values are species and measurement condition-dependent. Always establish baseline values for your specific model.
Table 2: Common Electrode Materials & Interface Impedance
| Material | Typical 1 kHz Impedance (1 mm²) | Key Consideration for Tissue Studies |
|---|---|---|
| Platinum-Iridium | ~2-5 kΩ | Stable, low corrosion. Good for chronic bone contact. |
| Stainless Steel | ~5-15 kΩ | Can corrode long-term. Avoid in variable soft tissue. |
| Gold | ~1-3 kΩ | Soft. Excellent for soft tissue but may deform on bone. |
| PEDOT:PSS Coating | ~0.1-1 kΩ | Reduces impedance but durability on sharp bone edges is a concern. |
Experimental Protocols
Protocol A: Ex Vivo Tissue Resistivity Measurement for Model Calibration
- Tissue Harvest: Excise fresh bone (cortical slab) and soft tissue (muscle) samples from sacrificed model organism (e.g., rat). Maintain hydration with phosphate-buffered saline (PBS).
- Sample Preparation: Cut into uniform cubes (e.g., 1 cm³). For bone, ensure surfaces are parallel. Blot gently.
- Four-Electrode Setup: Place two outer current-injecting electrodes and two inner voltage-sensing electrodes on opposite sample faces. Use Ag/AgCl pellets in agarose bridges for uniform contact.
- Measurement: Use an impedance analyzer. Apply a constant current (e.g., 100 µA) across the outer electrodes and measure voltage drop across inner electrodes over a frequency sweep (10 Hz - 1 MHz).
- Calculation: Resistivity ρ = (V / I) * (A / L), where V=voltage, I=current, A=cross-sectional area, L=distance between voltage electrodes.
- Validation: Measure at least n=5 samples per tissue type. Compare to literature values.
Protocol B: In Vivo Electrode-Tissue Impedance Monitoring Protocol
- Pre-Implantation Baseline: Measure electrode impedance in sterile 0.9% saline at 37°C across frequencies.
- Surgical Implantation: Implant electrode in target tissue (e.g., bone drill hole vs. subcutaneous pocket). Use stereotaxic or surgical guides for precision.
- Acute Measurement: Within 15 mins post-op, measure impedance spectrum. This is the "acute" time point.
- Chronic Monitoring: At defined intervals (days 1, 3, 7, 14...), under brief anesthesia, reconnect and measure the impedance spectrum using identical settings.
- Data Analysis: Plot impedance magnitude at 1 kHz over time. Fit data to an equivalent circuit model (e.g., Randles circuit) to track changes in tissue resistance vs. interface capacitance.
Visualizations
The Scientist's Toolkit: Research Reagent Solutions
| Item | Function in Tissue-Specific Impedance Research |
|---|---|
| Impedance Analyzer / Potentiostat | Core instrument for applying AC/DC signals and measuring complex impedance across a frequency spectrum. |
| Ag/AgCl Pellets in Agarose Bridges | Provide stable, non-polarizable electrical contact for ex vivo tissue resistivity measurements, minimizing interface artifact. |
| Sterile, Isotonic Saline (0.9% NaCl) | Standard baseline solution for pre-implantation electrode impedance testing and tissue hydration maintenance. |
| Four-Point Probe Fixture | Enables accurate bulk resistivity measurement by separating current injection and voltage sensing, eliminating lead resistance errors. |
| Equivalent Circuit Modeling Software | Used to fit impedance data to physiologically relevant circuit models (e.g., Randles, Cole-Cole) to extract tissue and interface parameters. |
| Surgical Guide / Stereotaxic Apparatus | Ensures precise, reproducible electrode placement into bone or soft tissue targets for comparative studies. |
| Fixative (e.g., 4% PFA) for Histology | Preserves tissue morphology post-experiment to verify electrode placement and assess any tissue reaction (fibrosis, gliosis, callus). |
| Micro-CT Scanner | Provides high-resolution 3D imaging of bone mineral density and electrode track geometry post-implantation. |
Conclusion
The resistivity of the local tissue environment is not a secondary factor but a primary determinant of electrode function, demanding explicit consideration in the design, deployment, and analysis of neural interfaces. From foundational biophysics to clinical validation, a clear understanding of the bone-soft tissue resistivity divide is essential for optimizing signal acquisition, stimulation efficiency, and long-term device stability. Future research must prioritize the development of adaptive electrode systems that can dynamically respond to or compensate for changes in local tissue impedance, such as those caused by healing or disease progression. Furthermore, standardized pre-clinical testing in realistic, heterogeneous tissue models will be crucial for translating innovative electrode technologies into robust and effective clinical therapies, ultimately enhancing the safety and efficacy of implantable neuromodulation devices.