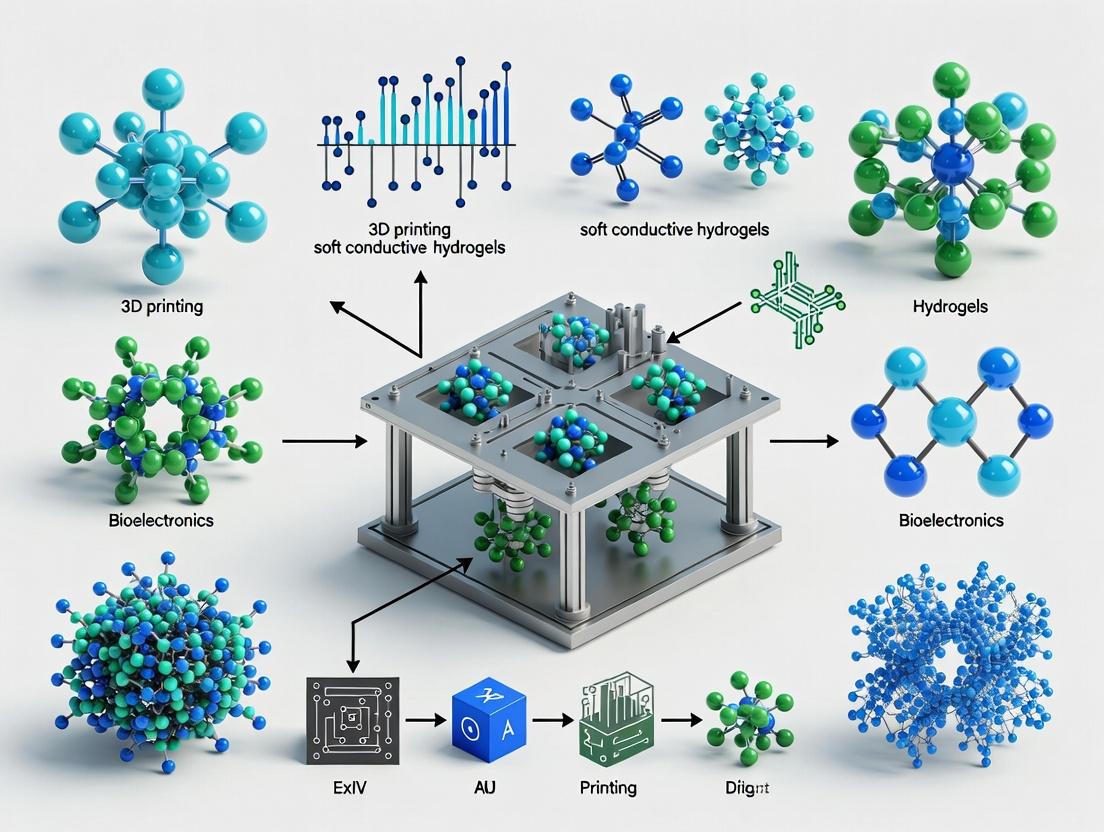
3D Printing of Soft Conductive Hydrogels: From Biomaterial Synthesis to Advanced Biomedical Applications
This article provides a comprehensive analysis of 3D-printed soft conductive hydrogels for research and drug development.
3D Printing of Soft Conductive Hydrogels: From Biomaterial Synthesis to Advanced Biomedical Applications
Abstract
This article provides a comprehensive analysis of 3D-printed soft conductive hydrogels for research and drug development. It explores the fundamental principles of these biomaterials, including their polymer networks and conductive mechanisms. It details advanced fabrication methodologies like Digital Light Processing (DLP) and extrusion printing for creating complex, cell-laden structures. The guide addresses critical challenges in printability, resolution, and stability, offering practical optimization strategies. Finally, it presents validation techniques and comparative assessments of leading hydrogel formulations against key performance metrics, establishing a roadmap for their translation into next-generation biosensors, neural interfaces, and drug delivery systems.
The Science of Soft Conductive Hydrogels: Composition, Properties, and Mechanisms
Application Notes
This document details the core components for 3D printing soft conductive hydrogels, a critical area of research for applications in bioelectronics, drug delivery devices, and regenerative medicine. The synergy between the polymeric network and the conductive phase dictates the printability, mechanical properties, electrical performance, and biofunctionality of the final construct.
Polymer Matrices: Structural and Rheological Foundation
The polymer matrix provides the 3D scaffold, dictates rheology for printability, and influences biocompatibility.
Natural Polymers:
- Gelatin Methacryloyl (GelMA): A photocrosslinkable derivative of gelatin. Offers excellent cell adhesion motifs (RGD sequences). Modifiable stiffness via concentration and degree of functionalization.
- Sodium Alginate: Ionically crosslinks rapidly with divalent cations (e.g., Ca²⁺). Excellent for extrusion printing and creating stable structures. Lacks inherent cell adhesiveness.
- Hyaluronic Acid (HA) Methacrylate: A component of the extracellular matrix. Imparts high water retention and can be tailored for specific cellular responses.
- Agarose: Forms thermoreversible gels, useful for support baths or sacrificial printing.
Synthetic Polymers:
- Poly(ethylene glycol) Diacrylate (PEGDA): Highly tunable, bio-inert, and offers precise control over network structure and mechanical properties. Often requires incorporation of bioactive motifs.
- Pluronic F127: A thermoresponsive triblock copolymer. Liquid at low temperatures, gels at physiological temperatures, useful for sacrificial printing or as a bioink additive for rheological modification.
- Poly(vinyl alcohol) (PVA): Forms strong, elastic hydrogels through physical crosslinking (freeze-thaw cycles) or chemical crosslinking.
Comparative Analysis: Table 1: Key Properties of Selected Polymer Matrices for Conductive Hydrogels
| Polymer | Type | Primary Crosslinking | Typical Conc. for Printing | Key Advantage | Primary Limitation |
|---|---|---|---|---|---|
| GelMA | Natural | Photopolymerization | 5-15% w/v | Excellent bioactivity & tunability | UV light required |
| Alginate | Natural | Ionic (Ca²⁺) | 2-4% w/v | Rapid gelation, high print fidelity | Low cell adhesion, slow degradation |
| PEGDA | Synthetic | Photopolymerization | 10-20% w/v | High mechanical tunability, reproducible | Bio-inert, requires modification |
| Pluronic F127 | Synthetic | Thermal (sol-gel) | 20-30% w/v | Excellent shear-thinning, sacrificial | Weak, non-permanent, non-degradable |
Conductive Phases: Enabling Electrical Functionality
Integration of conductive components transforms passive hydrogels into electroactive platforms.
Carbon-Based Materials:
- Carbon Nanotubes (CNTs): High aspect ratio, excellent electrical conductivity (~10³-10⁴ S/cm for SWCNTs), and mechanical strength. Require functionalization (e.g., carboxylation) for stable dispersion in aqueous polymer solutions.
- Graphene Oxide (GO) / Reduced GO (rGO): 2D sheets offering high surface area. GO is dispersible and can be post-print reduced (chemically, thermally, photothermally) to rGO for enhanced conductivity.
Conductive Polymers:
- Poly(3,4-ethylenedioxythiophene):Polystyrene sulfonate (PEDOT:PSS): A commercially available, water-dispersible conductive polymer complex. Offers moderate conductivity (~0.1-10 S/cm, tunable with additives) and excellent stability. Can compromise hydrogel mechanical integrity at high loadings.
Ionic Additives:
- Ionic Salts (e.g., NaCl, CaCl₂): Provide conductivity via ion migration. Simple, highly biocompatible, but conductivity is typically lower (~0.1-10 S/m) and not electronically conductive.
Comparative Analysis: Table 2: Key Properties of Conductive Phases for Hydrogels
| Conductive Phase | Type | Typical Loading | Conductivity Range | Key Advantage | Primary Challenge |
|---|---|---|---|---|---|
| CNTs | Carbon | 0.1-2 mg/mL | 10⁻² - 10² S/cm | High conductivity, mechanical reinforcement | Aggregation, cytotoxicity concerns |
| rGO | Carbon | 1-5 mg/mL | 10⁻³ - 10¹ S/cm | High surface area, photothermal properties | Complex processing, potential restacking |
| PEDOT:PSS | Polymer | 0.1-0.5% v/v | 10⁻³ - 10¹ S/cm | Easy dispersion, commercially available | Can be brittle, acidic (pH ~1.5) |
| Ionic Salts | Ionic | 0.1-1.0 M | 10⁻² - 10¹ S/m | High biocompatibility, simple | Non-electronic, leachable |
Experimental Protocols
Protocol 1: Formulation and 3D Printing of a GelMA-CNT Conductive Bioink
Objective: To prepare and extrude-print a cell-laden, conductive hydrogel construct.
Materials:
- GelMA (5-10% w/v in PBS)
- Carboxylated CNTs (cCNTs, 1 mg/mL stock in DI water)
- Photoinitiator (Lithium phenyl-2,4,6-trimethylbenzoylphosphinate, LAP, 0.5% w/v)
- Cell culture medium
- NIH/3T3 fibroblasts
- Bioprinter (extrusion-based, e.g., BIO X)
- Sterile printing cartridge and nozzle (22G-27G)
- UV light source (365 nm, 5-10 mW/cm²)
Methodology:
- cCNT Dispersion: Sonicate the cCNT stock for 30 min in an ice bath to ensure homogeneity.
- Bioink Formulation: In a sterile vial, mix GelMA solution, LAP solution, cell suspension (final density 1-5 x 10⁶ cells/mL), and cCNT stock to achieve final concentrations of 7% GelMA, 0.25% LAP, and 0.3 mg/mL cCNTs. Gently vortex.
- Rheology Assessment (Pre-print): Perform a shear rate sweep (0.1 to 100 s⁻¹) to confirm shear-thinning behavior. Measure storage (G') and loss (G'') moduli via oscillation frequency sweep.
- Printing: Load bioink into cartridge. Set printing parameters: Pressure 15-25 kPa, speed 5-10 mm/s, nozzle 25G. Print desired lattice structure (e.g., 10x10x2 mm grid) onto a cooled print bed (4°C).
- Crosslinking: Immediately after printing, expose the structure to UV light (365 nm, 10 mW/cm²) for 30-60 seconds to crosslink GelMA.
- Post-processing: Transfer construct to cell culture medium. Characterize conductivity via electrochemical impedance spectroscopy (EIS) and cell viability via Live/Dead assay at days 1, 3, and 7.
Protocol 2: Synthesis and Characterization of an Ionic-Crosslinked Alginate/PEDOT:PSS Hybrid Ink
Objective: To create a dual-crosslinking, conductive ink for extrusion printing.
Materials:
- Sodium alginate (4% w/v in DI water)
- PEDOT:PSS aqueous dispersion (Clevios PH1000)
- Glycerol (as a humectant)
- Calcium sulfate (CaSO₄) slurry (100 mM)
- Crosslinker bath (50 mM CaCl₂)
Methodology:
- Ink Formulation: Slowly add PEDOT:PSS (final 0.3% v/v) and glycerol (final 5% v/v) to alginate solution under magnetic stirring for 2 hours. Avoid introducing bubbles.
- Pre-crosslinking: Add CaSO₄ slurry to the ink to a final concentration of 10 mM. Stir briefly (30-60 sec) until viscosity noticeably increases. This step enhances shape fidelity.
- Printing: Extrude the ink into air or directly into a CaCl₂ crosslinking bath. Use a coaxial nozzle to sheath the ink with CaCl₂ solution for instantaneous gelation.
- Characterization:
- Conductivity: Use a 4-point probe method on a printed film.
- Mechanical: Perform uniaxial compression tests on printed cylinders.
- Swelling: Measure mass change of constructs in PBS over 72 hours.
Diagrams
Title: Component Selection for Conductive Bioink Design
Title: General Workflow for 3D Printing Conductive Hydrogels
The Scientist's Toolkit: Research Reagent Solutions
Table 3: Essential Materials for 3D Printing Soft Conductive Hydrogels
| Reagent/Material | Function in Research | Key Consideration for Use |
|---|---|---|
| GelMA (Methacrylated Gelatin) | Provides photopolymerizable, bioactive network for cell encapsulation. | Degree of functionalization (DoF) affects mechanical properties & gelation kinetics. |
| LAP Photoinitiator | Initiates radical crosslinking of methacrylated polymers under UV/VIS light. | Prefer over Irgacure 2959 for better water solubility & cell viability at lower UV doses. |
| Carboxylated CNTs | Imparts electronic conductivity and mechanical reinforcement. | Require thorough sonication in ice bath to disperse and minimize damage to polymer/cells. |
| PEDOT:PSS (Clevios PH1000) | Ready-to-use aqueous conductive polymer dispersion. | Highly acidic; must be neutralized (e.g., with NaOH) or buffered for cell compatibility. |
| Calcium Chloride (CaCl₂) | Ionic crosslinker for alginate-based inks. | Concentration and crosslinking time determine gel stiffness and porosity. |
| Pluronic F127 | Thermoresponsive sacrificial polymer for support bath printing or bioink rheology modifier. | Gelation is temperature-dependent; requires precise thermal control during printing. |
| RGD Peptide | Synthetic cell adhesion ligand for functionalizing synthetic polymers (e.g., PEGDA). | Coupling chemistry (e.g., acrylation) must be compatible with crosslinking mechanism. |
| Dulbecco's PBS (1X) | Standard buffer for bioink preparation and post-print washing/hydration. | Must be sterile, Ca²⁺/Mg²⁺ free if used before ionic crosslinking. |
This Application Note provides essential context and methodologies for researchers investigating conductive hydrogels for 3D bioprinting applications, such as biosensors, neural interfaces, and drug-eluting electroactive scaffolds. A fundamental understanding of the interplay between electronic conduction (via percolating networks) and ionic conduction (via mobile ions in the aqueous phase) is critical for designing materials with tailored electrical properties for specific biological environments.
Core Principles & Quantitative Comparison
Fundamental Mechanisms
- Electronic Conductivity: Achieved by embedding conductive fillers (e.g., carbon nanotubes, graphene, PEDOT:PSS, metallic nanoparticles) within the hydrogel matrix. Charge is carried by electrons or holes via percolation pathways.
- Ionic Conductivity: Intrinsic to hydrogels due to their water content and dissolved ions (from salts or polyelectrolytes). Charge is carried by mobile ions (e.g., Na⁺, K⁺, Cl⁻).
Key Parameter Comparison
Table 1: Comparison of Electronic vs. Ionic Conduction in Aqueous Hydrogels
| Parameter | Electronic Conduction | Ionic Conduction |
|---|---|---|
| Charge Carrier | Electrons/Holes | Cations and Anions |
| Typical Range | 10⁻⁵ to 10³ S/cm | 10⁻³ to 10⁻¹ S/cm (in physiological saline) |
| Temp. Dependence | Metallic: Positive | Arrhenius-type: Positive |
| Semiconductor: Variable | ||
| Frequency Dependence | Generally low | High (Electrode polarization at low freq.) |
| Key Influencing Factors | Filler type, concentration, dispersion, percolation threshold. | Water content, ion type/concentration, pore connectivity. |
| Primary Measurement | 4-point probe (bulk), 2-point probe (thin films). | Electrochemical Impedance Spectroscopy (EIS). |
| Common in 3D Printed Hydrogels | PEGDA/CNT, Alginate/PEDOT:PSS, GelMA/Graphene. | Alginate/Ca²⁺, Chitosan, Hyaluronic acid salt forms. |
Experimental Protocols
Protocol: Differentiating Conduction Type via Electrochemical Impedance Spectroscopy (EIS)
Objective: To characterize the dominant conduction mechanism and measure ionic conductivity of a hydrogel sample. Materials: Potentiostat/Galvanostat with EIS capability, two-electrode cell (e.g., platinum or stainless steel blocking electrodes), hydrogel sample (≈ 5mm thick disk), phosphate-buffered saline (PBS). Procedure:
- Sample Preparation: Cast or 3D print hydrogel into a defined geometry (e.g., disk). Pre-equilibrate in PBS for 24h.
- Cell Assembly: Place the hydrated sample between two parallel plate electrodes. Ensure full contact.
- EIS Setup: Apply a sinusoidal AC voltage (amplitude 10-50 mV) over a frequency range from 1 MHz to 0.1 Hz. Open circuit potential is typically used as the DC bias.
- Data Acquisition: Record impedance (Z) and phase angle (θ) at each frequency.
- Analysis:
- Plot Nyquist plot (Z'' vs. Z').
- Identify the high-frequency intercept with the real axis. This represents the bulk resistance (Rb).
- Calculate Ionic Conductivity: σ = d / (Rb * A), where d= sample thickness, A= contact area.
- A near-vertical line at low frequencies indicates ionic (blocking electrode) behavior. A depressed semicircle often suggests mixed electronic/ionic contribution.
Protocol: Measuring Electronic Conductivity via 4-Point Probe
Objective: To accurately measure the electronic conductivity of a conductive composite hydrogel, minimizing contact resistance. Materials: 4-point probe head (linear, in-line pins), source measure unit (SMU), flat, thick hydrogel sample (>5mm). Procedure:
- Sample Preparation: Prepare a hydrogel with conductive filler. Ensure a flat, smooth surface.
- Probe Placement: Place the four collinear probes in direct contact with the sample surface. Apply gentle, consistent pressure.
- Measurement: Apply a known DC current (I) between the outer two probes. Measure the resulting voltage drop (V) between the inner two probes.
- Calculation: For a thin sample on an insulating substrate, sheet resistance Rs = k * (V/I), where k is a geometric factor. For a bulk sample, resistivity ρ = 2πs * (V/I), where s is probe spacing. Conductivity σ = 1/ρ.
Visualizing Key Concepts
Title: Decision Workflow for Identifying Dominant Conduction Type
The Scientist's Toolkit: Research Reagent Solutions
Table 2: Essential Materials for Conductive Hydrogel Research
| Item | Function in Research |
|---|---|
| Polyethylene glycol diacrylate (PEGDA) | A common, photopolymerizable hydrogel matrix for creating well-defined 3D structures. |
| Gelatin Methacryloyl (GelMA) | A biofunctional, photopolymerizable hydrogel derived from collagen, enabling cell encapsulation. |
| Poly(3,4-ethylenedioxythiophene):poly(styrenesulfonate) (PEDOT:PSS) | A commercially available, water-dispersible conductive polymer for creating electronically conductive hydrogels. |
| Carbon Nanotubes (CNTs), single/multi-walled | High-aspect-ratio conductive fillers to establish electronic percolation networks at low loadings. |
| Sodium Alginate | An ionic-crosslinkable polysaccharide for forming ionically conductive gels and bioinks. |
| Phosphate Buffered Saline (PBS) | Standard ionic medium for hydrating and testing hydrogels in physiologically relevant conditions. |
| Lithium phenyl-2,4,6-trimethylbenzoylphosphinate (LAP) | A biocompatible photoinitiator for UV/blue light crosslinking of methacrylated hydrogels. |
| Calcium Chloride (CaCl₂) Solution | Ionic crosslinker for alginate-based hydrogels, influencing mechanical and ionic conductive properties. |
Within the broader thesis on 3D printing of soft conductive hydrogels, the interplay of rheology, mechanical modulus, swelling, and biocompatibility dictates the feasibility, functionality, and application potential of printed constructs. These properties are not independent; printability (rheology) affects microstructure, which dictates mechanical and swelling behavior, ultimately determining performance in biomedical applications such as drug-eluting implants or neural interfaces.
Application Notes & Protocols
Rheological Assessment for Printability
Application Note: Rheology determines the viscoelastic window for extrusion-based 3D printing. A suitable hydrogel ink must exhibit shear-thinning for extrusion, rapid recovery of storage modulus (G') for shape fidelity, and a sufficient yield stress to support layer-by-layer deposition. Recent studies (2023-2024) emphasize the importance of recovery kinetics post-shear, which is critical for multi-layered printing.
Protocol: Oscillatory Rheology for Printability
- Objective: To characterize the shear-thinning behavior, yield stress, and viscoelastic recovery of a conductive hydrogel precursor.
- Equipment: Rotational rheometer with parallel plate geometry (e.g., 25 mm diameter), Peltier temperature control.
- Procedure:
- Loading: Load pre-gel solution onto the pre-cooled (e.g., 10°C) lower plate. Lower the upper plate to a gap of 500 µm. Trim excess.
- Amplitude Sweep: At a constant frequency (ω = 10 rad/s), strain (γ) from 0.1% to 100%. Determine the linear viscoelastic region (LVR) and the yield point (where G' drops sharply).
- Frequency Sweep: Within the LVR (γ = 0.5%), ω from 0.1 to 100 rad/s. Assess frequency dependence.
- Three-interval Thixotropy Test (3ITT):
- Interval 1 (Rest): Low shear (γ = 0.5%, ω = 10 rad/s) for 60s to establish baseline G'.
- Interval 2 (Shear/Extrusion Simulation): High shear (γ = 1000%, ω = 10 rad/s) for 30s to simulate shear during extrusion.
- Interval 3 (Recovery): Immediately return to low shear (γ = 0.5%, ω = 10 rad/s). Monitor G' recovery for 180s. Calculate % Recovery = (G' at 180s / G' at Interval 1 baseline) x 100%.
- Key Quantitative Data (Representative):
Mechanical Modulus Characterization
Application Note: The elastic modulus (Young's modulus, E) must match the target tissue (e.g., brain ~0.1-1 kPa, skin ~10-100 kPa) to minimize stress shielding and promote integration. For conductive hydrogels, the addition of conductive fillers (e.g., PEDOT:PSS, carbon nanotubes) often alters the crosslinking network, affecting E.
Protocol: Uniaxial Compression Testing for Hydrogel Modulus
- Objective: To determine the compressive Young's modulus of a 3D printed hydrogel construct.
- Equipment: Universal mechanical tester, 5-50 N load cell, flat plate compression fixtures, calipers.
- Procedure:
- Sample Prep: Print cylindrical constructs (e.g., Ø=8mm, h=4mm). Swell to equilibrium in PBS at 37°C for 24h. Blot dry gently.
- Measurement: Place sample centrally on lower plate. Zero force and position. Compress at a constant strain rate of 1 mm/min (or 10% of height per minute). Stop at 30% strain.
- Analysis: Plot engineering stress (force/original area) vs. engineering strain (Δh/original height). Calculate the Young's Modulus (E) as the slope of the initial linear region (typically 5-15% strain).
- Key Quantitative Data (Representative):
Swelling Ratio and Kinetics
Application Note: Swelling ratio affects dimensional accuracy, mechanical properties, porosity (influencing drug diffusion), and electroactive surface area. It is governed by crosslink density and hydrophilicity. For drug delivery applications, swelling kinetics can be tuned for controlled release.
Protocol: Gravimetric Swelling Ratio Determination
- Objective: To measure the equilibrium mass swelling ratio (Q_m) and kinetics of a printed hydrogel.
- Equipment: Analytical balance, incubation chamber (37°C), PBS, blotting paper.
- Procedure:
- Dry Mass (Md): Lyophilize printed sample until constant mass. Record Md.
- Swelling: Immerse dried sample in excess PBS (pH 7.4) at 37°C.
- Kinetic Weighing: At predetermined time points, remove sample, blot gently to remove surface liquid, and weigh (M_t). Return to PBS.
- Equilibrium: Continue until Mt is constant (Meq, typically 24-72h).
- Calculations:
- Mass Swelling Ratio (Qm) = Meq / Md
- Water Content (%) = [(Meq - Md) / Meq] x 100%
- Plot Mt/Meq vs. √time for initial Fickian diffusion analysis.
- Key Quantitative Data (Representative):
Biocompatibility Assessment
Application Note: Biocompatibility is non-negotiable. For conductive hydrogels, assessments must evaluate both the polymer matrix and the leachables from conductive fillers. Standard tests include cytocompatibility (cell viability, adhesion) and in vivo inflammatory response.
Protocol: Indirect Cytotoxicity (ISO 10993-5) and Live/Dead Staining
- Objective: To assess the cytotoxicity of hydrogel leachables and direct cell viability on printed constructs.
- Equipment: Cell culture facility, CO2 incubator, fluorescence microscope, 96-well plates.
- Reagents: L929 fibroblasts or relevant cell line, DMEM, FBS, AlamarBlue (resazurin), Calcein-AM/EthD-1 Live/Dead stain.
- Procedure - Indirect Test:
- Extract Preparation: Sterilize hydrogels (UV, ethanol). Incubate in serum-free media (0.1g/mL) at 37°C for 24h. Filter (0.22 µm).
- Cell Seeding: Seed cells in 96-well plate (10,000 cells/well) in complete media for 24h.
- Treatment: Replace media with 100 µL of extract (or dilutions: 50%, 25% in complete media). Controls: complete media (negative), 10% DMSO (positive).
- Incubation: Incubate for 24h and 72h.
- Viability Assay: Add AlamarBlue (10% v/v), incubate 2-4h, measure fluorescence (Ex/Em 560/590 nm). Calculate % viability relative to negative control.
- Procedure - Direct Live/Dead Staining:
- Seed cells directly onto sterilized hydrogel surface.
- Culture for 1-3 days.
- Incubate with Calcein-AM (2 µM, labels live cells green) and EthD-1 (4 µM, labels dead cells red) for 30 min.
- Image with fluorescence microscope. Quantify live cell density.
- Key Quantitative Benchmark:
- Cytocompatible: ≥ 70% metabolic activity relative to negative control (ISO 10993-5).
Diagrams
Diagram Title: Rheology Workflow for Printability
Diagram Title: Interplay of Key Properties in 3D Printing
The Scientist's Toolkit: Research Reagent Solutions
Table 4: Essential Materials for Soft Conductive Hydrogel Research
| Item (Example Product) | Function in Research |
|---|---|
| Gelatin Methacryloyl (GelMA) | UV-crosslinkable, tunable hydrogel base providing natural cell-adhesive motifs (RGD). |
| Poly(3,4-ethylenedioxythiophene):Polystyrene sulfonate (PEDOT:PSS, Clevios PH1000) | Conductive polymer filler, provides electronic/ionic conductivity, dispersible in water. |
| Lithium phenyl-2,4,6-trimethylbenzoylphosphinate (LAP) | Efficient, cytocompatible photoinitiator for UV crosslinking of methacrylated hydrogels. |
| AlamarBlue Cell Viability Reagent | Resazurin-based assay for quantitative, non-destructive measurement of metabolic activity. |
| Calcein-AM / Ethidium Homodimer-1 (Live/Dead) Kit | Two-color fluorescence stain for simultaneous visualization of live and dead cells on constructs. |
| Phosphate Buffered Saline (PBS), 10X | Standard isotonic buffer for swelling studies, cell culture rinsing, and reagent dilution. |
| Rheometer with Peltier Plate (e.g., TA Instruments DHR-2) | Precisely measures viscoelastic properties (G', G'', η) and thixotropic recovery. |
| Universal Mechanical Tester (e.g., Instron 5943) | Quantifies compressive/tensile modulus, strength, and toughness of printed constructs. |
| Sterile Syringe Filters (0.22 µm PES) | For sterilizing hydrogel extracts and cell culture media in biocompatibility tests. |
Within the thesis investigating 3D-printed soft conductive hydrogels for biomedical interfaces, the rationale for adopting additive manufacturing (AM) is foundational. Traditional fabrication methods like molding or subtractive machining are limited in creating the complex, patient-specific, and functionally graded architectures required for advanced drug delivery systems, neural electrodes, and tissue engineering scaffolds. 3D printing transcends these limitations by enabling precise spatial control over material composition, microarchitecture, and conductive filler (e.g., graphene, PEDOT:PSS) distribution, which is critical for tuning electro-mechanical and biological properties.
Application Notes: Quantitative Advantages of 3D Printing for Hydrogels
Table 1: Comparative Analysis of Fabrication Techniques for Conductive Hydrogels
| Parameter | Traditional Molding/Casting | Extrusion-Based 3D Printing (Direct Ink Writing) | Vat Photopolymerization (SLA/DLP) | Rationale for AM Superiority |
|---|---|---|---|---|
| Feature Resolution | ~100-1000 µm (mold-dependent) | 50-500 µm (nozzle-dependent) | 1-100 µm (laser/ pixel-dependent) | Enables creation of microfluidic channels (<100 µm) for vasculature or drug diffusion pathways. |
| Geometric Complexity | Low (2.5D, simple geometries) | High (Freeform 3D) | Very High (Complex 3D) | Allows fabrication of lattice structures (90% porosity) for high surface area cell seeding or drug loading. |
| Material Waste | High (excess material trimmed) | Low (<10% waste) | Low (<5% waste) | Critical for expensive conductive nanomaterials; improves cost-efficiency. |
| Gradient Fabrication | Very Difficult (sequential steps) | Moderate (multi-printhead) | High (digital light processing) | Enables spatial gradients of conductivity (0.1 to 10 S/m) and stiffness (1-100 kPa) for mimicking tissue interfaces. |
| Production Speed | Fast for batch, slow for design change | Moderate to Fast | Fast for high-res parts | Rapid prototyping (hours vs. days) accelerates design iterations for drug release profile optimization. |
Table 2: Performance Metrics of 3D-Printed vs. Cast Conductive Hydrogels (Representative Data)
| Property | Cast Gelatin-Methacryloyl (GelMA)/ Graphene Composite | 3D-Printed GelMA/Graphene Composite | Implication for Drug Development & Research |
|---|---|---|---|
| Electrical Conductivity | 0.8 ± 0.1 S/m (homogeneous) | 0.3 to 4.2 S/m (spatially programmable) | Customizable electrical stimulation for guided cell therapy (e.g., neuron, cardiomyocyte differentiation). |
| Compressive Modulus | 12 ± 2 kPa (uniform) | 5 to 50 kPa (architecturally tuned) | Mechanically anisotropic scaffolds better mimic native tissue (e.g., skin vs. cartilage). |
| Drug Release Kinetics (Model Drug: Dexamethasone) | Monophasic, burst release (>60% in 24h) | Multiphasic, sustained release (40% in 72h) via lattice design | Enhanced control over release profiles improves therapeutic efficacy and reduces dosing frequency. |
| Cell Viability (NIH/3T3 fibroblasts) | 85% ± 5% at 7 days (surface growth) | 92% ± 3% at 7 days (3D infiltration) | High-porosity printed structures facilitate nutrient/waste exchange, improving in vitro model validity. |
Experimental Protocols
Protocol 1: Direct Ink Writing (DIW) of a Shear-Thinning Conductive Hydrogel Objective: To fabricate a 3D lattice structure from a nanocomposite hydrogel for neural tissue engineering. Materials: See "Research Reagent Solutions" below. Methodology:
- Bioink Formulation: In a sterile container, dissolve 8% w/v GelMA in PBS (37°C). Under sonication (30 min, 4°C), incorporate 2 mg/mL reduced graphene oxide (rGO). Add 0.25% w/v LAP photoinitrator. Mix thoroughly and centrifuge (2000 rpm, 5 min) to remove bubbles.
- Rheology & Printability Assessment: Load bioink into a syringe. Perform rotational rheometry: confirm shear-thinning behavior (viscosity drop >50% between 0.1 and 10 s⁻¹) and rapid recovery (>90% within 10s).
- Printing Parameters: Load syringe into pneumatic extrusion printer (18-22°C). Use a 22G conical nozzle (410 µm inner diameter). Set parameters: Pressure = 25-35 kPa, Print Speed = 8 mm/s, Layer Height = 300 µm.
- Printing & Crosslinking: Print a 10x10x2 mm lattice (0/90° infill, 1.5 mm strand spacing) onto a cooled print bed (10°C). Immediately after printing, expose the structure to 405 nm UV light (10 mW/cm²) for 60 seconds per layer for final crosslinking.
- Post-Processing: Submerge the printed construct in PBS for 24h to equilibrate. Characterize swelling ratio, conductivity (via 4-point probe), and mechanical properties.
Protocol 2: DLP Printing of a Drug-Loaded, Conductive Hydrogel Microneedle Patch Objective: To create a patient-specific transdermal patch for electrically modulated drug delivery. Materials: Poly(ethylene glycol) diacrylate (PEGDA, 700 Da), PEDOT:PSS dispersion, LAP, Model drug (e.g., Lidocaine). Methodology:
- Resin Preparation: Combine 20% v/v PEGDA, 1.2% v/v PEDOT:PSS, 0.3% w/v LAP, and 2 mg/mL Lidocaine in deionized water. Filter through a 0.45 µm syringe filter. Protect from light.
- Digital Design & Slicing: Design a 5x5 microneedle array (needle height: 800 µm, base width: 300 µm) using CAD software. Slice the model into 2D layers (slice thickness: 25 µm).
- Printing: Transfer resin to DLP printer vat. Set exposure parameters: Base layers (5): 35 s/layer; Normal layers: 1.8 s/layer. Initiate print.
- Post-Printing: Retrieve print, rinse in PBS to remove uncured resin. Post-cure under UV (365 nm, 20 mW/cm²) for 3 minutes to ensure complete reaction.
- Drug Release Testing: Immerse patch in 10 mL PBS (pH 7.4, 37°C) under mild agitation. Apply cyclic electrical stimulation (0-1 V, 1 Hz). Sample release medium at predetermined intervals and analyze via HPLC.
Visualizations
Title: Limitations of Traditional Hydrogel Fabrication
Title: 3D Printing Enables Transformative Hydrogel Fabrication
The Scientist's Toolkit: Research Reagent Solutions
Table 3: Essential Materials for 3D Printing Conductive Hydrogels
| Material/Reagent | Example Product/Catalog | Function in Research |
|---|---|---|
| Gelatin-Methacryloyl (GelMA) | Sigma-Aldrich, 900637; or in-house synthesis | Primary hydrogel matrix; provides biocompatibility, RGD cell-adhesion motifs, and tunable mechanical properties. |
| Poly(ethylene glycol) diacrylate (PEGDA) | Sigma-Aldrich, 455008 | Synthetic, photopolymerizable hydrogel precursor; offers high hydration and chemical versatility. |
| Conductive Nanofiller: Graphene Oxide (GO)/rGO | Cheap Tubes, GO-3-1; Graphenea | Enhances electrical conductivity; mechanical reinforcement. Surface chemistry allows functionalization. |
| Conductive Polymer: PEDOT:PSS | Heraeus Clevios PH 1000 | Provides high, stable ionic/electronic conductivity and excellent biocompatibility in printed structures. |
| Photoinitiator: Lithium phenyl-2,4,6-trimethylbenzoylphosphinate (LAP) | Sigma-Aldrich, 900889 | UV (365-405 nm) photoinitiator for rapid radical polymerization; offers superior biocompatibility over I2959. |
| Sacrificial Bioink: Pluronic F-127 | Sigma-Aldrich, P2443 | Used as a fugitive ink to print temporary supports or perfusable channels within permanent hydrogel constructs. |
| Crosslinking Agent: CaCl₂ Solution | Common laboratory stock | Ionic crosslinker for alginate-based bioinks, enabling rapid gelation post-extrusion (often used with GelMA). |
| Cell Culture Medium | Gibco, DMEM/F-12 | For preparing bioinks with live cells (bioprinting) and for post-printing culture of cell-laden constructs. |
Fabrication Frontiers: Techniques and Biomedical Applications of 3D-Printed Conductive Hydrogels
This document provides application notes and detailed experimental protocols for three primary 3D printing modalities, contextualized within research focused on fabricating soft, conductive hydrogels for biomedical and drug development applications.
Extrusion-Based 3D Printing (Direct Ink Writing)
Application Notes: Extrusion printing is the most prevalent method for soft conductive hydrogel fabrication due to its material versatility, low cost, and ability to handle high-viscosity bioinks. It is ideal for creating scaffolds for tissue engineering, neural interfaces, and drug-eluting constructs. The key challenge is formulating a hydrogel ink with suitable viscoelastic properties (shear-thinning and rapid recovery) to maintain shape fidelity while incorporating conductive elements like poly(3,4-ethylenedioxythiophene):polystyrene sulfonate (PEDOT:PSS), carbon nanotubes, or graphene flakes.
Experimental Protocol for Conductive Gelatin-Methacryloyl (GelMA)/PEDOT:PSS Hydrogel Scaffold:
Ink Preparation:
- Synthesize or procure GelMA (typical degree of methacrylation: 60-80%).
- Prepare a 10% w/v GelMA solution in PBS (phosphate-buffered saline) at 37°C.
- Blend with PEDOT:PSS aqueous dispersion (e.g., 1.3% w/v) at a 9:1 (GelMA:PEDOT:PSS) volume ratio.
- Add the photoinitiator Lithium phenyl-2,4,6-trimethylbenzoylphosphinate (LAP) to a final concentration of 0.25% w/v. Mix thoroughly and keep at 37°C to prevent gelation.
Printer Setup:
- Use a pneumatic or mechanical piston-driven extrusion system.
- Fit a conical nozzle (inner diameter: 22-27G, 410-210 µm).
- Maintain a heated print bed at 10-15°C to promote initial layer adhesion and gelation.
- Set pneumatic pressure (15-25 kPa) or extrusion rate based on rheological characterization.
Printing Parameters:
- Print Speed: 5-10 mm/s.
- Layer Height: 75-90% of nozzle inner diameter.
- Infill Pattern: Rectilinear or grid (80-100% density).
- Path Planning: Use slicing software to generate G-code for the desired scaffold (e.g., 10 mm x 10 mm, 5 layers).
Post-Processing:
- After printing, crosslink the structure via UV light exposure (λ = 365 nm, 5-10 mW/cm²) for 30-60 seconds per side.
- Transfer to cell culture medium or buffer for swelling equilibrium before electrical/mechanical characterization.
Vat Photopolymerization (SLA/DLP)
Application Notes: Stereolithography (SLA) and Digital Light Processing (DLP) offer superior resolution (µm-scale) and surface finish compared to extrusion. For conductive hydrogels, this modality requires formulating a photoreactive, conductive resin. Applications include high-resolution micro-electrodes, organ-on-a-chip devices, and intricate drug screening platforms. Incorporating conductive nanomaterials can scatter light, complicating curing depth and accuracy.
Experimental Protocol for DLP Printing of a Poly(ethylene glycol) Diacrylate (PEGDA)/Graphene Oxide (GO) Composite:
Resin Formulation:
- Prepare the aqueous photoresin: 20% w/v PEGDA (Mn 700) in deionized water.
- Add GO suspension (2 mg/mL) to achieve a final concentration of 0.1-0.3 mg/mL. Sonicate for 30 minutes to ensure dispersion.
- Add the water-soluble photoinitiator LAP to a final concentration of 0.3% w/v. Stir in the dark.
Printer Setup:
- Use a bottom-up DLP printer (405 nm wavelength).
- Clean the build platform (e.g., glass or silicone) and apply a PDMS coating to reduce adhesion forces.
- Load the resin into the vat. Ensure it is well-mixed and free of bubbles.
Printing Parameters:
- Layer Thickness: 50 µm.
- Exposure Time: 3-8 seconds per layer (requires optimization via working curve).
- Light Intensity: 10-15 mW/cm² at 405 nm.
- Design: Create a 3D model (e.g., a microlattice) and slice it into 2D bitmaps.
Post-Processing:
- After printing, gently rinse the structure in PBS to remove uncured resin.
- Perform a post-cure under UV light for 2 minutes to ensure complete crosslinking.
- (Optional) Reduction: To enhance conductivity, chemically reduce GO in the printed structure using ascorbic acid or thermal treatment.
Material Jetting (Inkjet Printing)
Application Notes: Inkjet printing provides non-contact, drop-on-demand deposition of picoliter volumes, enabling high-precision patterning of multiple materials. It is suited for creating conductive hydrogel circuits, biosensors, and gradient structures for drug release studies. The major constraint is formulating a low-viscosity ink (<20 mPa·s) with appropriate surface tension to ensure reliable jetting, which often limits solid (nanomaterial) loading.
Experimental Protocol for Inkjet Printing of an Alginate/Carbon Nanotube (CNT) Conductive Pattern:
Ink Preparation:
- Dissolve sodium alginate (1.5% w/v) in deionized water.
- Add carboxylic acid-functionalized single-walled CNTs (SWCNT-COOH) at 0.5 mg/mL.
- Sonicate the mixture using a probe sonicator (on ice) for 30 minutes at 40% amplitude to disperse CNTs. Follow with centrifugation (10,000 g, 20 min) to remove large aggregates. Use the supernatant as the ink.
- Filter through a 0.8 µm syringe filter.
Printer Setup:
- Use a piezoelectric inkjet printer with a disposable cartridge and nozzle (diameter ~50-70 µm).
- Load the ink into the cartridge, ensuring no bubbles are present.
- Set the print bed temperature to 25°C.
Printing & Crosslinking Parameters:
- Waveform: Optimize pulse voltage (40-80 V) and frequency (100-500 Hz) for stable droplet formation (observed via drop watcher camera).
- Drop Spacing: 50-100 µm.
- Pattern: Print a 2D conductive trace design.
- In-Situ Crosslinking: Use a co-axial aerosol spray or mist of calcium chloride solution (50 mM) directed at the print bed to gel the alginate upon deposition.
Post-Processing:
- After printing, immerse the structure in a 50 mM CaCl₂ bath for 5 minutes for complete crosslinking.
- Rinse gently with deionized water and characterize electrical properties.
Table 1: Quantitative Comparison of 3D Printing Modalities for Conductive Hydrogels
| Parameter | Extrusion | SLA/DLP | Inkjet |
|---|---|---|---|
| Typical Resolution | 100 - 500 µm | 25 - 100 µm | 50 - 200 µm (dot size) |
| Print Speed | Slow to Moderate | Moderate to Fast (per layer) | Fast (for 2D patterns) |
| Ink/Resin Viscosity Range | 1 - 10^5 Pa·s (Shear-thinning) | 0.1 - 5 Pa·s | 1 - 20 mPa·s |
| Key Material Requirement | Viscoelasticity, Yield Stress | Photoreactivity, Transparency | Newtonian Flow, Low Viscosity |
| Multi-Material Capability | Good (Multi-nozzle) | Limited (Multi-vat) | Excellent (Multi-printhead) |
| Conductive Filler Loading | High (5-20 mg/mL) | Low to Moderate (0.1-2 mg/mL) | Low (0.5-2 mg/mL) |
| Mechanical Strength | Moderate to High | High (Dense Crosslinking) | Low (Thin Films) |
| Primary Post-Processing | Ionic/UV Crosslinking | UV Washing & Post-Cure | Ionic/Crosslinking Bath |
The Scientist's Toolkit
Table 2: Key Research Reagent Solutions for 3D Printing Conductive Hydrogels
| Reagent/Material | Function & Role in Research |
|---|---|
| Gelatin-Methacryloyl (GelMA) | Photocrosslinkable hydrogel base providing biocompatibility, cell adhesion motifs, and tunable mechanics. |
| Poly(ethylene glycol) Diacrylate (PEGDA) | Biocompatible, photopolymerizable hydrogel precursor enabling high-resolution prints with controlled stiffness. |
| PEDOT:PSS Dispersion | Conductive polymer complex providing intrinsic ionic/electronic conductivity and hydrogel compatibility. |
| Carbon Nanotubes (CNTs) | Nanoscale conductive fillers (1D) to create percolation networks within hydrogels, enhancing electrical and mechanical properties. |
| Lithium Phenyl-2,4,6-trimethylbenzoylphosphinate (LAP) | Highly efficient, water-soluble photoinitiator for UV (365-405 nm) crosslinking of hydrogels. |
| Alginate | Ionic-crosslinkable polysaccharide enabling gentle gelation with divalent cations (Ca²⁺), ideal for cell encapsulation. |
| Graphene Oxide (GO) | Photocrosslinkable 2D nanomaterial precursor; can be reduced post-print to enhance conductivity. |
Experimental Workflow & Pathway Diagrams
Title: Workflow for 3D Printing Conductive Hydrogels
Title: Conduction Mechanisms in Printed Hydrogels
This application note details the formulation and characterization of bioinks for 3D bioprinting, specifically within a broader research thesis focused on developing soft conductive hydrogels for neural tissue engineering and cardiac patches. The primary challenge lies in balancing the trinity of bioink requirements: printability (extrusion and deposition), shape fidelity (structural integrity post-printing), and post-print cell viability. For conductive hydrogels (e.g., those incorporating carbon nanotubes, graphene oxide, or conductive polymers like PEDOT:PSS), this balance is further complicated by the need to maintain electrical functionality without compromising cytocompatibility or printability.
The table below summarizes critical parameters and their interconnected effects on bioink performance, incorporating recent data (2023-2024) on conductive hydrogel bioinks.
Table 1: Bioink Design Parameters and Their Interdependent Effects
| Parameter | Target Range (General) | Effect on Printability | Effect on Shape Fidelity | Effect on Cell Viability | Notes for Conductive Hydrogels |
|---|---|---|---|---|---|
| Viscosity (η) | 10 - 10⁴ Pa·s (shear-thinning) | High η aids filament formation but increases shear stress. | Positively correlated with stackability. | High shear stress during extrusion can damage cells. | CNT/Graphene increase viscosity; require optimization of concentration/dispersant. |
| Storage Modulus (G') | > 100 Pa (pre-gel) | Must be low enough for extrusion. | Higher post-print G' improves structural fidelity. | Indirect effect via mechanical stability. | Crosslinking must not inhibit percolation of conductive network. |
| Gelation Mechanism | Ionic/Photo/Thermal | Fast gelation can clog nozzle; slow can cause sagging. | Rapid gelation (e.g., UV) enhances shape fidelity. | Photo-initiators & UV exposure must be cytocompatible. | Dual-crosslinking (ionic for speed, covalent for stability) is prevalent. |
| Cell Density | 1-10 x 10⁶ cells/mL | High density increases viscosity unpredictably. | Can act as a filler, sometimes improving fidelity. | Critical for function; must survive shear and crosslinking. | Conductive materials can shield cells from shear? (Under investigation). |
| Conductive Filler % | CNT: 0.5-2 mg/mL; GO: 2-5 mg/mL | Increases viscosity and can cause nozzle abrasion/clogging. | Can reinforce structure (nanocomposite effect). | Cytotoxicity risk from impurities/charge. Requires surface functionalization. | Electrical conductivity typically 10⁻³ to 10⁻¹ S/cm achieved. |
Research Reagent Solutions Toolkit
Table 2: Essential Materials for Conductive Bioink Formulation & Testing
| Item | Function | Example Product/Chemical |
|---|---|---|
| Base Hydrogel Polymer | Provides the primary biocompatible scaffold. | Alginate, Gelatin methacryloyl (GelMA), Hyaluronic acid methacrylate (HAMA) |
| Conductive Nanomaterial | Imparts electrical conductivity to the matrix. | Carboxylated Single-Walled Carbon Nanotubes (SWCNT-COOH), Graphene Oxide (GO), PEDOT:PSS dispersion |
| Photo-initiator | Enables UV-induced covalent crosslinking of methacrylated polymers. | Lithium phenyl-2,4,6-trimethylbenzoylphosphinate (LAP) – lower cytotoxicity than Irgacure 2959. |
| Ionic Crosslinker | Enables rapid initial gelation (e.g., for alginate). | Calcium chloride (CaCl₂) solution, typically 100-200 mM. |
| Rheology Additive | Modifies viscosity and shear-thinning behavior. | Nanocellulose (CNF), methylcellulose, silicate nanoplatelets (Laponite). |
| Cell Viability Assay | Quantifies live/dead cells post-printing. | Calcein-AM (live, green) / Ethidium homodimer-1 (dead, red) staining kit. |
| Electrical Conductivity Setup | Measures bulk impedance/conductivity of printed construct. | Two-point or four-point probe station with impedance analyzer. |
Detailed Experimental Protocols
Protocol 4.1: Formulating a Dual-Crosslinking GelMA-SWCNT Bioink
Objective: Prepare a shear-thinning, conductive bioink suitable for extrusion printing with high cell viability. Materials: GelMA (5-15% w/v), LAP (0.25% w/v), SWCNT-COOH (1 mg/mL stock in PBS), PBS, primary cells. Procedure:
- Dispersion: Sonicate SWCNT-COOH stock for 30 min (pulse, ice bath). Mix with PBS to desired final concentration (e.g., 0.75 mg/mL).
- Polymer Solution: Dissolve GelMA powder in the SWCNT-PBS solution at 40°C. Vortex until clear.
- Photo-initiator: Add LAP to the warm GelMA-SWCNT solution under gentle stirring. Protect from light.
- Sterilization: Filter the bioink (0.22 µm syringe filter) if without cells. For cell-laden ink, prepare components sterilely and mix with cell pellet in biosafety cabinet.
- Pre-print Storage: Keep at 37°C in the dark for < 2 hours before printing.
Protocol 4.2: Assessing Printability and Shape Fidelity
Objective: Quantify filament uniformity and ability to maintain a 3D grid structure. Materials: Prepared bioink, extrusion bioprinter (≥22G nozzle), PBS or culture medium, imaging software (ImageJ). Procedure:
- Printability Test (Filament Formation):
- Print a straight 4 cm filament into air or into a crosslinking bath.
- Capture image. Measure filament diameter (D) at 10 points. Calculate coefficient of variation (CV = SD/mean). CV < 10% indicates good printability.
- Shape Fidelity Test (Grid Structure):
- Design a 10x10x2 mm 3D grid (e.g., 2 layers, 2 mm spacing).
- Print the structure.
- Image top-down immediately post-printing.
- Calculate Shape Fidelity Ratio (SFR) = (Area of Printed Object) / (Area of CAD Design). SFR closer to 1 indicates superior fidelity.
Protocol 4.3: Post-Print Cell Viability Assessment (Live/Dead Assay)
Objective: Determine viability of cells encapsulated and printed in the conductive bioink at 1-day and 7-days post-printing. Materials: Printed cell-laden construct, Calcein-AM, EthD-1, PBS, fluorescence microscope. Procedure:
- Staining Solution: Prepare 2 µM Calcein-AM and 4 µM EthD-1 in PBS.
- Staining: Incubate printed constructs in staining solution for 45 min at 37°C, protected from light.
- Rinsing: Gently rinse constructs 2x with warm PBS.
- Imaging: Image using FITC (live) and TRITC (dead) channels. Take images from at least 3 different locations/construct.
- Quantification: Use ImageJ to threshold and count live and dead cells. Viability (%) = (Live cells / (Live+Dead cells)) * 100.
Critical Pathways and Workflow Diagrams
Title: Bioink Design Optimization Workflow
Title: UV Crosslinking Pathway & Cell Stress Mitigation
This application note details the critical process parameters governing the extrusion and photopolymerization-based 3D printing of soft conductive hydrogels, a core focus of the broader thesis on "Advanced 3D Bioprinting for Bioelectronic and Drug Delivery Interfaces." The precise interplay between nozzle size, applied pressure, light exposure, and layer-by-layer curing dictates the structural fidelity, electrical conductivity, and biological functionality of printed constructs intended for neural interfaces, wearable biosensors, and controlled drug release platforms.
Key Parameter Interrelationships & Quantitative Data
The printability and final properties of conductive hydrogels (e.g., those based on poly(3,4-ethylenedioxythiophene):polystyrene sulfonate (PEDOT:PSS), gelatin methacryloyl (GelMA) with conductive nanomaterials) are governed by the following parameters.
Table 1: Interplay of Extrusion and Curing Parameters
| Parameter | Typical Range (Conductive Hydrogels) | Effect on Printability | Effect on Final Construct | Key Consideration |
|---|---|---|---|---|
| Nozzle Size (G) | 25G - 32G (≈ 260 - 110 µm ID) | Smaller size increases resolution but requires higher pressure; risk of clogging with nanocomposites. | Smaller nozzles yield finer features, higher electrode density. | Must be > max aggregate size in bioink (e.g., carbon nanotubes, gold nanowires). |
| Applied Pressure (kPa) | 20 - 100 kPa (Pneumatic) | Must be tuned with viscosity and nozzle size for continuous, non-dripping flow. | High pressure can cause filament spreading, reducing XY resolution. | Dynamic pressure control enables printing of complex geometries. |
| Light Exposure (Wavelength) | 365 - 405 nm (UV-Vis) | Initiates crosslinking; must penetrate bioink depth. | Degree of conversion affects mechanical stiffness and conductivity. | Photoinitiator (e.g., LAP, Irgacure 2959) concentration is critical for cytocompatibility. |
| Light Intensity (mW/cm²) | 5 - 50 mW/cm² | Higher intensity speeds curing but can generate excessive heat. | Over-curing may reduce polymer chain mobility, negatively impacting conductivity. | Must be optimized with exposure time for each layer. |
| Layer Cure Time (s) | 10 - 60 seconds/layer | Insufficient curing leads to collapse; excessive curing delays print. | Governs interlayer adhesion and layer fusion quality. | Z-axis conductivity can be impacted by interlayer bonding. |
Table 2: Example Parameter Set for a PEDOT:PSS-GelMA Hydrogel
| Parameter | Value | Rationale |
|---|---|---|
| Bioink Composition | 5% w/v GelMA, 0.3% w/v PEDOT:PSS, 0.25% w/v LAP | Balances conductivity, printability, and cytocompatibility. |
| Nozzle Size | 27G (210 µm ID) | Prevents CNT clogging while allowing ~150 µm filament width. |
| Print Pressure | 45 kPa | Ensures steady flow at 10 mm/s print speed for given viscosity. |
| Light Source | 405 nm LED | Better penetration and reduced cell damage vs. 365 nm UV. |
| Light Intensity | 15 mW/cm² | Sufficient for full depth cure of 100 µm layers without overheating. |
| Layer Cure Time | 20 seconds | Achieves >85% crosslinking, ensuring shape fidelity. |
Experimental Protocols
Protocol 3.1: Optimization of Pressure vs. Nozzle Size for Continuous Filament Extrusion
Objective: To establish the relationship between applied pneumatic pressure and nozzle gauge to achieve a consistent, non-beading filament for a given conductive hydrogel formulation.
Materials: See "The Scientist's Toolkit" (Section 5.0). Method:
- Prepare conductive hydrogel bioink (e.g., GelMA-PEDOT:PSS) and load into a sterile, clear printing cartridge. Avoid bubbles.
- Equip the extrusion printhead with a 25G nozzle. Set the stage temperature to 10°C to prevent premature gelation.
- Using bioprinter software, program a simple straight line pattern (e.g., 20 mm length).
- Set print speed to 10 mm/s. Begin testing at a low pressure (e.g., 15 kPa).
- Execute print, visually observing the start of extrusion, filament continuity, and end of extrusion. Capture video for analysis.
- Measure the diameter of the extruded filament from optical images at three points using image analysis software (e.g., ImageJ). Compare to nozzle inner diameter.
- Incrementally increase pressure by 5 kPa and repeat steps 5-6 until consistent, bead-free extrusion is achieved or filament shows significant overspreading (>150% of nozzle ID).
- Repeat the entire procedure (steps 2-7) for 27G, 30G, and 32G nozzles.
- Data Analysis: Plot applied pressure vs. measured filament diameter for each nozzle. The optimal working pressure is the minimum pressure yielding a filament diameter within 110-130% of the nozzle ID.
Protocol 3.2: Determination of Minimum Cure Energy for Layer Integrity
Objective: To determine the minimum light exposure energy (mJ/cm²) required to achieve mechanically stable, adherent layers without over-curing.
Materials: See "The Scientist's Toolkit" (Section 5.0). Method:
- Using parameters from Protocol 3.1, print a single-layer, 15x15mm square with the optimized pressure/nozzle combination.
- Set the light intensity to a fixed value (e.g., 10 mW/cm²). Vary the exposure time per layer from 5 to 60 seconds in 5-second increments (Exposure Energy = Intensity x Time).
- After curing, use a silicone spatula to gently probe the square's edge. Record the shortest exposure time at which the square does not detach or deform from gentle prodding (T_min).
- Print a two-layer square using T_min. Assess interlayer adhesion by attempting to separate layers with fine forceps under a microscope.
- If layers delaminate easily, incrementally increase exposure time by 2 seconds until no delamination occurs. This is the Minimum Cure Time for Adhesion (T_adhesion).
- Validation: Print a simple 5-layer lattice structure using Tadhesion. Evaluate for structural collapse using macroscopic and microscopic imaging. The resulting energy (Intensity x Tadhesion) is the minimum practical cure energy.
Visualizing the Workflow and Relationships
Optimizing Print Parameters for Conductive Hydrogels
Step-by-Step Layer Curing Protocol
The Scientist's Toolkit: Essential Research Reagent Solutions
Table 3: Key Materials for 3D Printing Soft Conductive Hydrogels
| Item / Reagent | Function & Rationale | Example Product / Specification |
|---|---|---|
| Methacrylated Hydrogel Precursor | Provides photocrosslinkable matrix for structural integrity and cell encapsulation. | Gelatin Methacryloyl (GelMA, 60-80% degree of substitution); Alginate Methacrylate. |
| Conductive Polymer/Nanomaterial | Imparts electronic/ionic conductivity to the hydrogel network. | PEDOT:PSS aqueous dispersion (1.3% w/w); Carbon Nanotubes (COOH-functionalized); Graphene Oxide. |
| Photoinitiator | Generates free radicals upon light exposure to initiate crosslinking. | Lithium Phenyl-2,4,6-trimethylbenzoylphosphinate (LAP) - cytocompatible, 405 nm absorbance. |
| Extrusion Nozzle (Cone-tip) | Defines filament diameter; must be chemically clean and sterile. | Sterile, disposable nozzles (25G-32G, polypropylene). |
| Bioprinter | Provides precise XYZ motion, pneumatic/piston extrusion, and integrated light source. | Systems with UV/VIS LED (365-405 nm) and temperature-controlled stage. |
| Rheometer | Characterizes bioink viscoelasticity (viscosity, storage/loss moduli) to inform pressure settings. | Cone-plate or parallel plate rheometer with temperature control. |
| Four-Point Probe | Measures the sheet resistance/conductivity of printed hydrogel films. | In-line or benchtop system with micrometer spacing. |
| Cell Viability Assay | Evaluates cytocompatibility of process parameters (e.g., cure energy). | Live/Dead staining kit (Calcein AM / Ethidium homodimer-1). |
Within the research on 3D printing of soft conductive hydrogels, two of the most impactful applications are the fabrication of engineered neural tissues and the development of platforms for electrically stimulated cell cultures. This spotlight details the application notes and experimental protocols central to these areas.
Application Notes
Engineered Neural Tissues: 3D-printed conductive hydrogel scaffolds (e.g., based on gelatin methacryloyl (GelMA) infused with graphene oxide or polypyrrole) provide a biomimetic, electroactive microenvironment for neural stem/progenitor cells (NSCs/NPCs). The hydrogel's conductivity facilitates the transmission of endogenous bioelectrical signals or applied external electrical stimulation (ES), which is crucial for neural differentiation, neurite outgrowth, and neural network maturation.
Electrically Stimulated Cell Cultures: Beyond neural applications, conductive hydrogel bioinks enable the direct and localized delivery of ES to various electrically excitable or responsive cell types (e.g., cardiomyocytes, skeletal muscle cells) in 3D. This allows for the creation of more physiologically relevant in vitro models for drug testing, disease modeling, and basic electrophysiology research.
Key Quantitative Data Summary:
Table 1: Common Conductive Bioink Formulations for Neural & Electrically Stimulated Cultures
| Base Hydrogel | Conductive Additive | Typical Concentration | Approx. Conductivity (S/cm) | Primary Cell Type Studied |
|---|---|---|---|---|
| GelMA | Graphene Oxide (GO) | 0.5 - 2 mg/mL | 1.2 x 10⁻³ to 5 x 10⁻³ | Neural Stem Cells (NSCs) |
| GelMA/Hyaluronic Acid | Polypyrrole (PPy) nanoparticles | 0.1 - 0.5 mg/mL | ~1 x 10⁻² | PC12 cells, NSCs |
| Alginate | Carbon Nanotubes (CNTs) | 0.5 - 1.5% w/v | 2 x 10⁻³ to 8 x 10⁻³ | Cardiomyocytes |
| Fibrin | Pedot:PSS | 0.1 - 0.3% v/v | ~5 x 10⁻² | Skeletal Myoblasts |
Table 2: Typical Electrical Stimulation Parameters for Differentiation
| Cell Type | Waveform | Amplitude | Frequency | Duration | Observed Outcome |
|---|---|---|---|---|---|
| Neural Stem Cells | Biphasic Pulsed | 100-250 mV/mm | 10-100 Hz | 30-60 min/day, 3-7 days | Enhanced neuronal differentiation, longer neurites |
| Mesenchymal Stem Cells | Direct Current (DC) | 50-100 mV/mm | Continuous | 1-4 hours/day, 7-14 days | Upregulated neural gene markers (βIII-tubulin, MAP2) |
| Cardiomyocytes | Monophasic Pulsed | 1-5 V/cm | 1-3 Hz | Continuous or cyclic | Improved synchronous beating, alignment |
Experimental Protocols
Protocol 1: 3D Bioprinting & Culture of a Basic Engineered Neural Tissue Objective: To fabricate a 3D neural tissue construct using a conductive GelMA-GO bioink and assess initial cell viability and neuronal differentiation.
- Bioink Preparation: Dissolve lyophilized GelMA (10% w/v) in PBS at 37°C. Add photoinitiator LAP (0.25% w/v). Slowly incorporate sterile graphene oxide (GO) dispersion to a final concentration of 1 mg/mL under gentle vortexing. Keep at 37°C in the dark.
- Cell Encapsulation: Harvest and resuspend neural stem/progenitor cells (NSCs/NPCs) at 5-10 x 10⁶ cells/mL in the pre-cooled (28°C) GelMA-GO bioink.
- 3D Printing: Load bioink into a temperature-controlled (18-22°C) extrusion printhead. Print lattice or aligned fiber structures onto a cooled print bed (4-10°C) using a 22-27G nozzle. Crosslink each layer immediately after deposition using 405 nm light (5-10 mW/cm² for 15-30 seconds).
- Post-print Culture: Transfer constructs to neural maintenance medium (e.g., Neurobasal-A + B27 + GlutaMAX). Culture for up to 28 days, changing medium every 2-3 days.
- Analysis: At defined timepoints, assess viability (Live/Dead assay), neuronal differentiation (immunostaining for βIII-tubulin, MAP2), and neurite outgrowth (confocal microscopy, image analysis).
Protocol 2: Electrical Stimulation of a 3D Bioprinted Construct Objective: To apply controlled ES to a 3D-bioprinted conductive hydrogel construct to direct cell fate or function.
- Stimulation Chamber Setup: Use a commercial or custom-built ES chamber with carbon rod or platinum wire electrodes. Sterilize the chamber with 70% ethanol and UV light.
- Construct Placement: Aseptically transfer the matured construct (from Protocol 1, day 7) into the chamber, ensuring it is positioned between, but not touching, the parallel electrodes. Submerge in pre-warmed, low-conductivity stimulation medium (e.g., serum-free medium).
- Stimulation Regimen: Connect electrodes to a function generator/amplifier. Apply biphasic, square-wave pulses (e.g., 200 mV/mm, 20 Hz, 2 ms pulse width) for 60 minutes per day for 5 consecutive days. Maintain control constructs in an identical chamber without applied stimulation.
- Post-Stimulation Analysis: 24 hours after the final stimulation, fix constructs for immunocytochemistry or lyse for gene/protein expression analysis (qRT-PCR for Nestin, βIII-tubulin, GFAP; Western Blot).
Visualizations
Title: ES Mechanism in 3D Neural Constructs
Title: Workflow: 3D Print & Electrically Stimulate Neural Tissue
The Scientist's Toolkit
Table 3: Essential Research Reagents & Materials
| Item | Function/Application |
|---|---|
| Gelatin Methacryloyl (GelMA) | Photo-crosslinkable base hydrogel providing cell-adhesive RGD motifs and tunable stiffness. |
| Graphene Oxide (GO) / Reduced GO | Conductive nanomaterial additive to enhance hydrogel conductivity and provide nanostructure for cell growth. |
| Lithium Phenyl-2,4,6-trimethylbenzoylphosphinate (LAP) | Cytocompatible photoinitiator for visible/UV light crosslinking of bioinks. |
| Neural Basal Medium + B27 Supplement | Serum-free culture medium optimized for the survival and differentiation of neural cells. |
| βIII-Tubulin / MAP2 Antibodies | Primary antibodies for immunostaining to identify newly differentiated and mature neurons, respectively. |
| Carbon Rod / Platinum Wire Electrodes | Inert electrodes for delivering electrical stimulation in a cell culture environment. |
| Function Generator & Stimulus Isolator | Equipment to generate and deliver precise, calibrated electrical waveforms to the culture. |
| Low-Conductivity Serum-Free Medium | Minimizes current-induced Joule heating and pH shifts during electrical stimulation. |
Within the thesis on 3D printing of soft conductive hydrogels, this application note explores their transformative potential for creating implantable biosensors and patient-specific biomedical electrodes. These devices leverage the unique properties of 3D-printed hydrogels—biocompatibility, tunable conductivity, and mechanical compliance—to enable chronic monitoring and personalized therapeutic interfaces.
Table 1: Performance Metrics of 3D-Printed Hydrogel-Based Implantable Devices
| Device Type | Target Analytic / Function | Conductivity (S/cm) | Mechanical Modulus (kPa) | Stability / Lifespan (in vivo) | Sensitivity / Performance Metric |
|---|---|---|---|---|---|
| Glucose Biosensor | Glucose | 0.05 - 0.15 | 10 - 50 | 14 - 28 days | 3.2 µA mM⁻¹ cm⁻² (Linear range: 0.1-20 mM) |
| Neural Electrode | Neural Signal Recording | 0.1 - 1.2 | 5 - 30 | >6 months | Impedance: 1-10 kΩ at 1 kHz |
| Cardiac Patch | Electrophysiological Mapping | 0.08 - 0.8 | 20 - 100 | >3 months | Charge Injection Capacity: 1.5-3 mC cm⁻² |
| Drug Release Electrode | Dexamethasone | 0.02 - 0.1 | 15 - 60 | Controlled release over 7 days | Release Kinetics: Zero-order for 120 hrs |
Table 2: Comparison of Biofouling and Immune Response
| Hydrogel Composition | Protein Adsorption (µg/cm²) after 7 days | Capsule Thickness (µm) after 4 weeks | Chronic Inflammatory Cell Count (cells/mm²) |
|---|---|---|---|
| PEDOT:PSS / Alginate | 1.8 ± 0.3 | 45.2 ± 12.1 | 155 ± 45 |
| PANI / GelMA | 2.5 ± 0.4 | 68.5 ± 15.3 | 210 ± 62 |
| PPy / Chitosan | 3.1 ± 0.5 | 89.7 ± 20.4 | 305 ± 78 |
| Pure Alginate (Control) | 5.8 ± 0.9 | 150.3 ± 35.6 | 550 ± 120 |
Experimental Protocols
Protocol 1: Fabrication of a 3D-Printed Glucose Biosensor
Objective: To fabricate a soft, implantable amperometric glucose biosensor via extrusion-based 3D printing. Materials: See "The Scientist's Toolkit" below. Method:
- Ink Preparation:
- Synthesize a conductive hydrogel ink by mixing 3% (w/v) alginate, 0.8% (w/v) PEDOT:PSS, and 0.5% (w/v) CaCl₂ in deionized water. Stir for 2 hours at 4°C.
- Add 150 U/mL glucose oxidase (GOx) and 1 mM [Os(bpy)₂ClPyCH₂NH₂]⁺ (redox mediator) to the ink. Mix gently and keep on ice.
- Printing Process:
- Load ink into a 3 mL syringe fitted with a 22G conical nozzle.
- Use a pneumatic extrusion bioprinter (e.g., BIO X). Set printing parameters: Pressure: 25 kPa, Speed: 8 mm/s, Nozzle Height: 0.2 mm, Bed Temp: 10°C.
- Print a 3-layer concentric circle working electrode (Diameter: 1.5 mm) onto a sterile, PEG-coated glass slide.
- Cross-linking & Assembly:
- Immerse the printed structure in 2% (w/v) CaCl₂ bath for 60 seconds for ionic crosslinking.
- Rinse with PBS (pH 7.4). Assemble with a printed Ag/AgCl reference and counter electrode into a final device. Insulate with a final layer of non-conductive alginate hydrogel.
- Calibration:
- Use a potentiostat. Apply +0.4V vs. Ag/AgCl in stirred PBS at 37°C.
- Record amperometric current response to successive glucose additions (0.5 mM steps up to 20 mM). Plot calibration curve.
Protocol 2: In Vivo Biocompatibility and Performance Testing
Objective: To assess the chronic immune response and functional stability of a 3D-printed neural electrode. Materials: Sterile hydrogel electrodes, rodent model, surgical suite, histological stains. Method:
- Implantation:
- Anesthetize the animal and perform a craniotomy.
- Implant the sterilized (ethylene oxide) hydrogel electrode array onto the somatosensory cortex using a sterile micro-positioner.
- Secure the device and close the surgical site.
- Long-term Monitoring:
- Record neural signals (local field potentials, single-unit activity) weekly for 12 weeks using a compatible amplifier system. Measure electrode impedance at 1 kHz weekly.
- Histological Analysis:
- At endpoint (e.g., 4, 12 weeks), transcardially perfuse with 4% PFA.
- Extract and section the brain tissue surrounding the implant.
- Stain with H&E for general histology and Iba1/CD68 for microglia/macrophages. Image and quantify capsule thickness and cell density (cells/mm²) at the tissue-device interface.
Signaling Pathway and Experimental Workflow Diagrams
Diagram Title: Hydrogel Biosensor Glucose Detection Pathway
Diagram Title: Patient-Specific Electrode Fabrication Workflow
The Scientist's Toolkit: Research Reagent Solutions
Table 3: Essential Materials for 3D Printing Hydrogel Biosensors/Electrodes
| Item | Function/Application | Example Product/Specification |
|---|---|---|
| Conductive Polymer | Provides electronic conductivity within hydrogel network. | PEDOT:PSS suspension (Clevios PH1000), 1.0-1.3% in water. |
| Hydrogel Polymer Base | Forms biocompatible, hydratable 3D network; determines mechanical properties. | Sodium Alginate (high G content, viscosity >2000 cP), Gelatin Methacryloyl (GelMA, 80% degree of substitution). |
| Biocatalytic Enzyme | Enables specific analyte detection in biosensors. | Glucose Oxidase (GOx) from Aspergillus niger, ≥100,000 U/g, lyophilized. |
| Redox Mediator | Facilitates electron transfer in 3D hydrogel biosensors. | [Os(bpy)₂ClPyCH₂NH₂]⁺ hexafluorophosphate salt. |
| Photo-initiator | Enables UV crosslinking of photopolymerizable hydrogels (e.g., GelMA). | Lithium phenyl-2,4,6-trimethylbenzoylphosphinate (LAP), >95% purity. |
| Ionic Crosslinker | Rapidly solidifies ion-sensitive hydrogels (e.g., alginate). | Calcium Chloride (CaCl₂), sterile 2-5% (w/v) solution in PBS. |
| Rheology Modifier | Adjusts ink viscosity for printability. | Nanocrystalline cellulose (NCC), 2% (w/v) suspension, or silica nanoparticles. |
| Cell-Adhesive Peptide | Enhances bio-integration for electrodes. | RGD peptide (Arg-Gly-Asp), synthesized, >97% purity. |
Within the broader thesis on 3D printing of soft conductive hydrogels, this application spotlight focuses on their transformative potential in creating next-generation drug delivery devices. Traditional drug delivery systems often suffer from poor spatial and temporal control, leading to suboptimal therapeutic efficacy and side effects. 3D-printed conductive hydrogels offer a unique solution by integrating biocompatibility, customizable 3D architecture, and electrical responsiveness. This enables the fabrication of implantable or insertable devices capable of storing therapeutic agents and releasing them on-demand via an applied electrical trigger, promising personalized and adaptive therapies.
Application Notes
Core Mechanism & Design Principles
The on-demand release is typically achieved through three primary electro-responsive mechanisms engineered into the hydrogel matrix:
- Electro-chemically Controlled Degradation/Bond Cleavage: Application of a voltage or current induces localized pH changes or redox reactions, leading to the cleavage of labile bonds (e.g., ester, hydrazone) linking the drug to the hydrogel backbone or causing hydrogel erosion.
- Electrostatic Modulation: For hydrogels loaded with charged drug molecules (e.g., proteins, DNA), an applied electric field can alter electrostatic interactions between the drug and the polymer network, triggering reversible swelling/deswelling or charge repulsion to expel the payload.
- Electro-thermal Activation: In hydrogels with conductive fillers (e.g., carbon nanotubes, polypyrrole, graphene oxide), electrical stimulation generates mild, localized heat. This can increase mesh size via thermal expansion or trigger the phase transition of thermosensitive hydrogel components (e.g., PNIPAM), facilitating drug diffusion.
Key Performance Metrics from Recent Literature
The following table summarizes quantitative data from recent studies (2023-2024) on 3D-printed conductive hydrogel drug delivery systems.
Table 1: Performance Metrics of Recent 3D-Printed Conductive Hydrogel Drug Delivery Systems
| Conductive Hydrogel Composition (Matrix/Filler) | Printed Structure | Loaded Agent | Electrical Stimulus | Release Profile & Efficiency | Key Outcome | Ref. Year |
|---|---|---|---|---|---|---|
| GelMA / Polypyrrole Nanoparticles | Microneedle Array | Dexamethasone (anti-inflammatory) | +1.0 V, 60 s pulses | ~80% release on-demand vs. <10% passive over 24h. | Suppressed inflammation in a rheumatoid arthritis model. | 2024 |
| Alginate / MXene (Ti₃C₂Tₓ) Nanosheets | Cubic Lattice Implant | Doxorubicin (chemotherapy) | -0.5 V, 5 min cycles | 92% cumulative release after 6 cycles vs. 28% passive. | Effective tumor growth inhibition in vivo with reduced systemic toxicity. | 2023 |
| PNIPAM-based / Graphene Oxide | Thermo-responsive Disc | Insulin | 1.5 V, 30 s (Joule heating) | Rapid pulse release (≈70% in 15 min) triggered by heat-induced shrinkage. | Demonstrated glucose-responsive coupling via integrated sensor. | 2024 |
| PEGDA / Carbon Nanotubes | Tubular Scaffold | Nerve Growth Factor (NGF) | 100 mV/mm DC field, 1 h/day | Sustained, guided release enhancing neurite outgrowth by 250% vs. control. | Promoted significant axonal regeneration in a nerve injury model. | 2023 |
Experimental Protocols
Protocol: Fabrication and Testing of a 3D-Printed Electro-Responsive Drug Delivery Patch
Aim: To fabricate a drug-loaded conductive hydrogel patch via extrusion 3D printing and characterize its electrically triggered release kinetics.
I. Materials & Pre-Printing Preparation
- Hydrogel Bioink: Synthesize or procure a shear-thinning, crosslinkable hydrogel precursor (e.g., Gelatin Methacryloyl - GelMA, 10% w/v).
- Conductive Filler: Prepare a stable dispersion of multi-walled carbon nanotubes (MWCNTs, 0.5% w/v) in the GelMA solution via prolonged sonication and stirring.
- Drug Solution: Prepare a 5 mg/mL solution of a model cationic drug (e.g., Doxorubicin Hydrochloride, DOX) in PBS.
- Photoinitiator: Add Lithium phenyl-2,4,6-trimethylbenzoylphosphinate (LAP, 0.25% w/v) to the GelMA-MWCNT mixture.
- Loading: Mix the DOX solution with the bioink to a final DOX concentration of 0.1 mg/mL. Protect from light.
II. 3D Printing Process
- Load the drug-loaded bioink into a sterile syringe fitted with a conical nozzle (22G-27G).
- Mount the syringe onto a pneumatic or screw-driven extrusion 3D bioprinter.
- Set printing parameters: Pressure = 25-35 kPa, Speed = 8 mm/s, Nozzle Height = 0.2 mm.
- Print a 10 mm x 10 mm single-layer grid pattern (strand spacing = 1.5 mm) onto a hydrophobic glass slide.
- Immediately after printing, crosslink the structure by exposure to 405 nm UV light (5-10 mW/cm²) for 60 seconds.
III. In Vitro Release Study with Electrical Triggering
- Setup: Place the printed hydrogel patch in a custom PTWE flow cell with integrated platinum wire electrodes (5 mm apart) on either side of the patch. Connect electrodes to a potentiostat.
- Perfusion: Use a peristaltic pump to circulate 10 mL of phosphate-buffered saline (PBS, pH 7.4, 37°C) as release medium at 0.5 mL/min.
- Sampling: Collect effluent at predetermined time points (e.g., every 5 min for 1 h, then hourly).
- Stimulation Protocol:
- Passive Release (Control): Run for 2 hours with no electrical stimulus.
- Active Release: After 2h, apply a galvanostatic stimulus (e.g., 0.1 mA/cm² for 60 s, repeated every 30 min for 3 cycles).
- Quantification: Analyze DOX concentration in effluent samples using fluorescence spectroscopy (Ex/Em: 480/590 nm). Calculate cumulative release percentage.
Protocol: Assessing Biocompatibility & Cellular Response
- Extract Preparation: Incubate sterilized hydrogel patches in cell culture medium (e.g., DMEM) for 24h (37°C, 5% CO₂) to obtain conditioned extracts.
- Cell Seeding: Seed relevant cells (e.g., L929 fibroblasts) in a 96-well plate.
- Treatment: Replace medium with hydrogel extracts (100 µL/well). Use fresh medium as a negative control and medium with 10% DMSO as a positive control.
- Viability Assay: After 24h and 72h, perform an MTT assay. Measure absorbance at 570 nm. Calculate cell viability relative to the negative control.
Diagrams
The Scientist's Toolkit: Research Reagent Solutions
Table 2: Essential Materials for Conductive Hydrogel Drug Delivery Research
| Item / Reagent | Function / Rationale | Example Vendor(s) |
|---|---|---|
| Gelatin Methacryloyl (GelMA) | A gold-standard, photopolymerizable hydrogel matrix providing excellent cell adhesion and tunable mechanical properties. | Advanced BioMatrix, Sigma-Aldrich |
| Poly(3,4-ethylenedioxythiophene):Polystyrene sulfonate (PEDOT:PSS) | A commercially available, highly conductive polymer dispersion easily blended with hydrogels for electroactivity. | Heraeus, Ossila |
| MXene (Ti₃C₂Tₓ) Dispersions | Two-dimensional conductive ceramics offering high conductivity, biocompatibility, and near-infrared responsiveness. | NanoResearch Elements, Merck |
| Lithium Phenyl-2,4,6-trimethylbenzoylphosphinate (LAP) | A highly efficient, water-soluble, and cytocompatible photoinitiator for UV crosslinking of hydrogels. | Sigma-Aldrich, TCI Chemicals |
| RGD-Modified Alginate | A biocompatible, ionic-crosslinkable polymer; RGD modification enhances cellular interaction for implantable devices. | NovaMatrix, FMC Biopolymer |
| Carbon Nanotubes (CNTs) - Carboxylated | Provide high electrical conductivity and mechanical reinforcement; carboxylation improves dispersion in aqueous bioinks. | Sigma-Aldrich, Cheap Tubes Inc. |
| Model Therapeutic Agents (e.g., Doxorubicin, Fluorescent Dextrans) | Small molecule drugs and labeled macromolecules used to quantitatively study loading efficiency and release kinetics. | Thermo Fisher, Cayman Chemical |
| Potentiostat/Galvanostat | Instrument for applying precise electrical stimuli (constant voltage/current) and performing electrochemical characterization. | Metrohm Autolab, Ganny Instruments |
Overcoming Key Challenges: Strategies for Printability, Resolution, and Functional Stability
The extrusion-based 3D printing of soft conductive hydrogels presents unique challenges distinct from conventional thermoplastics. These materials, typically composed of aqueous networks laden with conductive fillers (e.g., carbon nanotubes, graphene, PEDOT:PSS), are engineered for applications in bioelectronics, drug-eluting scaffolds, and tissue engineering. Their rheological properties—shear-thinning for extrusion and rapid post-printing recovery—are delicate. Failures such as nozzle clogging, structural collapse, and delamination are not merely operational nuisances but critically compromise print fidelity, electrical conductivity, and biological function. This document details these failure modes, providing application notes and protocols for researchers.
Nozzle Clogging
Mechanism & Causes: In hydrogel printing, clogging is predominantly due to aggregation of conductive fillers, premature crosslinking (ionic, thermal, or light-induced) within the nozzle, or evaporation leading to viscosity increase. Particle sedimentation in low-viscosity pre-gel solutions can also block the nozzle orifice.
Research Reagent Solutions: Clogging Mitigation
| Reagent/Material | Function & Rationale |
|---|---|
| Pluronic F-127 | A surfactant used to improve dispersion of hydrophobic conductive fillers (e.g., CNTs) in aqueous phases, reducing aggregation-induced clogs. |
| Pristine Nozzles (Sapphire/Tungsten Carbide) | Hard, non-reactive nozzle materials prevent adhesion of hydrogel and filler particles, easing cleaning. |
| EDTA (Ethylenediaminetetraacetic acid) | Chelating agent added to ionic-crosslinking bioinks (e.g., alginate) to sequester stray divalent cations and prevent premature gelation in the cartridge. |
| Glycerol | A humectant added to the bioink formulation to minimize water evaporation at the nozzle tip. |
| Sterile Filter (Cellulose Acetate, 5 µm) | For pre-printing filtration of the hydrogel composite to remove large aggregates prior to loading. |
Protocol: Assessing and Preventing Nozzle Clogging
Objective: Quantify the clogging propensity of a soft conductive hydrogel formulation. Materials: 3D bioprinter, 22G-27G conical nozzles, pressure extrusion system, digital microscope, formulation components. Procedure:
- Ink Preparation: Prepare a 2 mL batch of conductive hydrogel. Sonicate filler (e.g., 0.5% w/v CNTs) in deionized water with 0.1% Pluronic F-127 for 30 min. Mix with polymer (e.g., 3% w/v alginate) and homogenize.
- Baseline Flow Test: Load ink into a clean syringe. Extrude at a standard pressure (e.g., 15 psi) for 60 seconds, collecting and weighing the extrudate. This is the baseline mass (M_b).
- Intermittent Printing Simulation: Program a discontinuous print (5s extrusion, 10s pause) for 10 cycles at constant pressure.
- Post-Test Flow Test: Immediately after the last cycle, extrude again for 60s at the same pressure and weigh the extrudate (M_p).
- Clogging Ratio Calculation: Calculate (Mp / Mb) * 100%. A value below 85% indicates significant clogging.
- Nozzle Inspection: Use a digital microscope (200x) to image the nozzle interior pre- and post-test for filler deposition. Analysis: Correlate clogging ratio with filler concentration, surfactant presence, and nozzle diameter.
Structural Collapse
Mechanism & Causes: Soft hydrogels possess low mechanical modulus and slow viscoelastic recovery. Under gravitational force or the weight of subsequent layers, printed filaments can sag, leading to loss of dimensional accuracy, pore closure, and ultimately, a collapsed structure. This is exacerbated by high water content and insufficient/ delayed crosslinking.
Quantitative Data: Factors Influencing Structural Collapse
| Factor | Typical Range Tested | Impact on Collapse Resistance (Scale: Low to High) | Key Measurement Technique |
|---|---|---|---|
| Storage Modulus (G') Post-Print | 100 Pa - 5000 Pa | Directly proportional | Rheometry (time sweep after extrusion) |
| Gelation Time | 2 sec - 300 sec | Inversely proportional | In-situ rheology or visual gelation test |
| Filament Diameter | 150 µm - 500 µm | Thicker filaments resist collapse better | Microscope imaging |
| Printing Temperature | 4°C - 25°C | Lower temps increase viscosity, reducing sag | Controlled stage/cartridge heating |
| Crosslinker Concentration | 0.5% - 5.0% CaCl₂ (for alginate) | Higher concentration increases resistance | Compression testing |
Protocol: Quantifying Filament Sagging and Layer Fusion
Objective: Measure the extent of filament sagging and define the maximum allowable time between layers. Materials: 3D bioprinter, glass substrate, high-speed camera, image analysis software (e.g., ImageJ). Procedure:
- Print a Cantilever: Program the printer to extrude a single horizontal filament suspended between two vertical supports with a 10 mm gap.
- Image Acquisition: Use a side-view high-speed camera to record the extrusion and the subsequent 5 minutes.
- Sag Measurement: In ImageJ, measure the vertical deflection (δ) at the midpoint of the filament over time (t).
- Data Fitting: Fit the δ vs. t data to a model (e.g., Kelvin-Voigt) to extract a characteristic sag time constant (τ_sag).
- Define Critical Time: The maximum inter-layer delay time (tmax) is defined as the time at which δ equals 50% of the filament diameter. Printing subsequent layers before tmax is critical to prevent collapse. Analysis: tmax should be compared with the actual printing time per layer. If printing time per layer > tmax, structural collapse is likely. Strategies include accelerated crosslinking or formulation modification.
Delamination
Mechanism & Causes: Delamination, the separation between printed layers, occurs due to poor interfacial bonding. In hydrogel printing, this is often a result of insufficient inter-layer diffusion of polymer chains or crosslinkers, complete surface drying of a prior layer before the next is deposited, or mismatch in mechanical properties.
Research Reagent Solutions: Enhancing Interlayer Adhesion
| Reagent/Material | Function & Rationale |
|---|---|
| Mucoadhesive Polymers (e.g., Chitosan) | Added to the formulation to promote physical entanglement and hydrogen bonding between wet layers. |
| Photoinitiator (e.g., LAP, Irgacure 2959) | Enables UV-mediated crosslinking applied after several layers are deposited, creating a unified network across layers. |
| Humidity Enclosure | Maintains a near-100% RH environment during printing to prevent surface drying of deposited layers. |
| Spray Coater (Micro-nebulizer) | Used to mist a fine aerosol of crosslinking agent (e.g., CaCl₂) over each new layer to strengthen the interface. |
Protocol: Testing Interlayer Adhesion Strength (Peel Test)
Objective: Quantify the bond strength between layers of a printed conductive hydrogel construct. Materials: Bioprinter, tensile tester, custom peel fixture, sample molds. Procedure:
- Sample Fabrication: Print a rectangular, multi-layer sample (e.g., 20 x 10 x 2 mm, 5 layers) with known print path and layer deposition time.
- Partial Notching: Carefully create a pre-crack between the top two layers at one end using a thin razor blade.
- Peel Test Setup: Clamp the bottom four layers in the lower grip of a tensile tester. Clamp the top layer in the upper grip using a custom fixture.
- Testing: Perform a 90-degree peel test at a constant crosshead speed (e.g., 5 mm/min).
- Data Analysis: Record the peel force (F) as a function of displacement. Calculate the average peel strength (energy per unit area, J/m²). Analysis: Compare peel strengths for different inter-layer delay times, humidity conditions, and formulations. Effective bonding typically requires peel strengths > 10 J/m² for handling.
Title: Failure Mode Root Cause Analysis for Hydrogel Printing
Title: Diagnostic Protocol for 3D Bioprinting Failures
Within the broader thesis on 3D printing soft conductive hydrogels, precise control over rheological behavior is paramount. For extrusion-based techniques, including direct ink writing (DIW) and bioprinting, the bioink must exhibit shear-thinning to flow under pressure through a nozzle and rapid recovery (high storage modulus, G') immediately after deposition to maintain structural fidelity. This application note details protocols and material strategies to achieve this critical rheological profile for advanced applications in tissue engineering and drug delivery.
Core Rheological Principles & Targets
The target rheological properties for extrusion-based 3D printing are quantifiable. The following table summarizes key parameters and their target ranges for successful printing of self-supporting structures.
Table 1: Target Rheological Parameters for Extrusion Printing
| Parameter | Symbol | Target Range | Rationale |
|---|---|---|---|
| Zero-shear viscosity | η₀ | > 10³ Pa·s | Prevents gravitational sagging pre-extrusion. |
| Shear-thinning index n | n | < 0.5 (Power Law) | Strong decrease in viscosity with applied shear. |
| Yield Stress | τᵧ | 50 - 500 Pa | Material flows only above this stress. |
| Recovery Time (to 90% G') | trec | < 10 seconds | Rapid solidification post-deposition. |
| Loss Factor at 1 Hz | tan δ (G"/G') | < 0.5 (post-recovery) | Solid-like, elastic dominance after extrusion. |
Material Strategies for Shear-Thinning & Recovery
Achieving these properties hinges on incorporating reversible, non-covalent crosslinks that break under shear and rapidly re-form.
Table 2: Common Mechanisms for Rheological Optimization
| Mechanism | Typical Components | Function in Rheology | Recovery Kinetics |
|---|---|---|---|
| Physical Entanglement | High Mw polymers (e.g., alginate, hyaluronic acid) | Provides baseline viscosity and shear-thinning. | Moderate (chain reptation) |
| Ionic Crosslinking | Alginate (Guluronic blocks) with Ca²⁺, Mg²⁺ | Forms reversible "egg-box" structures, contributing to yield stress. | Fast (diffusion-limited) |
| Hydrophobic Association | Polymers grafted with alkyl chains (e.g., C12-C18) | Forms strong, reversible physical junctions under critical concentration. | Very Fast (ms-s) |
| Host-Guest Interaction | Cyclodextrin and guest molecules (e.g., adamantane) | Provides specific, reversible physical crosslinks. | Fast |
| Electrostatic Interaction | Chitosan (cationic) / Xanthan Gum (anionic) | Forms polyelectrolyte complexes with shear-sensitive bonds. | Moderate to Fast |
| Dynamic Covalent Bonds | Phenylboronic acid / Diol complexes | Forms reversible covalent bonds, often pH-dependent. | Tunable (s-min) |
Experimental Protocols
Protocol 4.1: Formulation of a Model Conductive Nanocomposite Hydrogel
This protocol creates a shear-thinning, rapidly recovering hydrogel suitable for 3D printing conductive traces.
Materials:
- Base Polymer: Hyaluronic acid (HA, 1.5 MDa), 2% (w/v) in DI water.
- Shear-Thinning Enhancer: Nanocrystalline cellulose (NCC), 1.5% (w/v).
- Conductive Filler: Graphene oxide (GO) nanosheets, 2 mg/mL.
- Physical Crosslinker: Diblock copolymer (Pluronic F127), 10% (w/v).
- Solvent: Deionized water.
Procedure:
- Dissolve HA powder in DI water under gentle magnetic stirring (500 rpm) at 4°C for 12 hours to obtain a homogeneous 2% solution.
- Slowly add NCC to the HA solution while using a high-shear homogenizer (10,000 rpm for 5 minutes, ice bath) to ensure uniform dispersion and avoid agglomeration.
- Add GO nanosheets to the mixture and sonicate using a probe sonicator (amplitude 40%, 2 minutes ON / 30 seconds OFF, 5 cycles) to exfoliate and distribute evenly.
- Finally, dissolve Pluronic F127 into the composite mixture at 4°C with slow stirring until clear. Store the final bioink at 4°C for 24 hours to allow equilibration of interactions before rheological testing.
Protocol 4.2: Rheological Characterization for Printability Assessment
Instrument: Rotational rheometer with parallel plate geometry (e.g., 25 mm diameter, 500 μm gap).
Procedure:
- Loading: Pipette ~200 μL of equilibrated ink onto the Peltier plate (maintained at printing temperature, e.g., 20°C). Lower the geometry, trim excess, and apply a solvent trap.
- Amplitude Sweep: Perform an oscillatory strain sweep (γ = 0.1% - 100%) at a constant angular frequency (ω = 10 rad/s). Determine the linear viscoelastic region (LVR) and the yield strain (γᵧ) where G' = G".
- Frequency Sweep: Within the LVR (γ = 0.5%), perform a frequency sweep (ω = 0.1 - 100 rad/s). Plot G' and G". Ideal inks show G' > G" across the range, indicating solid-like behavior at rest.
- Flow Curve (Shear-Thinning): Perform a steady-state shear rate sweep ( e.g., 0.01 s⁻¹ to 1000 s⁻¹). Fit the data to the Herschel-Bulkley model (τ = τᵧ + K * γⁿ) to obtain yield stress (τᵧ), consistency index (K), and flow index (n).
- Three-Step Thixotropy Test (Recovery): a. Step 1 (Rest): Apply a small oscillatory strain within LVR (γ = 0.5%, ω = 10 rad/s) for 60s to measure initial G'. b. Step 2 (Shear): Apply a high continuous shear rate (e.g., 100 s⁻¹) for 30s to simulate extrusion. c. Step 3 (Recovery): Immediately return to the low oscillatory strain (γ = 0.5%, ω = 10 rad/s) and monitor G'(t) for 180s. Calculate recovery time (t90%) for G' to reach 90% of its initial value.
Protocol 4.3: Extrusion Printing Test for Fidelity Assessment
Equipment: Pneumatic or piston-driven 3D bioprinter equipped with a temperature-controlled stage and conical nozzles (e.g., 22G-27G).
Procedure:
- Load the characterized ink into a sterile syringe barrel. Centrifuge briefly to remove air bubbles. Attach the chosen nozzle.
- Set the printing stage temperature to 15-20°C to aid rapid recovery.
- Using printer software, define a simple test structure (e.g., a 20x20 mm, 4-layer square lattice).
- Systematically vary printing parameters: pressure (5-25 kPa), speed (5-15 mm/s), and layer height (0.8-1.2x nozzle diameter).
- Capture images of printed structures using a mounted camera. Assess fidelity by measuring line width consistency, strand roundness, and the ability to form spanning filaments. The optimal parameter set yields smooth, continuous strands with minimal spreading and high shape retention.
Visualization of Key Concepts
Diagram 1: Rheological Cycle for Extrusion Printing
Diagram 2: Printability Optimization Workflow
The Scientist's Toolkit: Research Reagent Solutions
Table 3: Essential Materials for Hydrogel Rheology Optimization
| Item | Function / Role | Example (Supplier) |
|---|---|---|
| High Molecular Weight Biopolymers | Provides backbone viscosity, entanglement, and sites for modification. | Hyaluronic Acid (1-2 MDa, Lifecore), Alginate (high G, NovaMatrix) |
| Nanocellulose (CNC/CNF) | Rigid nanofiller that induces shear-thinning and enhances yield stress via network formation. | Nanocrystalline Cellulose (CelluForce) |
| Conductive Nanomaterials | Imparts electrical conductivity; aspect ratio aids in physical networking. | Graphene Oxide (Graphenea), Carbon Nanotubes (OCSiAl) |
| Thermo-reversible Gelling Polymer | Provides rapid, temperature-sensitive recovery post-extrusion. | Pluronic F127 (Sigma-Aldrich), Methylcellulose (Sigma-Aldrich) |
| Ionic Crosslinking Agent | Source of divalent cations for instantaneous ionic crosslinking (e.g., with alginate). | Calcium Sulfate (CaSO₄) dihydrate slurry (Sigma-Aldrich) |
| Dynamic Crosslinker | Enables formation of reversible covalent bonds for self-healing. | Phenylboronic Acid (PBA) modified polymers (custom synthesis) |
| Rheology Additive (Clay) | Excellent shear-thinning and rapid recovery agent via plate-like interactions. | Laponite XLG (BYK) |
| Surfactant | Aids in dispersion of hydrophobic components (e.g., CNTs) in aqueous ink. | Polysorbate 20 (Tween 20, Sigma-Aldrich) |
Within the broader thesis on 3D printing of soft conductive hydrogels, a fundamental trade-off exists: achieving high electrical conductivity often compromises printability and structural integrity. Conductive fillers like carbon nanotubes (CNTs), graphene, or PEDOT:PSS can aggregate, clog nozzles, and weaken gels. This document details strategies using tailored dispersants and crosslinkers to optimize this balance, enabling the fabrication of complex, functional structures for biosensing and drug delivery.
Core Strategies: Dispersants vs. Crosslinkers
Dispersant Strategies
Dispersants stabilize conductive fillers in the aqueous pre-gel solution, preventing aggregation and ensuring homogeneity. This is critical for reliable extrusion and consistent conductivity.
Crosslinker Strategies
Crosslinkers determine the hydrogel's final mechanical properties and mesh density. The choice and concentration directly affect the mobility of conductive elements and the ink's rheology pre- and post-printing.
Table 1: Common Dispersants for Conductive Fillers in Hydrogel Inks
| Dispersant | Target Filler | Mechanism | Typical Conc. (wt%) | Impact on Conductivity | Impact on Viscosity |
|---|---|---|---|---|---|
| Sodium Dodecyl Sulfate (SDS) | CNTs, Graphene | Electrostatic stabilization | 0.1 - 1.0 | Moderate enhancement | Moderate increase |
| Chitosan | CNTs, PEDOT:PSS | Steric & electrostatic stabilization | 0.5 - 2.0 | Can be insulating if thick layer; good for biocompatibility | Significant increase |
| Pluronic F-127 | Graphene Oxide, CNTs | Steric stabilization (block copolymer) | 1 - 5 | Slight reduction due to insulation | Tunable thermoresponse |
| Polyvinylpyrrolidone (PVP) | Silver nanowires, CNTs | Steric stabilization via adsorption | 0.5 - 3.0 | Preserved well | Moderate increase |
| Hyaluronic Acid | PEDOT:PSS | Biocompatible polymeric dispersion | 1 - 3 | Good ionic conductivity | High shear-thinning |
Table 2: Crosslinker Systems for Conductive Hydrogels
| Crosslinker / System | Base Polymer | Crosslinking Mechanism | Gelation Time | Impact on Conductivity | Key Property |
|---|---|---|---|---|---|
| Calcium Chloride (CaCl₂) | Alginate, Pectin | Ionic (divalent cations) | Seconds to minutes | Minimal obstruction; ionically conductive | Rapid, reversible |
| APS/TEMED | Polyacrylamide, Gelatin-MA | Radical polymerization (chemical initiator) | 1-10 minutes | Can disrupt filler network if rapid | Tunable stiffness |
| UV Light + LAP Photoinitiator | Gelatin-MA, PEGDA | Photopolymerization | 10-60 seconds | Good preservation if post-print curing | Spatial-temporal control |
| Genipin | Chitosan, Gelatin | Chemical (nucleophilic attack) | 30 min - 12 hrs | No interference; excellent biocompatibility | Slow, high stability |
| Ferric Ions (Fe³⁺) | Alginate, PAA | Dual ionic/coordination | Seconds (Alg) / Hours (PAA) | Can enhance conductivity (redox-active) | Multi-mechanism |
Experimental Protocols
Protocol 3.1: Optimizing CNT Dispersion in Gelatin-Methacryloyl (GelMA) Ink
Objective: To prepare a stable, printable, and conductive CNT/GelMA composite ink. Materials:
- GelMA (10% w/v in PBS)
- Carboxylated multi-walled CNTs
- Dispersant: PVP (MW 40,000) or Chitosan (0.5% in 1% acetic acid)
- Photoinitiator: Lithium phenyl-2,4,6-trimethylbenzoylphosphinate (LAP, 0.5% w/v)
- Probe sonicator (with ice bath)
- Rheometer
- Conductivity meter / 4-point probe
Procedure:
- Dispersion: Weigh 5 mg of CNTs into a 5 mL vial. Add 4 mL of the chosen dispersant solution (e.g., 1% PVP). Probe sonicate for 8 minutes at 40% amplitude in an ice bath to prevent overheating.
- Ink Formulation: Mix the 4 mL CNT dispersion thoroughly with 6 mL of 10% GelMA solution. Add LAP stock to a final concentration of 0.1% w/v. Vortex for 2 minutes.
- Homogenization: Subject the final mixture to a secondary, gentle probe sonication (2 min, 20% amplitude, ice bath) to ensure homogeneity without degrading GelMA.
- Characterization:
- Stability: Let stand for 24h. Visually assess for sedimentation/aggregation.
- Rheology: Measure viscosity vs. shear rate (0.1 to 100 s⁻¹) at printing temperature (e.g., 20-25°C).
- Conductivity: Cast a thin film, UV cure (405 nm, 5 mW/cm², 60s), measure sheet resistance.
Protocol 3.2: Evaluating Dual Ionic/Photo-Crosslinking for Alginate/PEDOT:PSS Inks
Objective: To decouple printability (via ionic crosslinking) from final mechanical stabilization (via photo-crosslinking). Materials:
- Alginate (3% w/v in water)
- PEDOT:PSS dispersion
- Acrylated Alginate (Alg-Ac, synthesized per literature)
- Calcium sulfate (CaSO₄) slurry (50 mg/mL)
- Photoinitiator (Irgacure 2959, 1% w/v)
- Dual-barrel syringe/mixing nozzle
- UV light source (365 nm, 10 mW/cm²)
Procedure:
- Ink Preparation (Two Parts):
- Part A: Mix 8 mL Alginate, 2 mL PEDOT:PSS, and 0.5 mL Irgacure 2959 solution.
- Part B: 2 mL Alg-Ac (2% in water) with 0.5 mL CaSO₄ slurry.
- Printing Setup: Load Part A and Part B into separate barrels of a coaxial or side-by-side mixing syringe.
- Extrusion & Crosslinking: Extrude through a mixing tip (e.g., 22G) onto a substrate. Instant ionic crosslinking from Ca²⁺ provides shape fidelity.
- Post-Printing Curing: Immediately expose the printed structure to UV light (365 nm, 30-60 seconds) to initiate covalent crosslinking of the Alg-Ac network, locking in the structure and enhancing durability.
- Evaluation: Compare mechanical robustness (compression testing) and electrochemical impedance of dually crosslinked vs. ionically-only crosslinked structures.
Visualizations
Title: Dispersant Role in Ink Formulation
Title: Dual Crosslinking Hydrogel Workflow
The Scientist's Toolkit: Research Reagent Solutions
Table 3: Essential Materials for Conductive Hydrogel Printing
| Reagent/Material | Supplier Examples | Function in Research |
|---|---|---|
| Gelatin-Methacryloyl (GelMA) | Advanced BioMatrix, Sigma-Aldrich | Photocrosslinkable, biocompatible base polymer providing cell-adhesive motifs. |
| Lithium Phenyl-2,4,6-trimethylbenzoylphosphinate (LAP) | Sigma-Aldrich, TCI Chemicals | Highly efficient water-soluble photoinitiator for UV/VIS light crosslinking (cyto-compatible). |
| PEDOT:PSS (Clevios PH1000) | Heraeus | Conductive polymer dispersion, the benchmark for transparent conductive hydrogels. |
| Carboxylated Carbon Nanotubes | Cheap Tubes, Sigma-Aldrich | High-aspect-ratio conductive filler; carboxylation aids dispersion in aqueous systems. |
| Alginic Acid (Sodium Alginate) | Sigma-Aldrich, FMC Biopolymer | Ionic-crosslinkable biopolymer for rapid gelation with divalent cations (e.g., Ca²⁺). |
| Irgacure 2959 | BASF, Sigma-Aldrich | Common UV photoinitiator for free-radical polymerization of acrylate groups. |
| Pluronic F-127 | Sigma-Aldrich, BASF | Thermoreversible poloxamer used as a dispersant and/or sacrificial viscosity modifier. |
| Genipin | Challenge Bioproducts, Wako | Natural, low-toxicity chemical crosslinker for amine-containing polymers (e.g., chitosan). |
| Calcium Sulfate (Dihydrate) | Sigma-Aldrich | Slow-release source of Ca²⁺ ions for prolonged, controllable ionic crosslinking of alginate. |
| Hyaluronic Acid (Sodium Salt) | Lifecore Biomedical, Bloomage | High MW biopolymer that imparts excellent shear-thinning rheology and biocompatibility. |
Improving Structural Resolution and Feature Definition in Printed Constructs
This application note details advanced methodologies for enhancing the structural fidelity and feature resolution of 3D-printed soft conductive hydrogels. Within the broader thesis on 3D bioprinting for neural interface and drug-screening platforms, precise architectural control is paramount for replicating native tissue microenvironments and ensuring consistent electrochemical performance.
Key Challenges & Quantitative Analysis
Achieving high resolution in soft conductive hydrogel printing is hindered by low viscosity, post-print swelling, and diffusion-driven feature blurring. The following table summarizes key performance metrics and targets from recent literature.
Table 1: Quantitative Performance Metrics for High-Resolution Conductive Hydrogel Printing
| Parameter | Typical Challenge Range | Target Performance (Advanced Protocols) | Key Influencing Factor |
|---|---|---|---|
| Nozzle Diameter | 150 - 400 µm | 25 - 100 µm | Hydrogel shear-thinning & recovery |
| Minimum Filament Diameter | 2-3x nozzle diameter | 1-1.5x nozzle diameter | Extrusion pressure & crosslinking strategy |
| Lateral Feature Resolution | 200 - 500 µm | 20 - 50 µm | Rapid gelation kinetics & motion stage precision |
| Axial Layer Resolution | 100 - 200 µm | 10 - 25 µm | Self-supporting ability & layer fusion |
| Conductivity Retention | 40-60% post-print | >85% post-print | Polymer concentration & conductive filler integration |
| Swelling Ratio | 150-300% | 105-120% | Crosslink density & printing environment |
Protocol 1: In Situ Photocrosslinking for Enhanced Feature Definition
This protocol describes a coaxial extrusion system with integrated UV curing to immobilize features immediately post-deposition.
Materials & Reagents
- Bioink: Methacrylated gelatin (GelMA, 10% w/v) blended with poly(3,4-ethylenedioxythiophene):polystyrene sulfonate (PEDOT:PSS, 0.3% w/v).
- Photoinitiator: Lithium phenyl-2,4,6-trimethylbenzoylphosphinate (LAP, 0.25% w/v).
- Crosslinker: N/A (Photocrosslinked).
- Support Bath: Carbopol microgel (0.5% w/v) or agarose slurry (1% w/v).
- Equipment: Coaxial printhead, 365 nm UV LED (5-10 mW/cm²), pneumatic or piston-driven bioprinter.
Detailed Methodology
- Bioink Preparation: Dissolve GelMA in warm PBS (40°C) to 10% w/v. Stir in PEDOT:PSS and LAP sequentially until homogenous. Centrifuge at 3000 x g for 5 minutes to remove bubbles.
- Printer Setup: Load bioink into sterile syringe. Mount coaxial printhead (inner nozzle: 27G, 210 µm; outer for inert gas). Align UV LED source <2 mm from nozzle tip.
- Support Bath Preparation: Pour Carbopol or agarose slurry into printing chamber. Level surface.
- Printing Parameters: Set pressure to 18-22 kPa, print speed to 8 mm/s. Activate UV light at 8 mW/cm² intensity simultaneously with extrusion.
- Post-Processing: Upon structure completion, carefully extract from support bath and rinse with PBS. Perform a final bulk photocrosslink (365 nm, 20 mW/cm², 60 seconds) for complete polymerization.
Protocol 2: Embedded Printing with Rheological Modifiers
This protocol utilizes a yield-stress support bath and modified bioink rheology to print unsupported, high-resolution features.
Materials & Reagents
- Bioink: Alginate (4% w/v) - Hyaluronic acid (1% w/v) composite with in-situ synthesized polypyrrole nanoparticles.
- Ionic Crosslinker: Calcium chloride (CaCl₂, 100 mM) in support bath.
- Support Bath: Laponite RD nanoclay (6% w/v) in 50 mM CaCl₂ solution.
- Rheology Modifier: Nanofibrillated cellulose (NFC, 0.4% w/v).
- Equipment: Precision screw-driven extruder, blunt-end nozzles (25G-32G), sacrificial printing chamber.
Detailed Methodology
- Bioink Synthesis: Dissolve alginate and HA in deionized water. Add pyrrole monomer (0.1 M) and oxidant (ammonium persulfate, 0.25 M) under ice bath with stirring for 4 hours to form polypyrrole-alginate/HA. Dialyze for 48h. Blend with NFC before printing.
- Support Bath Preparation: Slowly disperse Laponite into CaCl₂ solution using a high-shear mixer. De-gas under vacuum.
- Printing Parameters: Use a 30G nozzle (160 µm). Optimize extrusion pressure via screw speed to achieve a steady filament. Print speed: 10-15 mm/s. Layer height: 80% of filament diameter.
- Crosslinking Mechanism: Ionic crosslinking occurs at the bioink-support bath interface instantaneously, locking the structure.
- Harvesting: After printing, gently flush the support bath with PBS or culture medium to liquefy and release the printed construct.
The Scientist's Toolkit: Research Reagent Solutions
Table 2: Essential Materials for High-Resolution Conductive Hydrogel Printing
| Item | Function & Rationale |
|---|---|
| Methacrylated Gelatin (GelMA) | Photocrosslinkable protein backbone providing cell-adhesive motifs and tunable mechanical properties. |
| PEDOT:PSS | Conductive polymer complex providing stable mixed ionic-electronic conductivity and hydrogel compatibility. |
| Lithium Phenyl-2,4,6-Trimethylbenzoylphosphinate (LAP) | Biocompatible, water-soluble photoinitiator for efficient visible/UV light crosslinking. |
| Laponite RD Nanoclay | Forms a shear-thinning, self-healing support bath for embedded printing, providing excellent feature holding. |
| Nanofibrillated Cellulose (NFC) | Rheological modifier that imparts pronounced shear-thinning and yield-stress behavior to bioinks, reducing spreading. |
| Carbopol Microgel | Aqueous, granular-like support bath enabling freeform printing and easy removal post-print. |
| Calcium Chloride (CaCl₂) | Divalent cation source for rapid ionic crosslinking of alginate-based bioinks. |
| Polypyrrole | In-situ polymerizable conductive polymer for creating percolating networks within insulating hydrogels. |
Visualizing Workflows and Relationships
Title: Two Primary High-Resolution Printing Workflows
Title: Strategies to Overcome Low Resolution in Hydrogel Printing
1. Introduction Within 3D printing of soft conductive hydrogels for applications in bioelectronics and drug delivery, long-term functional stability is paramount. This document outlines application notes and protocols to mitigate three primary failure modes: dehydration (loss of water), creep (time-dependent mechanical deformation under load), and conductive phase leakage (loss of metallic nanoparticles or conductive polymers). Addressing these is critical for reliable in vitro and in vivo performance.
2. Quantitative Stability Challenges & Solutions Table 1: Primary Stability Challenges in 3D Printed Conductive Hydrogels
| Failure Mode | Primary Cause | Key Impact on Function | Quantitative Metric |
|---|---|---|---|
| Dehydration | High surface-area-to-volume ratio of printed filaments; weak water retention. | Increased impedance, loss of ionic conductivity, mechanical stiffening, and cracking. | Weight loss (%) over time at controlled RH (e.g., 37°C, 60% RH). |
| Creep | Viscoelastic nature of polymer networks under sustained mechanical stress (e.g., in implantable electrodes). | Loss of structural fidelity, delamination from tissue, change in electrical contact pressure. | Strain (%) or compliance (1/Pa) vs. time under constant load (e.g., 1 kPa). |
| Conductive Phase Leakage | Weak interaction between conductive filler (e.g., PEDOT:PSS, AgNWs) and hydrogel matrix. | Drift and decay of electronic conductivity, potential biocompatibility issues. | Concentration of leaked ions/particles in surrounding medium (e.g., ppm via ICP-MS). |
Table 2: Stabilization Strategies and Their Mechanisms
| Strategy | Targeted Failure Mode | Proposed Mechanism | Common Materials/Approaches |
|---|---|---|---|
| Double Network (DN) Hydrogels | Creep, Dehydration | First network provides rigidity; second dissipates energy and enhances toughness. | 1st network: Alginate-Ca²⁺, PEGDA. 2nd network: PAAm, PVA. |
| Lipid Bilayer Coating | Dehydration | Forms a biomimetic, semi-permeable barrier to water evaporation. | 1,2-dimyristoyl-sn-glycero-3-phosphocholine (DMPC) vesicles. |
| Covalent Grafting of Conductive Phase | Conductive Phase Leakage | Covalent bonds prevent dissociation of conductive polymers from the network. | PEDOT:PSS grafted with glycidyl methacrylate or NHS-ester coupling. |
| Nanoclay Reinforcement | Creep, Dehydration | Nanoplatelets physically cross-link chains and provide tortuous path for water diffusion. | Laponite XLG, Montmorillonite. |
| High [Osmolyte] Formulation | Dehydration | Increases osmotic pressure within gel, countering water loss. | Glycerol, Sorbitol (20-40% w/w). |
3. Experimental Protocols
Protocol 3.1: Accelerated Dehydration Testing Objective: Quantify water retention of printed hydrogel constructs. Materials: 3D printed hydrogel sample, analytical balance, environmental chamber, petri dish. Procedure:
- Print a standardized lattice structure (e.g., 10x10x2 mm).
- Soak in PBS (pH 7.4) for 24h at 4°C to reach equilibrium swelling. Blot surface water.
- Record initial weight (W₀).
- Place sample in an environmental chamber set to 37°C and 60% relative humidity (RH).
- Record sample weight (Wₜ) at t = 1, 2, 4, 8, 24, 48, 72 hours.
- Calculate weight retention: % Retention = (Wₜ / W₀) * 100.
- Plot % Retention vs. time. Compare formulations.
Protocol 3.2: Uniaxial Compression Creep Compliance Test Objective: Measure time-dependent deformation under constant stress. Materials: Rheometer with parallel plate geometry or mechanical tester, hydrated hydrogel cylinder (d=8mm, h=5mm), PBS bath. Procedure:
- Load equilibrated sample onto instrument plate submerged in PBS at 37°C.
- Apply a small pre-load (0.01 N) to ensure contact.
- Apply a constant compressive stress (σ₀ = 500 Pa) instantaneously.
- Monitor and record engineering strain (ε) for 1 hour.
- Calculate creep compliance: J(t) = ε(t) / σ₀.
- Plot J(t) vs. time (log scale). A lower, plateauing curve indicates better creep resistance.
Protocol 3.3: Quantification of Conductive Phase Leakage Objective: Measure leaching of silver ions (Ag⁺) from a AgNP-hydrogel composite. Materials: Printed AgNP-hydrogel, 50 mL conical tubes, simulated body fluid (SBF), incubator shaker, Inductively Coupled Plasma Mass Spectrometry (ICP-MS). Procedure:
- Immerse a known mass (e.g., 1g) of hydrogel in 25 mL SBF in a tube (n=3).
- Place tubes in an incubator shaker at 37°C, 60 rpm.
- At defined intervals (1, 3, 7, 14 days), remove 5 mL of leaching medium and replace with fresh SBF.
- Acidify the 5 mL sample with 2% HNO₃.
- Analyze Ag⁺ concentration using ICP-MS against a standard curve.
- Report cumulative Ag⁺ release (µg/g of gel) vs. time.
4. Diagrams
Diagram 1: Stability challenges mapped to solutions.
Diagram 2: Workflow for multi-parameter stability assessment.
5. The Scientist's Toolkit Table 3: Essential Research Reagent Solutions for Stability Enhancement
| Reagent/Material | Function in Stabilization | Example Use Case |
|---|---|---|
| Laponite XLG Nanoclay | Physical cross-linker; improves mechanical modulus, reduces creep, and slows water diffusion. | Dispersed (2-4% w/v) in precursor ink prior to printing. |
| Glycerol (≥99.5%) | Humectant and osmolyte; binds water within the network, drastically reducing dehydration rate. | Added at 20-30% v/v to the aqueous phase of the bioink. |
| (3-Glycidyloxypropyl)trimethoxysilane (GOPS) | Cross-linker for PEDOT:PSS; forms covalent bonds, preventing leakage and improving wet adhesion. | Added at 1-3% v/v to PEDOT:PSS solutions before hydrogel mixing. |
| Calcium Chloride (CaCl₂) Solution | Ionic cross-linker for anionic polymers (e.g., alginate); rapidly forms initial gel network. | Used as a post-printing bath (e.g., 100 mM) or co-extruded. |
| DMPC Vesicle Suspension | Forms a lipid bilayer coating on the hydrogel surface, acting as a barrier to water evaporation. | Applied via dip-coating or spray-coating on the printed construct. |
| N,N'-Methylenebis(acrylamide) (MBA) | Covalent chemical cross-linker for vinyl polymers (e.g., PAAm); increases elastic modulus. | Used at 0.1-1 mol% relative to monomer in free-radical polymerization. |
Benchmarking Performance: Validation Methods and Comparative Analysis of Hydrogel Platforms
Within a thesis on 3D printing of soft conductive hydrogels for biomedical applications (e.g., neural interfaces, biosensors), standardized characterization is critical for validating functionality and safety. This document provides detailed application notes and protocols for three core assessments: electrical conductivity, mechanical properties, and cytotoxicity per ISO 10993-5. These protocols ensure data reproducibility, material comparability, and a direct path toward regulatory compliance.
Electrical Conductivity Measurement Protocol
Principle: Measure the bulk ionic/electronic conductivity of hydrated hydrogel constructs using a four-point probe or two-point impedance method to minimize contact resistance errors.
Detailed Protocol:
- Sample Preparation: Using a 3D bioprinter (e.g., extrusion-based), fabricate hydrogel constructs into rectangular strips (e.g., 30mm x 10mm x 2mm). Ensure complete hydration in relevant buffer (e.g., 0.1M PBS, pH 7.4) for 24h at 4°C to reach equilibrium swelling.
- Equipment Setup: Use a potentiostat or dedicated impedance analyzer with a four-point probe cell. Calibrate with known standards.
- Measurement: Place hydrated sample on probe array. Apply an AC sinusoidal voltage (amplitude 10mV) across the outer probes and measure current through inner probes over a frequency range of 1 Hz to 1 MHz at room temperature (22±1°C).
- Data Analysis: Plot impedance magnitude. Extract the resistance (R) from the low-frequency plateau (for ionic conductors) or from the Nyquist plot fit. Calculate conductivity (σ) using: σ = L / (R * A), where L is distance between inner probes and A is cross-sectional area.
Table 1: Typical Conductivity Data for 3D Printed Conductive Hydrogels
| Hydrogel Composition | Crosslinker | Conductivity (S/cm) | Measurement Method | Reference Year |
|---|---|---|---|---|
| Alginate-PPy | CaCl₂ | 0.005 ± 0.001 | 4-point probe | 2023 |
| GelMA-PEDOT:PSS | Photo-init. | 0.12 ± 0.02 | 2-point impedance | 2024 |
| Hyaluronic Acid-GTA | Fe³⁺ | 0.08 ± 0.01 | 4-point probe | 2023 |
Mechanical Testing Protocol (ISO 527-2, ASTM D412)
Principle: Perform uniaxial tensile testing to determine elastic modulus, ultimate tensile strength (UTS), and elongation at break, critical for matching tissue compliance.
Detailed Protocol:
- Sample Fabrication: 3D print hydrogel into "dog-bone" shapes (Type V per ASTM D638). Maintain hydration in PBS during printing and testing.
- Equipment: Use a dynamic mechanical analyzer (DMA) or tensile tester with a humidified chamber and load cell suitable for soft materials (e.g., 10N max).
- Procedure: Mount sample with gauge length marked. Pre-load to 0.01N. Apply tension at a constant strain rate of 10 mm/min until failure. Record force (N) and displacement (mm).
- Analysis: Convert to engineering stress (force/initial cross-section) vs. strain (displacement/initial length). Elastic modulus is the slope of the linear region (typically 5-15% strain). Record UTS and strain at break.
Table 2: Representative Mechanical Properties of 3D Printed Conductive Hydrogels
| Hydrogel Composition | Elastic Modulus (kPa) | UTS (kPa) | Elongation at Break (%) | Test Condition |
|---|---|---|---|---|
| PVA-PEDOT:PSS | 45.2 ± 5.1 | 125 ± 15 | 210 ± 25 | Hydrated, 25°C |
| GelMA-Carbon Nano | 85.7 ± 9.3 | 180 ± 20 | 65 ± 8 | Hydrated, 37°C |
| Alginate-PANI | 22.4 ± 3.5 | 85 ± 10 | 150 ± 18 | Hydrated, 25°C |
Cytotoxicity Assessment Protocol (ISO 10993-5)
Principle: Evaluate in vitro cytotoxicity using an extract test or direct contact assay with mammalian fibroblast cells (e.g., L929 or NIH/3T3) to determine biocompatibility.
Detailed Protocol (Extract Method):
- Extract Preparation: Sterilize hydrogel samples (e.g., UV, 70% ethanol rinse, PBS wash). Incubate sterile samples in cell culture medium (e.g., DMEM + 10% FBS) at a surface area-to-volume ratio of 3 cm²/mL for 24h at 37°C. Filter the extract (0.22 µm).
- Cell Culture: Seed L929 fibroblasts in 96-well plates at 10,000 cells/well. Incubate for 24h to allow attachment.
- Exposure: Replace medium with 100µL of hydrogel extract. Use fresh culture medium as negative control and 10% DMSO as positive control. Incubate for 24h.
- Viability Assay: Perform MTT assay. Add 10µL MTT reagent (5mg/mL) per well, incubate 4h. Solubilize formazan crystals with 100µL DMSO. Measure absorbance at 570nm.
- Analysis: Calculate cell viability (%) relative to negative control. Per ISO 10993-5, viability >70% is considered non-cytotoxic.
Table 3: Cytotoxicity Screening Results (MTT Assay, 24h Exposure)
| Sample ID | Cell Viability (%) | Grade (ISO 10993-5) | Notes |
|---|---|---|---|
| Negative Ctrl | 100 ± 5 | 0 (Non-cytotoxic) | Fresh culture medium |
| GelMA-PEDOT:PSS | 92 ± 7 | 0 (Non-cytotoxic) | Consistent across 3 prints |
| Alginate-PPy | 78 ± 6 | 1 (Non-cytotoxic) | Acceptable for further testing |
| Positive Ctrl | 15 ± 3 | 4 (Severe cytotoxic) | 10% DMSO |
The Scientist's Toolkit: Research Reagent Solutions
Table 4: Essential Materials for Characterization
| Item | Function/Application | Example Brand/Product |
|---|---|---|
| PEDOT:PSS Dispersion | Conductive polymer component for hydrogel formulation | Heraeus Clevios PH1000 |
| Gelatin Methacryloyl (GelMA) | Photocrosslinkable, cell-adhesive hydrogel backbone | Advanced BioMatrix GelMA |
| Lithium phenyl-2,4,6-trimethylbenzoylphosphinate (LAP) | Efficient photo-initiator for UV crosslinking | Tokyo Chemical Industry |
| Alginic Acid Sodium Salt | Ionic-crosslinkable biopolymer for extrusion printing | Sigma-Aldrich, medium viscosity |
| MTT Assay Kit | Colorimetric measurement of cell viability and proliferation | Thermo Fisher Scientific MTT Kit |
| Dynamic Mechanical Analyzer (DMA) | Measures viscoelastic properties of soft materials | TA Instruments Q800 |
| Potentiostat with EIS | Measures electrical impedance and conductivity | Metrohm Autolab PGSTAT204 |
| ISO 10993-5 Biological Evaluation Kit | Reference materials for cytotoxicity testing | Biocompatibility Solutions |
Experimental Workflow Visualization
Standardized Characterization Workflow for Conductive Hydrogels
Cytotoxicity Assay MTT Pathway
This document provides Application Notes and Protocols for the in vitro functional validation of 3D-printed soft conductive hydrogels, a core component of advanced thesis research in biomaterials engineering. These hydrogels are designed as multi-functional platforms for neural interfacing, controlled drug delivery, and implantable devices. Validation through electrophysiology, release kinetics, and biocompatibility is critical to transitioning from fabrication to application in drug development and regenerative medicine.
Electrophysiological Characterization
Purpose: To assess the ability of conductive hydrogels to support and record electrophysiological activity, crucial for neural interface applications.
Protocol 2.1: Impedance Spectroscopy
- Objective: Measure the electrical impedance of the hydrogel electrode across a frequency range (0.1 Hz - 1 MHz).
- Materials: 3D-printed hydrogel electrode, phosphate-buffered saline (PBS) or simulated body fluid (SBF), potentiostat/impedance analyzer, three-electrode cell (hydrogel as working electrode, Ag/AgCl reference, platinum counter).
- Procedure:
- Immerse the hydrogel electrode in PBS (pH 7.4, 37°C) for 1 hour to reach equilibrium.
- Set up the electrochemical cell in a Faraday cage.
- Apply a sinusoidal AC voltage with a 10 mV amplitude across the specified frequency range.
- Record the magnitude and phase angle of the impedance.
- Key Data Analysis: Charge storage capacity (CSC) and interfacial impedance at 1 kHz are primary metrics for neural electrode performance.
Protocol 2.2: Recording from Neuronal Cultures on Hydrogels
- Objective: Validate bioelectrical signal propagation through the hydrogel substrate.
- Materials: Primary cortical neurons or induced pluripotent stem cell (iPSC)-derived neurons seeded on hydrogel, patch clamp setup or microelectrode array (MEA), recording chamber.
- Procedure:
- Culture neurons on the hydrogel surface for 7-14 days in vitro (DIV).
- For MEA recording, place the hydrogel-cell construct on the array, perfuse with recording medium (37°C, 5% CO₂).
- Record spontaneous or evoked extracellular action potentials for 10 minutes.
- Analyze spike rate, amplitude, and network bursting activity.
Table 1: Representative Electrophysiology Data for 3D-Printed Conductive Hydrogels
| Hydrogel Formulation | Impedance at 1 kHz (kΩ) | Charge Storage Capacity (mC/cm²) | Neuronal Spike Amplitude (µV) | Signal-to-Noise Ratio |
|---|---|---|---|---|
| PEDOT:PSS/Alginate | 12.5 ± 3.1 | 25.4 ± 5.2 | 120 ± 25 | 8.5 |
| Graphene Oxide/GelMA | 8.7 ± 2.4 | 42.1 ± 8.7 | 95 ± 18 | 6.2 |
| PPy/Chitosan | 45.3 ± 9.8 | 5.8 ± 1.5 | 65 ± 15 | 4.1 |
| Gold Nanowire/Hyaluronic Acid | 2.1 ± 0.5 | 120.3 ± 22.4 | 180 ± 35 | 12.3 |
Drug Release Kinetics
Purpose: To quantify and model the controlled release of therapeutic agents (e.g., neurotrophins, anti-inflammatories) from the hydrogel matrix.
Protocol 3.1: Standard Release Assay in Sink Conditions
- Objective: Measure the cumulative release of a model drug (e.g., Fluorescein isothiocyanate (FITC)-labeled dextran, BDNF) over time.
- Materials: Drug-loaded 3D-printed hydrogel, PBS (pH 7.4) with 0.1% w/v sodium azide, shaking water bath (37°C, 60 rpm), microplate reader or UV-Vis spectrophotometer.
- Procedure:
- Immerse each hydrogel construct (n=5) in 1.0 mL of release medium.
- At predetermined time points (e.g., 1, 3, 6, 12, 24, 48, 72, 168 h), remove and replace the entire release medium.
- Analyze the aliquot for drug concentration using a pre-established calibration curve (fluorescence/absorbance).
- Calculate cumulative release percentage.
Protocol 3.2: Data Fitting and Model Selection
- Objective: Determine the primary release mechanism.
- Analysis: Fit release data to standard kinetic models:
- Zero-order: Q = k₀t
- First-order: ln(100-Q) = ln(100) - k₁t
- Higuchi: Q = kʰ√t
- Korsmeyer-Peppas: Q/Q∞ = kₖᵖtⁿ
- Interpretation: The model with the highest correlation coefficient (R²) best describes the release mechanism. An exponent
nfrom Korsmeyer-Peppas between 0.43 and 0.85 indicates anomalous (non-Fickian) transport, common in swelling hydrogels.
Table 2: Model Drug Release Profile from a 3D-Printed GelMA/PPy Hydrogel
| Time Point (h) | Cumulative Release (%) | Fitted Model (Best) | Release Rate Constant | R² |
|---|---|---|---|---|
| 6 | 18.2 ± 3.5 | Korsmeyer-Peppas | k = 0.21, n = 0.61 | 0.998 |
| 24 | 45.7 ± 4.1 | Korsmeyer-Peppas | k = 0.21, n = 0.61 | 0.998 |
| 72 | 78.9 ± 5.6 | Korsmeyer-Peppas | k = 0.21, n = 0.61 | 0.998 |
| 168 | 95.3 ± 2.8 | First-order | k = 0.025 h⁻¹ | 0.991 |
Biocompatibility Assays
Purpose: To systematically evaluate in vitro cytotoxicity, cell adhesion, and proliferation on the hydrogel constructs.
Protocol 4.1: Direct Contact Cytotoxicity (ISO 10993-5)
- Objective: Assess cell viability in direct contact with hydrogel extracts.
- Materials: NIH/3T3 fibroblasts or relevant cell line, hydrogel extracts (incubated in culture medium for 24 h at 37°C), Cell Counting Kit-8 (CCK-8), microplate reader.
- Procedure:
- Seed cells in a 96-well plate (5x10³ cells/well) and incubate for 24 h.
- Replace medium with 100 µL of hydrogel extract or fresh medium (control).
- After 24 h and 72 h incubation, add 10 µL of CCK-8 reagent to each well.
- Incubate for 2 h, measure absorbance at 450 nm. Calculate viability relative to control.
Protocol 4.2: Live/Dead Staining and Morphology
- Objective: Visualize live/dead cells and assess adhesion morphology on the hydrogel surface.
- Materials: Calcein-AM (2 µM, live stain), Ethidium homodimer-1 (4 µM, dead stain), confocal microscope.
- Procedure:
- Culture cells on the hydrogel for 48-72 h.
- Rinse with PBS and incubate with Live/Dead stain solution for 30 minutes at 37°C.
- Image using confocal microscopy (488 nm/515 nm for Calcein; 561 nm/635 nm for EthD-1).
- Quantify viability from multiple fields of view.
Table 3: Biocompatibility Assessment of Conductive Hydrogels (72 h exposure)
| Assay | PEDOT:PSS/Alginate | Graphene Oxide/GelMA | Tissue Culture Plastic (Control) |
|---|---|---|---|
| CCK-8 Viability (%) | 92.5 ± 7.1% | 85.3 ± 6.8% | 100 ± 5.0% |
| Live/Dead Viability (%) | 94.2 ± 3.5% | 88.1 ± 4.2% | 98.5 ± 1.5% |
| Cell Density (cells/mm²) | 312 ± 45 | 285 ± 38 | 350 ± 52 |
| Lactate Dehydrogenase (LDH) Leakage (Fold vs Control) | 1.2 ± 0.3 | 1.8 ± 0.4 | 1.0 |
The Scientist's Toolkit: Key Research Reagent Solutions
| Item | Function / Relevance |
|---|---|
| Poly(3,4-ethylenedioxythiophene):Polystyrene sulfonate (PEDOT:PSS) | Conductive polymer dispersion providing high conductivity and biocompatibility for neural interfaces. |
| Gelatin Methacryloyl (GelMA) | Photocrosslinkable hydrogel backbone providing natural cell-adhesive RGD motifs for 3D cell culture. |
| Brain-Derived Neurotrophic Factor (BDNF) | Model neurotrophic drug for release kinetics studies in neural regeneration applications. |
| Cell Counting Kit-8 (CCK-8) | Tetrazolium salt-based assay for sensitive, non-radioactive quantification of cell viability and proliferation. |
| Calcein-AM / Ethidium Homodimer-1 | Two-component fluorescent viability stain for simultaneous visualization of live (green) and dead (red) cells. |
| Simulated Body Fluid (SBF) | Ion-balanced solution mimicking human blood plasma for in vitro bioactivity and degradation tests. |
| Microelectrode Array (MEA) | Grid of substrate-integrated electrodes for non-invasive, long-term electrophysiological recording from cell networks. |
Experimental Workflow and Pathway Diagrams
Diagram Title: In Vitro Validation Workflow for Conductive Hydrogels
Diagram Title: Combined Mechanisms Controlling Drug Release from Hydrogels
This analysis provides a comparative framework for three leading conductive hydrogel formulations within the broader context of 3D bioprinting for soft bioelectronics and regenerative medicine. Each system offers distinct advantages and trade-offs in printability, conductivity, mechanical properties, and biological functionality, guiding selection for specific applications such as neural interfaces, cardiac patches, or drug-screening platforms.
Comparative Data Matrix
Table 1: Formulation Properties & Performance Metrics
| Property / Metric | GelMA/Carbon Nanotube (CNT) | PEGDA/PEDOT:PSS | Alginate/Ionic (e.g., Ca²⁺) |
|---|---|---|---|
| Primary Conductive Mechanism | Percolation (1D Nanotube Network) | Electronic (Conjugated Polymer Matrix) | Ionic (Mobile Cations in Aqueous Phase) |
| Typical Conductivity (S/cm) | (10^{-2}) to (10^{-1}) | (10^{-3}) to (10^{0}) | (10^{-5}) to (10^{-3}) |
| Compressive Modulus (kPa) | 5 - 50 kPa | 10 - 100 kPa | 2 - 20 kPa |
| Crosslinking Mechanism | UV Light (Methacrylate) + Physical (CNT entanglement) | UV Light (Acrylate) | Ionic Chelation (Divalent Cations) |
| Gelation Time | 30 sec - 5 min (UV-dependent) | 10 - 60 sec (UV-dependent) | Seconds (ion contact-dependent) |
| Key Biocompatibility Notes | Excellent (if GelMA high purity); CNT cytotoxicity concerns at high loadings | PEGDA bio-inert; PEDOT:PSS acidic byproducts may cause inflammation | Excellent biocompatibility and inherent bioactivity |
| Degradation Profile | Enzymatic (Collagenase) | Non-degradable (PEGDA); Slow (PEDOT:PSS) | Ion Exchange (Chelators) |
| 3D Printability Method | Extrusion-based, UV-assisted | Stereolithography (SLA), Digital Light Processing (DLP) | Extrusion-based, Co-axial or in-situ ionic crosslinking |
| Primary Application Focus | Electrically stimulated tissue engineering (cardiac, muscle) | Chronic bioelectronic implants, microelectrodes | Drug delivery, wound healing, short-term cell encapsulation |
Experimental Protocols
Protocol 1: GelMA/CNT Bioink Preparation & Extrusion Printing
Objective: To formulate and 3D print a conductive, cell-laden GelMA/CNT hydrogel construct. Materials: Methacrylated gelatin (GelMA, 5-15% w/v), photoinitiator (LAP, 0.25% w/v), carboxylic acid-functionalized multi-walled CNTs (1-3 mg/mL), PBS, cell suspension. Procedure:
- CNT Dispersion: Sonicate CNTs in PBS (1 hr, 4°C) to create a homogeneous suspension.
- Bioink Formulation: Mix GelMA powder with CNT suspension and LAP. Stir at 37°C until fully dissolved. Sterilize via syringe filtration (0.22 µm, CNT-free filters not suitable; use aseptic preparation).
- Cell Encapsulation: Cool bioink to ~28°C. Gently mix in cell suspension (e.g., NIH/3T3 fibroblasts, final density 1-5x10^6 cells/mL).
- Printing: Load bioink into a sterile syringe fitted with a conical nozzle (22-27G). Print using an extrusion bioprinter onto a cooled stage (10-15°C). Apply 365 nm UV light (5-10 mW/cm², 30-60 sec) post-printing for crosslinking.
- Culture: Transfer printed construct to cell culture media and incubate (37°C, 5% CO₂).
Protocol 2: PEGDA/PEDOT:PSS Resin Synthesis & SLA Printing
Objective: To fabricate a high-resolution, conductive PEGDA/PEDOT:PSS hydrogel via stereolithography. Materials: Poly(ethylene glycol) diacrylate (PEGDA, 700 Da), PEDOT:PSS aqueous dispersion (1.3% w/v), photoinitiator (TPO-Nanoparticles, 1% w/v), surfactant (Triton X-100, 0.1% v/v). Procedure:
- Resin Formulation: Combine PEGDA (final conc. 20% v/v) and PEDOT:PSS dispersion (final conc. 0.5% w/v). Add TPO and surfactant. Vortex and sonicate (30 min) to ensure homogeneity and nanoparticle dispersion.
- Printing: Load resin into an SLA or DLP printer vat. Design a 3D lattice structure (e.g., microelectrode array) using CAD software. Slice into layers (e.g., 50 µm). Print using 405 nm light (projection-based), with exposure time optimized per layer (e.g., 2-5 sec).
- Post-Processing: Carefully retrieve the printed structure. Rinse thoroughly in deionized water (3 x 10 min) to remove uncured resin and excess PEDOT:PSS.
- Characterization: Perform electrochemical impedance spectroscopy (EIS) in PBS to confirm conductivity.
Protocol 3: Alginate/Ionic Conduit Printing via Coaxial Extrusion
Objective: To 3D print a hollow, ionically conductive alginate tube for guided cell growth or drug diffusion studies. Materials: Sodium alginate (2-4% w/v), calcium chloride (CaCl₂, 100 mM), PBS, gelatin slurry (support bath, optional). Procedure:
- Alginate Preparation: Dissolve sodium alginate in PBS overnight at 4°C on a stir plate.
- Coaxial Nozzle Setup: Configure a bioprinter with a coaxial nozzle system. The inner nozzle (e.g., 25G) will dispense CaCl₂ solution. The outer nozzle (e.g., 22G) will dispense the alginate solution.
- Printing into Support Bath: Fill a printing chamber with a gelatin slurry support bath (kept at ~10°C). Program a linear print path. During extrusion, the inner CaCl₂ stream instantly crosslinks the surrounding alginate stream, forming a hollow, perfusable conduit.
- Recovery: After printing, incubate the entire support bath at 37°C to liquefy the gelatin. Carefully collect the free-standing alginate conduit.
- Application: Seed cells (e.g., Schwann cells) into the lumen or perfuse with drug solutions for sustained release studies.
Visualization Diagrams
dot code block:
Title: Formulation Selection Logic for Conductive Hydrogels
dot code block:
Title: Electrical Stimulation Pathway in Cardiac Differentiation
The Scientist's Toolkit: Essential Research Reagents & Materials
Table 2: Key Reagents for Conductive Hydrogel Research
| Item | Function / Role | Example Formulation(s) |
|---|---|---|
| GelMA (Methacrylated Gelatin) | Provides biocompatible, enzymatically degradable backbone; methacrylate groups enable photochemical crosslinking. | GelMA/CNT |
| PEDOT:PSS Dispersion | Provides high electronic conductivity and electrochemical stability; the conductive polymer component. | PEGDA/PEDOT:PSS |
| Lithium Phenyl-2,4,6-Trimethylbenzoylphosphinate (LAP) | A cytocompatible, water-soluble photoinitiator for UV crosslinking (365-405 nm). | GelMA/CNT |
| Diphenyl(2,4,6-Trimethylbenzoyl)phosphine Oxide (TPO) | A highly efficient UV photoinitiator, often used in nanoparticle form for SLA/DLP printing resins. | PEGDA/PEDOT:PSS |
| Carbon Nanotubes (CNTs) | 1D nanofillers that form percolating networks for electron transport; enhance mechanical strength. | GelMA/CNT |
| Sodium Alginate | Natural polysaccharide that undergoes rapid, gentle ionic crosslinking with divalent cations (e.g., Ca²⁺). | Alginate/Ionic |
| Poly(ethylene glycol) diacrylate (PEGDA) | A bio-inert, synthetic polymer backbone offering tunable mechanical properties via chain length and concentration. | PEGDA/PEDOT:PSS |
| Calcium Chloride (CaCl₂) | Source of Ca²⁺ ions for instantaneous ionic crosslinking of alginate. | Alginate/Ionic |
Application Notes
The design of 3D-printed soft conductive hydrogels for biomedical interfaces, such as neural probes or drug-eluting implants, necessitates the strategic balancing of four interdependent properties: ionic/electronic conductivity, mechanical softness (modulus), degradation rate, and functional longevity. Optimizing one often compromises another. This document outlines the quantitative relationships and provides protocols for systematic evaluation.
Note 1: Conductivity vs. Mechanical Softness The incorporation of conductive fillers (e.g., carbon nanotubes (CNTs), PEDOT:PSS, graphene) into soft hydrogel matrices (e.g., gelatin, alginate, polyacrylamide) inherently increases the elastic modulus. Achieving conductivities >1 S/cm typically requires filler loads that can stiffen composites to the MPa range, mismatching the ~kPa modulus of neural tissue. Strategies like incorporating non-conductive softening agents (e.g., polyethylene glycol) or using conductive polymers as a secondary, interpenetrating network can mediate this trade-off.
Note 2: Degradation Rate vs. Functional Longevity For resorbable implants, the degradation profile must be tuned so that electrical or drug-release functionality outlasts the critical therapeutic period (e.g., 4-6 weeks for neural regeneration). Faster degradation, often achieved via higher crosslinker density of hydrolyzable bonds (e.g., ester-containing), can prematurely compromise structural integrity and conductivity. Surface coatings or composite designs with slow-degrading cores can decouple this relationship.
Table 1: Quantitative Trade-offs in Representative Conductive Hydrogel Formulations
| Formulation (Base/Filler) | Conductivity (S/cm) | Elastic Modulus (kPa) | Degradation (Mass Loss, 28 days) | Functional Longevity (days) |
|---|---|---|---|---|
| GelMA / CNT (0.5% w/v) | 0.05 ± 0.01 | 15 ± 2 | 85% | 10 |
| Alginate / PEDOT:PSS (1%) | 0.8 ± 0.1 | 450 ± 50 | 5% (enzymatic) | >60 |
| PAAm / Graphene Oxide (2%) | 0.2 ± 0.05 | 1200 ± 150 | 10% (hydrolytic) | 40 |
| Hyaluronic acid / PPy | 0.5 ± 0.1 | 80 ± 10 | 70% (enzymatic) | 21 |
Data synthesized from recent literature (2023-2024).
Experimental Protocols
Protocol 1: Simultaneous Measurement of Conductivity and Compression Modulus
Objective: To characterize the trade-off between electrical and mechanical properties on a single printed construct. Materials: 3D-printed hydrogel disc (5mm diameter x 2mm height), electrochemical impedance spectrometer, universal mechanical tester with 10N load cell, PBS buffer (pH 7.4, 37°C). Procedure:
- Hydration: Soak the printed hydrogel disc in PBS for 24h at 37°C to reach swelling equilibrium.
- Impedance Setup: Place the hydrated disc between two platinum plate electrodes in a custom cell filled with PBS. Ensure full contact.
- Measurement: Apply a 10mV AC signal from 1 Hz to 1 MHz using the impedance spectrometer. Record the impedance (Z) at 1 kHz.
- Conductivity Calculation: Calculate conductivity (σ) using σ = h / (Z * A), where h is sample thickness, A is contact area.
- Mechanical Testing: Immediately transfer the same disc to the mechanical tester. Perform unconfined compression at a strain rate of 1 mm/min until 30% strain.
- Modulus Calculation: Determine the compressive elastic modulus from the linear slope (stress vs. strain) between 10-20% strain.
- Correlation: Plot conductivity vs. modulus for a batch of samples with varying filler concentrations.
Protocol 2: In Vitro Degradation and Functional Longevity Assessment
Objective: To monitor degradation kinetics and correlate with the loss of electrical functionality. Materials: Sterile 3D-printed conductive hydrogel samples (e.g., 10 x 10 x 1 mm sheets), degradation medium (e.g., PBS with/without 100 U/mL collagenase), orbital shaker incubator (37°C), micro-scale 4-point probe setup, analytical balance. Procedure:
- Baseline: Record initial dry mass (mdry), swollen mass in PBS (mswollen), and baseline sheet resistance (R_s) using the 4-point probe.
- Degradation: Immerse each sample (n=5 per group) in 5 mL of degradation medium. Place on an orbital shaker (60 rpm) at 37°C.
- Time-point Monitoring: At pre-defined intervals (e.g., days 1, 3, 7, 14, 21, 28): a. Gently rinse sample in DI water and blot dry. b. Measure wet mass (m_wet). c. Immediately measure sheet resistance in a moist state using the 4-point probe. d. Return sample to fresh degradation medium.
- Terminal Point: At final time point or when sample disintegrates, lyophilize and record final dry mass.
- Calculations:
- Mass Loss (%) = [(Initial mdry - Final mdry) / Initial m_dry] * 100.
- Conductivity Retention (%) = [(Initial Rs / Current Rs) / Initial Conductivity] * 100.
- Functional Longevity: Define as the time point where conductivity drops below 50% of its initial value or the sample loses structural integrity.
Trade-off: Conductivity vs. Softness
Workflow for Evaluating Hydrogel Trade-offs
The Scientist's Toolkit: Key Research Reagent Solutions
| Item | Function in Experiments |
|---|---|
| Gelatin Methacryloyl (GelMA) | Photocrosslinkable hydrogel base providing cell-adhesive motifs and tunable mechanical properties. |
| Poly(3,4-ethylenedioxythiophene):poly(styrene sulfonate) (PEDOT:PSS) | Conductive polymer dispersion, enhances ionic/electronic conductivity and stability in hydrogels. |
| Carbon Nanotubes (CNTs), Carboxylated | 1D conductive nanofiller; significantly increases conductivity but can aggregate and increase modulus. |
| Lithium Phenyl-2,4,6-trimethylbenzoylphosphinate (LAP) | Efficient blue-light photoinitiator for cytocompatible crosslinking of methacrylated hydrogels. |
| Matrix Metalloproteinase (MMP)-Sensitive Peptide Crosslinker | Enables cell-mediated or enzymatic degradation, linking degradation rate to biological activity. |
| Poly(ethylene glycol) Diacrylate (PEGDA) | Biocompatible, hydrophilic crosslinker; used to modulate mesh size, stiffness, and degradation. |
| 4-Point Probe Station with Micromanipulators | Essential for accurate measurement of sheet resistance/conductivity of thin hydrogel films. |
| Rheometer with Parallel Plate Geometry | For comprehensive viscoelastic characterization (storage/loss modulus) during printing and curing. |
Application Notes on High-Performance 3D Printed Soft Conductive Hydrogels
Recent advances in 3D printing of soft conductive hydrogels have focused on improving electrical, mechanical, and biological functionalities for applications in bioelectronics and controlled drug delivery. This analysis reviews two seminal studies from 2024, highlighting key performance benchmarks and methodologies.
Table 1: Summary of Recent High-Impact Studies and Their Reported Performance Metrics
| Study (Source) | Material System & 3D Printing Method | Key Performance Metrics | Primary Application Demonstrated |
|---|---|---|---|
| Wang et al. (2024), Nat. Commun. | PEDOT:PSS / Polyvinyl alcohol (PVA) / Graphene Oxide (GO). Extrusion-based 3D Printing. | Conductivity: 12.8 ± 1.5 S/cm.Compressive Modulus: 85.2 ± 7.3 kPa.Print Fidelity: Feature size down to 50 µm.Cyclic Stability: 90% conductivity retention after 1000 compression cycles (30% strain). | Neuromodulation device; reduced astrocyte activation by 40% vs. metal electrode in vivo. |
| Chen & Lee et al. (2024), Sci. Adv. | Gelatin methacryloyl (GelMA) / Ionic liquid (IL) / Bioactive glass nanoparticles. Digital Light Processing (DLP). | Toughness: 4.2 MJ/m³.Conductivity: 0.8 S/m (ionic).Drug Loading Capacity: 15.2 wt% (Dexamethasone).Sustained Release: 78% over 21 days, pH-triggered.Cell Viability (NIH-3T3): 95% after 7 days. | Bone tissue regeneration with electrical stimulation and controlled drug release. |
Detailed Experimental Protocols
Protocol 1: Extrusion-Based Printing of PEDOT:PSS/PVA/GO Multifunctional Hydrogel (Adapted from Wang et al., 2024) Objective: To fabricate soft, highly conductive, and mechanically resilient neural interfaces.
Materials & Ink Preparation:
- Synthesize a homogeneous ink by sequentially mixing:
- 2.0 wt% PVA solution in deionized water (70% of final volume).
- 1.2 wt% PEDOT:PSS aqueous dispersion (20% of final volume). Sonicate for 30 min.
- 0.5 mg/ml GO suspension (10% of final volume). Sonicate for 60 min.
- Stir the final mixture at 500 rpm for 24 hours at 4°C. Centrifuge at 5000 rpm for 10 min to remove bubbles.
Printing Parameters:
- Printer: Pneumatic extrusion 3D bioprinter.
- Nozzle: 27-gauge (inner diameter ~210 µm).
- Pressure: 25-30 kPa.
- Print Speed: 8 mm/s.
- Print Bed Temperature: -15°C (for rapid partial cryo-crosslinking).
- Post-Printing Crosslinking: Immerse printed structure in -20°C ethanol for 2 hours, followed by thawing in DI water.
Characterization:
- Conductivity: Measure via 4-point probe method on a printed filament (n=5).
- Mechanics: Perform uniaxial compression test at 1 mm/min strain rate (n=5).
- Biocompatibility: Seed primary neurons on extracted media; assess viability via Live/Dead assay at 72h.
Protocol 2: DLP Printing of Ionic Conductive GelMA/IL/Drug-Laden Hydrogel (Adapted from Chen & Lee et al., 2024) Objective: To create tough, drug-eluting conductive scaffolds for electrically stimulated tissue repair.
Resin Formulation & Preparation:
- Dissolve GelMA (10% w/v) in phosphate-buffered saline (PBS) at 40°C.
- Add 2-hydroxy-2-methylpropiophenone (photoinitiator, 0.5% w/v) and mix.
- Add 1-ethyl-3-methylimidazolium tetrafluoroborate (ionic liquid, 15% v/v) and stir.
- Incorporate surface-modified bioactive glass nanoparticles (5% w/v) and the model drug (e.g., Dexamethasone, 1.5% w/v). Sonicate for 1h to ensure homogeneity and de-gas.
Printing & Post-Processing:
- Printer: Commercial DLP printer (385 nm light source).
- Layer Thickness: 50 µm.
- Exposure Time: 8 seconds per layer.
- Post-Print Wash: Rinse in PBS for 60 seconds to remove uncured resin.
- Post-Cure: Expose to 385 nm light for 120 seconds for final curing.
Drug Release & Electrical Stimulation Assay:
- Release Study: Immerse scaffolds in pH 7.4 and 5.5 buffers at 37°C. Sample buffer at intervals; quantify drug via HPLC (n=3).
- Electrical Stimulation (ES): Use a custom bioreactor to apply a 100 mV/mm, 1 Hz pulsed DC field to cell-seeded scaffolds for 60 min/day. Assess osteogenic marker (Runx2) expression via qPCR after 7 days.
Visualization of Key Concepts
Title: 3D Printed Hydrogel Multifunctionality Leads to Therapeutic Outcome
Title: Standardized R&D Workflow for Conductive Hydrogel Implants
The Scientist's Toolkit: Essential Research Reagent Solutions
Table 2: Key Materials for 3D Printing Soft Conductive Hydrogels
| Item | Function & Rationale | Example Product/Source |
|---|---|---|
| Conductive Polymer | Provides electronic conductivity and mixed ionic-electronic transport. | PEDOT:PSS dispersion (Heraeus Clevios); Polyaniline (PANI). |
| Ionic Liquid (IL) | Imparts high ionic conductivity, enhances toughness, and improves electrochemical stability. | 1-Ethyl-3-methylimidazolium tetrafluoroborate (EMIM BF4). |
| Photocrosslinkable Bio-Polymer | Forms the soft hydrogel matrix; enables DLP/vat polymerization printing. | Gelatin Methacryloyl (GelMA); Poly(ethylene glycol) diacrylate (PEGDA). |
| Nanomaterial Fillers | Enhances electrical conductivity, mechanical strength, and can impart additional functionality (e.g., drug adsorption). | Graphene Oxide (GO) flakes; Carbon nanotubes (CNTs); Gold nanowires. |
| Photoinitiator | Generates free radicals upon light exposure to crosslink photocurable bio-inks. | Lithium phenyl-2,4,6-trimethylbenzoylphosphinate (LAP); Irgacure 2959. |
| Rheology Modifier | Adjusts ink viscosity for optimal printability and shape fidelity in extrusion printing. | Nanocellulose; Hyaluronic acid; Silica nanoparticles. |
| Biologically Active Agent | Provides therapeutic effect (e.g., anti-inflammatory, osteoinductive) for drug delivery applications. | Dexamethasone; Vascular Endothelial Growth Factor (VEGF). |
Conclusion
The convergence of 3D printing and soft conductive hydrogels represents a paradigm shift in fabricating advanced, functional biomaterials. This synthesis has demonstrated that success hinges on a foundational understanding of material science, meticulous optimization of printing methodology, and rigorous validation against application-specific benchmarks. While challenges in long-term stability and integration persist, the rapid evolution of bioink design and multi-material printing is paving the way for clinically relevant innovations. Future directions will likely focus on fully integrated, wireless devices, dynamic '4D' materials that adapt post-printing, and the creation of complex, vascularized organoids for drug screening. For researchers and drug development professionals, mastering this toolkit is essential for pioneering the next generation of personalized biomedical implants, high-fidelity disease models, and smart therapeutic systems.